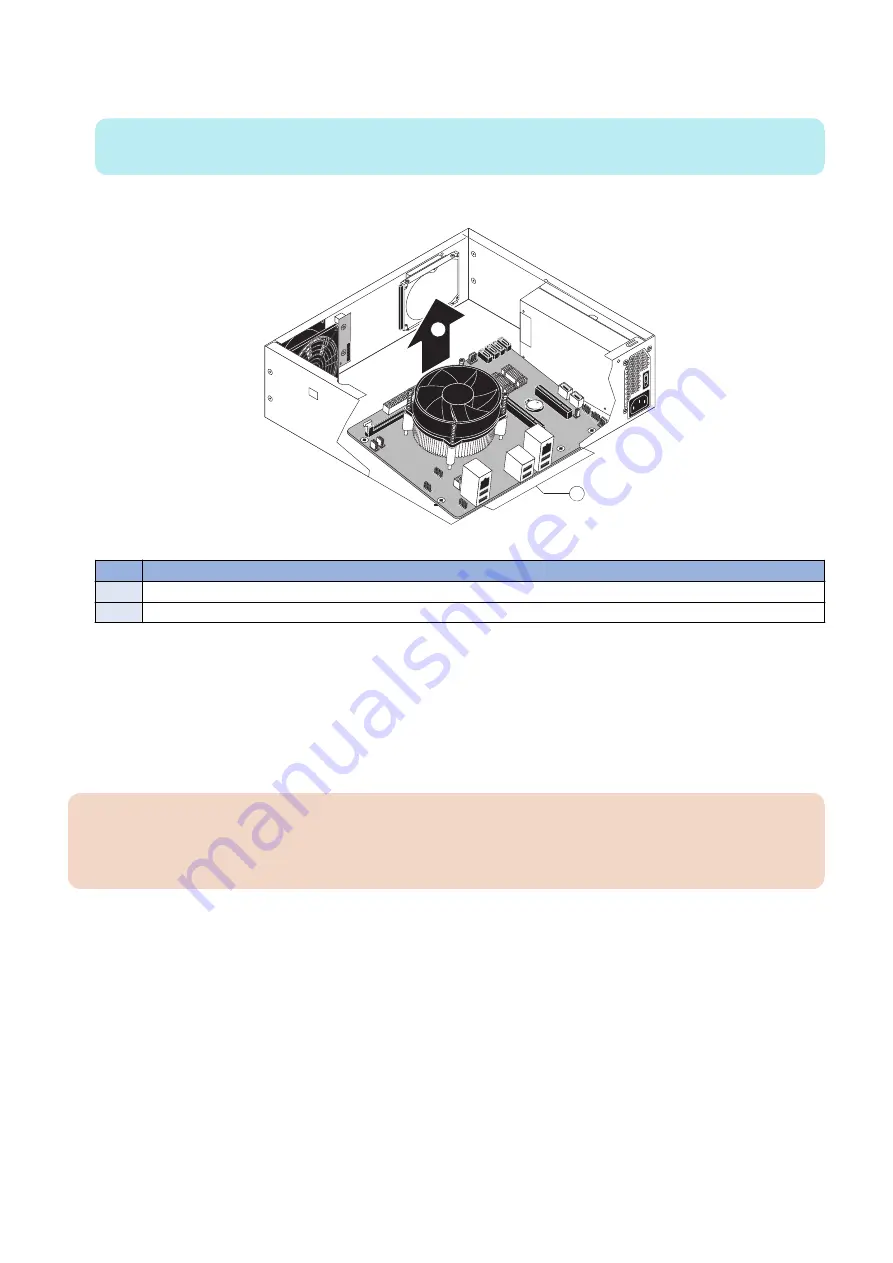
2. Lift the motherboard edge opposite to the connector panel to release the motherboard from the chassis, and then gently
slide the motherboard out of the chassis.
NOTE:
Make sure to lift the motherboard edge near the DIMM area, so that the underside of this area clears the nearby screw standoff.
Make sure that the connectors on the motherboard clear the cutouts in the chassis as you remove the board. Avoid handling
contacts or using excessive force.
1
2
Figure 14: Removing the motherboard from the chassis
No.
Item
1
Lift edge of motherboard and remove from chassis.
2
Make sure that the motherboard connectors clear the cutouts in the chassis (cutouts not shown).
3. If you are replacing the motherboard with a new motherboard, remove the following from the old motherboard:
• DIMM(see
)
• CPU(see
“CPU and CPU cooling assembly” on page 28
)
“Transferring the security chip” on page 25
● Transferring the security chip
Transferring the security chip from the old motherboard to the new motherboard ensures that all customer-purchased software
options are transferred.
IMPORTANT:
Make sure to remove the security chip from the old motherboard before returning the old motherboard to your authorized
service/support center. If you fail to install the security chip on the new motherboard, the imagePASS will not start up and
all customer-purchased software options will be lost.
To transfer the security chip to the new motherboard
1. Locate the extraction tool provided in the new motherboard kit.
3. REPLACING PARTS
25
Содержание imagePASS-P2
Страница 1: ...Revision 1 1 imagePASS P2 Service Manual ...
Страница 6: ...Introduction 1 Introduction 2 Specifications 6 ...
Страница 13: ...Using the imagePASS 2 Using the imagePASS 9 ...
Страница 16: ...Figure 3b The imagePASS Tools menu 2 Using the imagePASS 11 ...
Страница 17: ...REPLACING PARTS 3 Replacing Parts 13 ...
Страница 44: ...INSTALLING SYSTEM SOFTWARE 4 Installing System Software 40 ...
Страница 64: ...TROUBLESHOOTI NG 5 Troubleshooting 60 ...
Страница 84: ...2 Stepped Screw M4 2x 3 4x Screw with Toothed Washer M4x8 Stepped Screw M4 4 4x 8x 6 INSTALLATION PROCEDURE 79 ...
Страница 87: ...2 2x Stepped Screw M4 3 Screw with Toothed Washer M4x8 Stepped Screw M4 6x 4 4x 8x 6 INSTALLATION PROCEDURE 82 ...
Страница 88: ...5 4x Screw with Toothed Washer M4x8 6 Crossover Ethernet Cable 1x 2x 7 2x 8 2x 6 INSTALLATION PROCEDURE 83 ...


