63
9
Click
Create Volume
.
10
Enter a volume name, volume description, volume, and size (if you enabled LVM), then click
OK
.
The volume size that you specify here can be changed later. To change the volume size, refer to the "Expanding
Volume Sizes" section below.
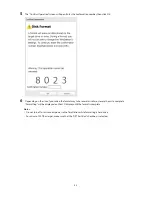
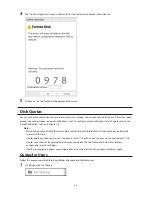
11
The "Confirm Operation" screen will open. Enter the confirmation number, then click
OK
.
12
Click
OK
, then
Close
.
Creating an iSCSI volume is finished.
Note:
If you click
Disable Connection
for the selected volume in
Drives
-
iSCSI
in Settings, the selected iSCSI
volume can no longer be accessed. If you click
Enable Connection
, the volume will become accessible from the
iSCSI initiator software.
Connecting or Disconnecting Volumes
There are two methods to connect or disconnect volumes. One uses the pre-installed Microsoft iSCSI Initiator on
Windows; the other uses Buffalo iSCSI Connection Tool. The method to use Buffalo iSCSI Connection Tool is available
only to customers with TS5000 series TeraStations.
Note:
By default, the IP address of the TeraStation is automatically assigned from a DHCP server. However, in
this case, if you turn off and restart the TeraStation, the IP address may be changed and the volumes on the
TeraStation may not be accessible. To avoid changing the IP address unexpectedly, using a fixed IP address for
the TeraStation is recommended.
Using Microsoft iSCSI Initiator
Connecting Volumes
To connect a volume using Microsoft iSCSI Initiator from a Windows computer, follow the procedure below.
Note:
Do not shut down the TeraStation while connecting to an iSCSI volume. It may cause unexpected data
erasure. Make sure all connections are disconnected before shutdown.
1
In Windows, navigate to
Control Panel
-
Administrative Tools
-
iSCSI Initiator
.
Содержание TeraStation WSS 5000
Страница 10: ...9 Chapter 1 Installation Diagrams TS5800D TS5800DN TS5800DWR µ µ µ µ TS5600D TS5600DN µ µ µ µ ...
Страница 60: ...59 6 Click Edit under NAS Volume 7 Click Create Volume ...
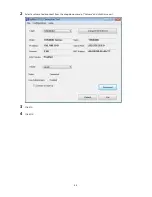
Страница 67: ...66 2 Select the TeraStation name from the drop down menu of Target and click Register iSCSI Device 3 Click OK ...
Страница 88: ...87 2 Click to the right of Backup 3 Click List of LinkStations and TeraStations ...
Страница 90: ...89 3 Click Create New Job Note Up to 8 backup jobs can be configured ...
Страница 104: ...103 18Click Time Machine ...
Страница 105: ...104 19Click Select Backup Disk 20Select the TeraStation then click Use Disk ...
Страница 116: ...115 3 Click Create New Job ...
Страница 117: ...116 4 Select backup settings such as date and time to run 5 Click Add 6 Click Browse under Backup Source Folder Name ...
Страница 128: ...127 3 Click Edit 4 Click Browse 5 Select the shared folder that you want to make available to iTunes then click OK ...
Страница 131: ...130 9 Click Open Squeezebox The Squeezebox s settings will open ...
Страница 136: ...135 4 Open the License tab then click Activate Free License To deactivate the license click ...
Страница 138: ...137 3 Click Next 4 Click Find Cameras ...
Страница 144: ...143 2 Select the search criteria on the left side of the search screen then click Search ...
Страница 145: ...144 3 The search results are displayed Click a thumbnail to start the media viewer ...
Страница 191: ...190 4 Click Edit Note The settings of the PHP language interpreter can be changed from Edit php ini 5 Click Browse ...


