177
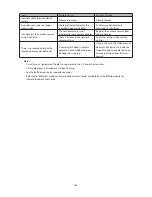
Trunking Mode
Characteristics
TLB
The outgoing network packet traffic is distributed according to
the current load (relative to the speed) on each network interface
slave.
*A separate intelligent switch that supports EtherChannel or other port trunking is required. Configure two LAN
ports on the switch for port trunking first.
**A separate intelligent switch that supports IEEE 802.3ad is required. Configure LACP in the switch first.
Configuring Port Trunking
If the TeraStation is being used as an iSCSI hard drive, disable iSCSI before changing network settings such as port
trunking. Navigate to
Drives
-
iSCSI
in Settings and move the iSCSI switch to the
position temporarily.
1
Use an Ethernet cable to connect the hub LAN port and TeraStation LAN port 1.
Notes:
•
Do not connect the second Ethernet cable to the TeraStation yet.
•
If using an intelligent switch, configure the LAN ports on the switch first, before connecting to the
TeraStation.
2
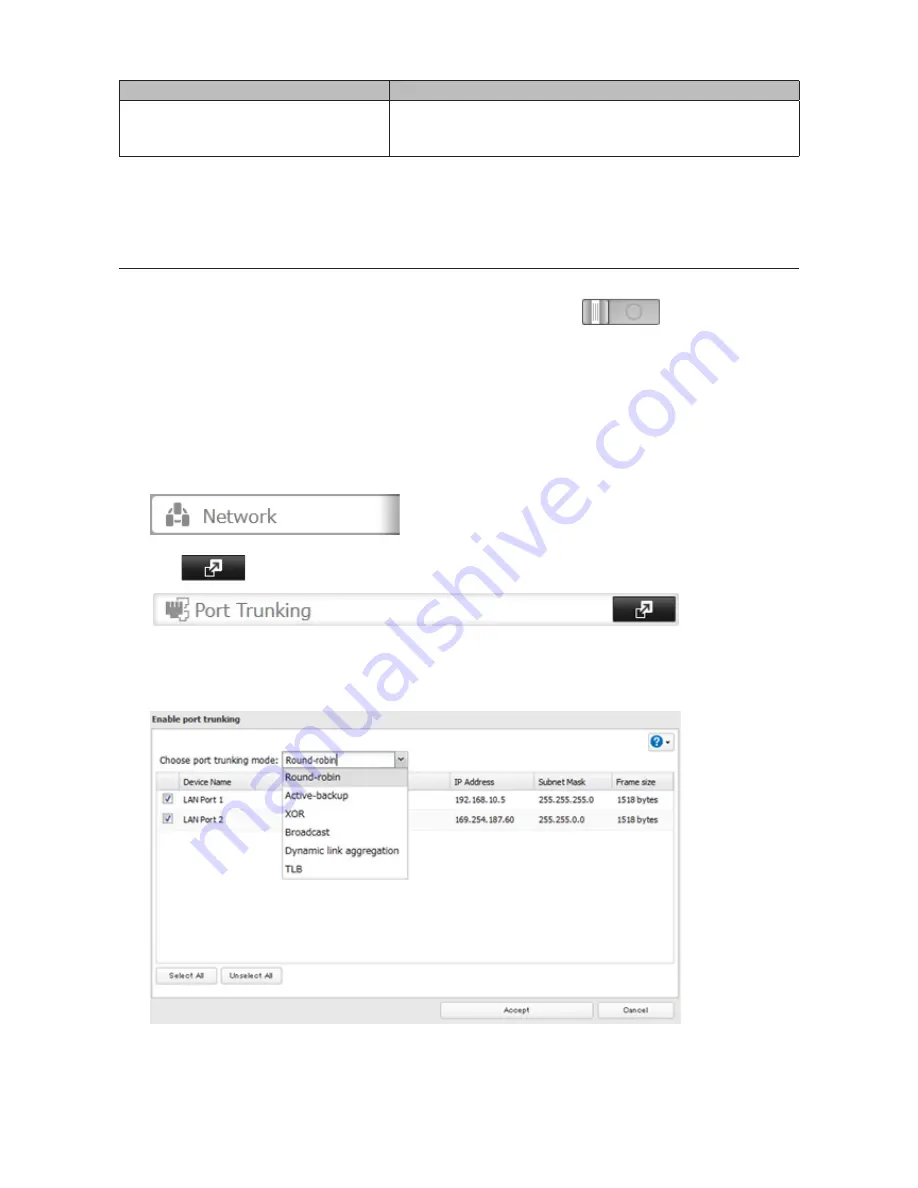
In Settings, click
Network
.
3
Click
to the right of "Port Trunking".
4
Choose a port trunking link.
5
Select the LAN port that will be used, select the port trunking mode, and click
Accept
.
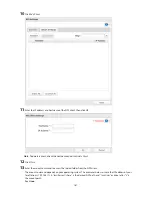
6
Connect the hub's LAN port and TeraStation's LAN port using the second LAN cable. If you are using an
intelligent switch, connect to the LAN port that was previously configured for port trunking.
Содержание TeraStation WSS 5000
Страница 10: ...9 Chapter 1 Installation Diagrams TS5800D TS5800DN TS5800DWR µ µ µ µ TS5600D TS5600DN µ µ µ µ ...
Страница 60: ...59 6 Click Edit under NAS Volume 7 Click Create Volume ...
Страница 67: ...66 2 Select the TeraStation name from the drop down menu of Target and click Register iSCSI Device 3 Click OK ...
Страница 88: ...87 2 Click to the right of Backup 3 Click List of LinkStations and TeraStations ...
Страница 90: ...89 3 Click Create New Job Note Up to 8 backup jobs can be configured ...
Страница 104: ...103 18Click Time Machine ...
Страница 105: ...104 19Click Select Backup Disk 20Select the TeraStation then click Use Disk ...
Страница 116: ...115 3 Click Create New Job ...
Страница 117: ...116 4 Select backup settings such as date and time to run 5 Click Add 6 Click Browse under Backup Source Folder Name ...
Страница 128: ...127 3 Click Edit 4 Click Browse 5 Select the shared folder that you want to make available to iTunes then click OK ...
Страница 131: ...130 9 Click Open Squeezebox The Squeezebox s settings will open ...
Страница 136: ...135 4 Open the License tab then click Activate Free License To deactivate the license click ...
Страница 138: ...137 3 Click Next 4 Click Find Cameras ...
Страница 144: ...143 2 Select the search criteria on the left side of the search screen then click Search ...
Страница 145: ...144 3 The search results are displayed Click a thumbnail to start the media viewer ...
Страница 191: ...190 4 Click Edit Note The settings of the PHP language interpreter can be changed from Edit php ini 5 Click Browse ...


