32
8
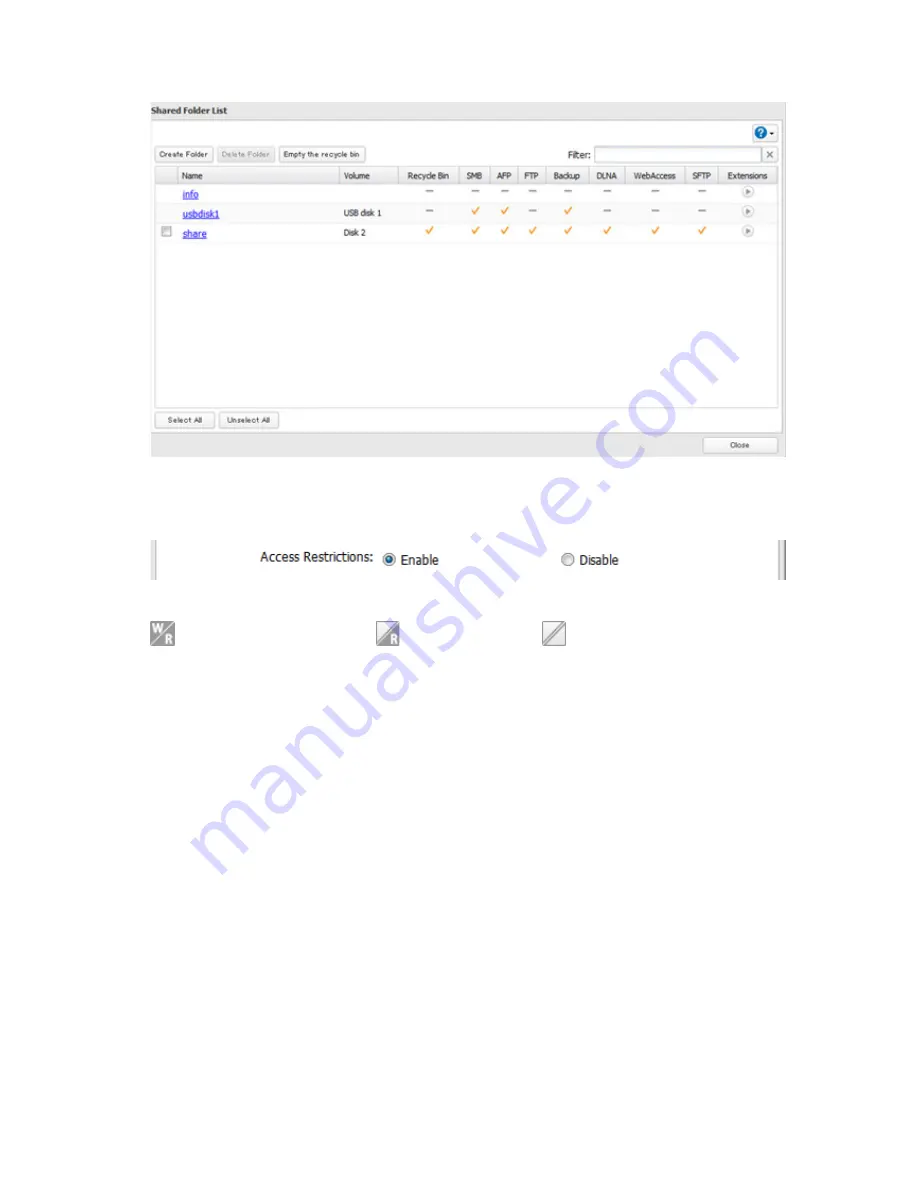
Click a shared folder that you want to set access restrictions for.
9
Click
Edit
.
10
Enable "Access Restrictions".
11
Select the level of access for the user or group.
: Read and write access allowed
: Read access allowed
: Access prohibited
12
Click
OK
.
Notes:
•
To have the TeraStation join an Active Directory domain, configure it to use a DNS server that can resolve
names for the Active Directory domain.
•
After building an Active Directory domain, the administrator password for joining the domain must be
changed at least once, or joining the Active Directory domain will fail.
•
The DNS name and NetBIOS name of Active Directory domains should be identical.
•
If both read-only and read & write permissions are given, the user will have read-only access. The most
restrictive access setting will apply.
•
If there are more than 5 minutes difference between the TeraStation's clock and the domain controller's clock,
joining the domain or authenticating domain users and groups may fail. For best results, use an NTP server to
set the time for all network devices.
•
To use the TeraStation as a member server in an Active Directory domain, the TeraStation should be logged
in to the domain and accessed from a computer that is not a member of the domain with a valid domain
account.
•
If the TeraStation is a member server of an Active Directory domain, you cannot connect as a guest user via
AFP.
•
If your TeraStation is a member server in an Active Directory domain and you change the authentication
method to "Workgroup", the account on the domain controller will not be deleted automatically.
•
If FTP is enabled, local and domain group access restrictions from the AD network do not work. Use user
access restrictions instead.
Содержание TeraStation WSS 5000
Страница 10: ...9 Chapter 1 Installation Diagrams TS5800D TS5800DN TS5800DWR µ µ µ µ TS5600D TS5600DN µ µ µ µ ...
Страница 60: ...59 6 Click Edit under NAS Volume 7 Click Create Volume ...
Страница 67: ...66 2 Select the TeraStation name from the drop down menu of Target and click Register iSCSI Device 3 Click OK ...
Страница 88: ...87 2 Click to the right of Backup 3 Click List of LinkStations and TeraStations ...
Страница 90: ...89 3 Click Create New Job Note Up to 8 backup jobs can be configured ...
Страница 104: ...103 18Click Time Machine ...
Страница 105: ...104 19Click Select Backup Disk 20Select the TeraStation then click Use Disk ...
Страница 116: ...115 3 Click Create New Job ...
Страница 117: ...116 4 Select backup settings such as date and time to run 5 Click Add 6 Click Browse under Backup Source Folder Name ...
Страница 128: ...127 3 Click Edit 4 Click Browse 5 Select the shared folder that you want to make available to iTunes then click OK ...
Страница 131: ...130 9 Click Open Squeezebox The Squeezebox s settings will open ...
Страница 136: ...135 4 Open the License tab then click Activate Free License To deactivate the license click ...
Страница 138: ...137 3 Click Next 4 Click Find Cameras ...
Страница 144: ...143 2 Select the search criteria on the left side of the search screen then click Search ...
Страница 145: ...144 3 The search results are displayed Click a thumbnail to start the media viewer ...
Страница 191: ...190 4 Click Edit Note The settings of the PHP language interpreter can be changed from Edit php ini 5 Click Browse ...


