68
Relay Contacts and Event Inputs
To perform event trapping via the RS-232C interface, the circuit must first be ARMED; that is,
made ready to receive an event trigger. Only one event may be captured after every arming, but
the events are stored sequentially in the event buffer in exactly the same manner as the normal
event time mode, thereby allowing up to 200 events to be recorded.
8.2.9
Event Trapping Setup
Configuring the clock to trap events (incoming data) on the RS-232C interface requires making the
configuration changes described in Section 5.2.2.
Arm the Event-Trapping circuit from the front panel using the SET RS-232 sub-menu from the
SETUP key. This menu also provides for configuration of communications port parameters (e.g.
baud rate, word length, etc.) to match those of the computer or equipment to be interfaced. The
following steps are required to arm the Event Trapping circuitry from the front panel:
1. Press the following keys in order; SETUP
>
ENTER
>
SETUP
>
SETUP. The display
should indicate the following:
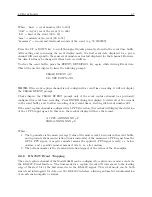
SET
A EVENT?
2. Press ENTER again and the display should indicate the following:
ARM
A EVENT?
PRESS ENTER TO ARM
3. Press the ENTER button and the Event Input should be armed.
When the event occurs on the RS-232C port (i.e. the start bit of the next received character), the
event data can be reviewed in the event mode exactly as any normally captured event would be. To
capture further events, the circuit must be re-armed from the front panel or by using the RS-232
Command “AR.”
Note that received commands are viewed as complete when the final character in the command is
received. Control characters, such as carriage-return and line-feed, are ignored and may follow the
“AR” command, but the start bit of the next character after the “R” (even if a carriage return)
may trigger the event timer. For a complete list of RS-232C Event Mode commands, refer to
Section 9.2.2.
Содержание 1088A
Страница 4: ...iv ...
Страница 6: ...vi ...
Страница 18: ...xviii LIST OF FIGURES ...
Страница 23: ...1 4 Attaching Rack Mount Ears to 1088A B Series Clocks 3 Figure 1 2 Attaching Rack Mount Ears ...
Страница 24: ...4 Unpacking the Clock ...
Страница 32: ...12 Front and Rear Panels ...
Страница 38: ...18 Connecting Inlet Power Input and Output Signals ...
Страница 41: ...4 1 GPS Antenna Installation 21 Figure 4 2 Antenna Mounting Bracket Figure 4 3 Antenna Mounting with AS0044600 ...
Страница 46: ...26 GPS Antenna and Cable Information ...
Страница 48: ...28 Setting Internal Jumpers Figure 5 1 Model 1088B Main Board ...
Страница 76: ...56 The Setup Menus ...
Страница 112: ...92 Serial Communication and Command Set ...
Страница 127: ...B 4 Physical Dimensions 107 Figure B 1 Suggested Mounting of the AS0094500 Surge Arrester ...
Страница 128: ...108 Using Surge Arresters ...
Страница 137: ...C 5 Option 04 Parallel BCD Output 117 C 5 2 Option 04 Firmware Setup Figure C 2 Option 04 Firmware Setup ...
Страница 145: ...C 5 Option 04 Parallel BCD Output 125 Figure C 4 Option 04 Output Jumper Settings ...
Страница 146: ...126 Options List Figure C 5 Option 04 Board Layout and Jumper Locations ...
Страница 165: ...C 12 Option 17 Parallel BCD Output and Second RS 232 Port 145 Figure C 11 Option 17 Output Jumper Settings ...
Страница 166: ...146 Options List Figure C 12 Option 17 Board Layout and Jumper Locations ...
Страница 176: ...156 Options List C 14 5 Typical Network Configuration Figure C 15 Option 18 Network Configuration ...
Страница 187: ...C 16 Option 20A Four Fiber Optic Outputs 167 Figure C 22 Option 20A Jumper Locations ...
Страница 194: ...174 Options List Figure C 24 Option 23 Internal Jumper Setup ...
Страница 196: ...176 Options List Figure C 25 Option 27 Jumper Locations ...
Страница 214: ...194 Options List Figure C 28 Option 29 Connector Signal Locations ...
Страница 270: ...250 Options List ...


