110
Options List
C.2
Option 01: Backlighted LCD Display
C.2.1
General Description
Option 01 for the Arbiter System line of Satellite-Controlled Clocks adds illumination to the front
panel display, if so equipped. The standard reflective liquid crystal display (LCD) is replaced with
a transflective LCD. An Electro-luminescent (EL) panel located behind the transflective LCD pro-
vides backlighting; thereby increasing the readability of the display in subdued lighting conditions.
The backlight can be set to remain on indefinitely, or to turn off after a predetermined time fol-
lowing the last keystroke. With the backlight turned off, the display is still readable in ordinary
ambient light.
C.2.2
Specifications
•
Initial Luminance:
30 cd/m2 minimum
•
Service Life:
4000 hours (down to 10 cd/m2)
C.2.3
Configuration
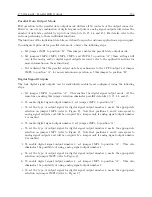
The SETUP menu outlined in the Operation Manual contains a sub-menu, which allows selection
of the backlight-operating mode. To set the backlight-operating mode, observe the following steps:
1. With the clock power turned on, press the SETUP key. The display should change to read,
SET RS-232.
2. Press the SETUP key repeatedly, until the display reads, “SET BACK LIGHT?”. Press the
ENTER key to select the backlight sub-menu. The current backlight operating mode will be
displayed, from one of the following selections:
•
OFF – Backlight never on.
•
ON – Backlight always on.
•
AUTO – Backlight turns on when a key is pressed, remains on for 30 seconds after the
last key is pressed. This is the preferred mode for applications requiring a lighted display,
since it will provide the longest EL panel lifespan (see Specifications, above).
3. Pressing the UP and DOWN keys will change the selection. When the desired operating
mode is displayed, press the ENTER key to confirm the choice and return to the first level
of the SETUP menu.
The backlight operating mode can also be changed via the RS-232C port, using the L0, L1, or L2
commands for OFF, ON, and AUTO, respectively. For details regarding setting the backlight using
the RS-232C port, refer to Section 9.2.5.
Содержание 1088A
Страница 4: ...iv ...
Страница 6: ...vi ...
Страница 18: ...xviii LIST OF FIGURES ...
Страница 23: ...1 4 Attaching Rack Mount Ears to 1088A B Series Clocks 3 Figure 1 2 Attaching Rack Mount Ears ...
Страница 24: ...4 Unpacking the Clock ...
Страница 32: ...12 Front and Rear Panels ...
Страница 38: ...18 Connecting Inlet Power Input and Output Signals ...
Страница 41: ...4 1 GPS Antenna Installation 21 Figure 4 2 Antenna Mounting Bracket Figure 4 3 Antenna Mounting with AS0044600 ...
Страница 46: ...26 GPS Antenna and Cable Information ...
Страница 48: ...28 Setting Internal Jumpers Figure 5 1 Model 1088B Main Board ...
Страница 76: ...56 The Setup Menus ...
Страница 112: ...92 Serial Communication and Command Set ...
Страница 127: ...B 4 Physical Dimensions 107 Figure B 1 Suggested Mounting of the AS0094500 Surge Arrester ...
Страница 128: ...108 Using Surge Arresters ...
Страница 137: ...C 5 Option 04 Parallel BCD Output 117 C 5 2 Option 04 Firmware Setup Figure C 2 Option 04 Firmware Setup ...
Страница 145: ...C 5 Option 04 Parallel BCD Output 125 Figure C 4 Option 04 Output Jumper Settings ...
Страница 146: ...126 Options List Figure C 5 Option 04 Board Layout and Jumper Locations ...
Страница 165: ...C 12 Option 17 Parallel BCD Output and Second RS 232 Port 145 Figure C 11 Option 17 Output Jumper Settings ...
Страница 166: ...146 Options List Figure C 12 Option 17 Board Layout and Jumper Locations ...
Страница 176: ...156 Options List C 14 5 Typical Network Configuration Figure C 15 Option 18 Network Configuration ...
Страница 187: ...C 16 Option 20A Four Fiber Optic Outputs 167 Figure C 22 Option 20A Jumper Locations ...
Страница 194: ...174 Options List Figure C 24 Option 23 Internal Jumper Setup ...
Страница 196: ...176 Options List Figure C 25 Option 27 Jumper Locations ...
Страница 214: ...194 Options List Figure C 28 Option 29 Connector Signal Locations ...
Страница 270: ...250 Options List ...

