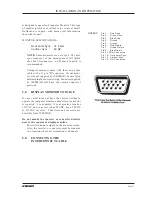
Page 49
WESMAR
INSTALLATION AND OPERATION
position with the top hoist clamp even with the top
of the lead screw.]
Loosen the packing gland, safety clamp, and top hoist
clamp.
Feed the soundome cable and tube through them in
the same order.
If the top hoist clamp will not fit around the soun-
dome tube, increase the diameter of the hole in
the top hoist clamp. Do this by pressing a wedge
into the slot between the hole for the soundome
tube and the hole for the lead screw. DO NOT
remove the top hoist clamp from the lead screw.
Tighten the top hoist clamp.
Place the safety clamp immediately below the hoist
clamp and fasten it with the locking bolt.
We discuss positioning the tube in 4.0 Positioning
the Soundome.
Place the neoprene gasket on the seachest flange.
Lower the soundome into the seachest.
Position the hoist assembly so that you can easily
reach the Junction Box.
Use the bolts provided to secure the hoist flange to
the seachest.
4.0
POSITIONING THE
SOUNDOME
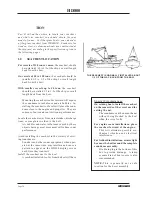
To determine how high or low to position the soundome
within the seachest, go below the boat and measure
the distance between the bottom of the soundome and
the end of the seachest.
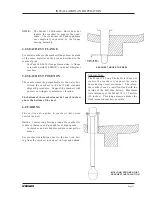
The correct position of the soundome boot is
3.8
cm (1.5 inches) within the seachest.
See Page
55, #1.
If the soundome is too high or too low loosen the top
hoist clamp and safety clamp.
Raise or lower the soundome according to your mea-
surement.
Align the soundome so that the mark you made on the
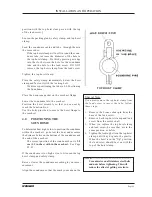
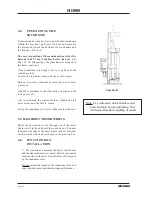
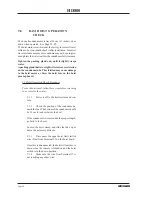
Special Note:
If you must remove the top hoist clamp from
the lead screw to insert the tube, follow
these steps:
1. Remove the bronze shear pin from the
base of the lead screw.
2. Remove both top hoist clamp and lead
screw from the motor shaft.
3. When you replace the top hoist clamp
and lead screw, be sure they are in the
same position as before.
4. Tighten the locking bolts on the top hoist
clamp until they dig into the plastic.
When the hoist is in the "Up" position,
the lead screw should be even with the
top of the hoist clamp.
TOP HOIST CLAMP
NOTE: ..............................................................
Use anti-seize on all stainless steel bolts
and nuts before tightening. This will
reduce the affect of galling or seizure.
Summary of Contents for HD800/110-10
Page 10: ...Page 10 WESMAR HD800...
Page 32: ...Page 32 WESMAR HD800 Section III INSTALLATION...
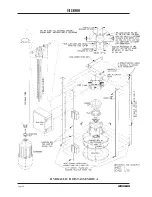
Page 64: ...Page 64 WESMAR HD800 HYDRAULIC HOIST ASSEMBLY A...
Page 65: ...Page 65 WESMAR INSTALLATION AND OPERATION HYDRAULIC HOIST ASSEMBLY B...
Page 74: ...Page 74 WESMAR HD800 M18 HOIST CONTROL CIRCUITRY THIS PAGE LEFT INTENTIONALLY BLANK...
Page 86: ...Page 86 WESMAR HD800...
Page 87: ...Page 87 WESMAR INSTALLATION AND OPERATION Section IV FIELD ADJUSTMENTS CALIBRATION...
Page 92: ...Page 92 WESMAR HD800 HD J BOX TRANSMIT PREAMP RECEIVER PCB T P R...

