Working with Scan Modes
27
Table
of Contents
▼
TIP: To revert to the original settings for a predefined mode, click the
Defaults button.
To create a new scan mode:
1. From the Visioneer menu, choose Scan Settings. The Scan Settings
dialog box appears.
2. From the Target Application pop-up menu, choose the application
for which you want to create a new scan mode. Settings for the
application appear. (After you create a new mode, you can choose it
for use with any application you want.)
3. If you want to base the new mode on a predefined mode, choose the
mode from the Scan Mode pop-up menu.
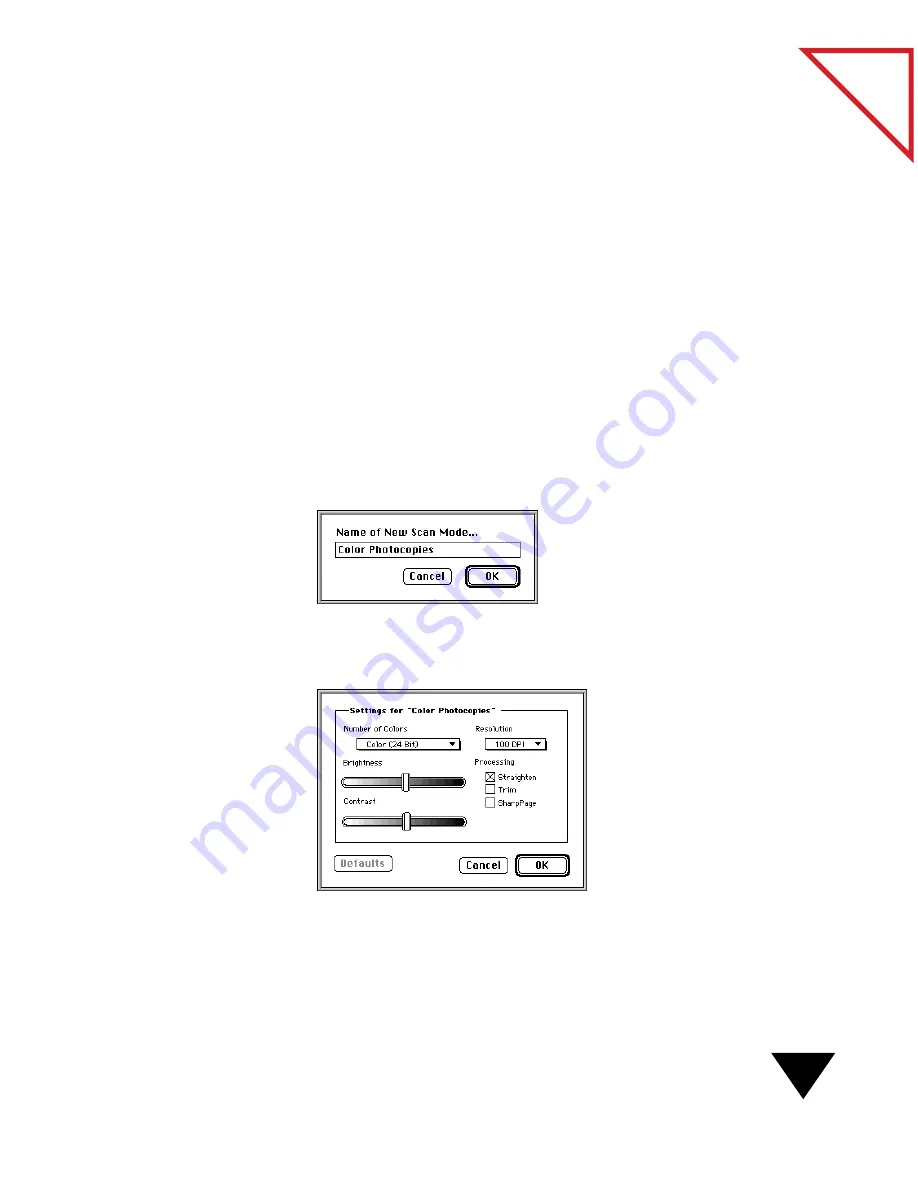
4. From the Scan Mode pop-up menu, choose Create. A dialog box
appears asking you to name the new scan mode.
5. Type a name and click OK. The Settings For dialog box appears.
The following figure shows a new mode named Color Photocopies.
6. Select settings for the mode and click OK. The Scan Settings dialog
box appears. The new scan mode appears in the Scan Mode pop-up
menu.
Summary of Contents for PAPERPORT 5.0 SOFTWARE FOR MACINTOSH
Page 1: ...PaperPort 5 0 Software User s Guide F O R M A C I N T O S H...
Page 8: ...viii...
Page 42: ...2 Scanning Items 34 T a b l e o f C o n t e n t s...
Page 54: ...3 Viewing Items 46 T a b l e o f C o n t e n t s...
Page 88: ...6 Fine Tuning Images 80 T a b l e o f C o n t e n t s...
Page 110: ...7 Annotating Items 102 T a b l e o f C o n t e n t s...


