8: Importing, Saving, and Deleting Items
110
Table
of Contents
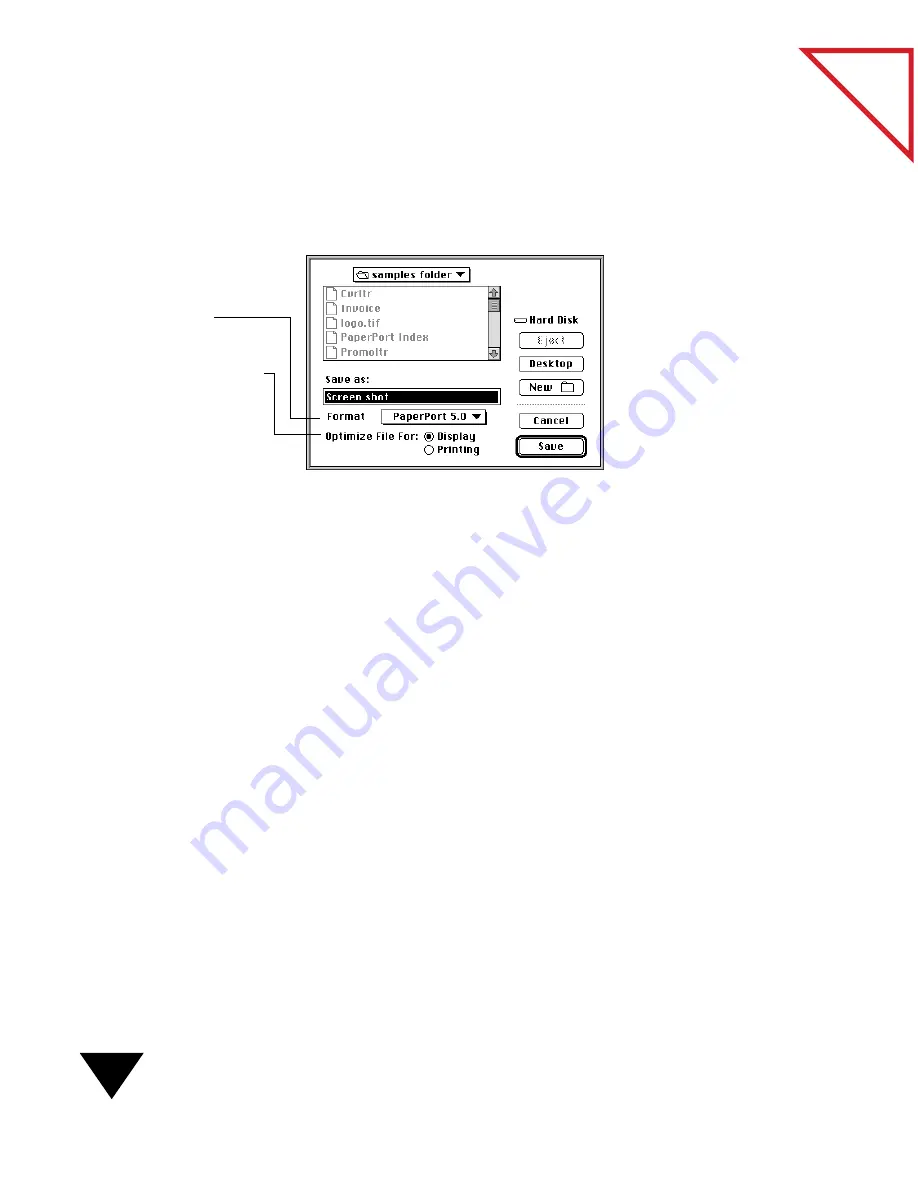
To save an item in a format other than the PaperPort format:
1. On the PaperPort Desktop or in the Page Viewer, select the item
that you want to save.
2. From the File menu, choose Save As. The directory dialog box appears.
3. From the Format list, choose the format type that you want.
The PaperPort software supports several TIFF formats. In general,
you will have the fewest compatibility problems between Macintosh
applications if you use uncompressed, single-page TIFF files.
However, the file size is larger.
4. Select the drive and folder to which you want to save the item.
5. Type a new name for the item in the “Save as” box.
6. If you are saving the item in an image format, select an Optimize
File For
option, depending on if you want to print the file or display
it on your screen. For example, if you want to print a scanned item
that has colored text on a colored background, the PaperPort
software optimizes the image so that the text is more readable when
printed.
7. Click Save. As each page of the item is saved, a progress gauge shows
the status of that page.
The PaperPort software saves each page separately and puts all the
pages into a new folder. For example, if you save the document
“Profits,” which has two pages as a TIFF file, PaperPort creates two
files—“Profits, 1” and “Profits, 2”—and stores them in the Profits
folder.
Select a file format for
the saved item.
Choose Display if you want the
best quality image for viewing
on a screen. Choose Printing if
you want the best quality
image for printing or faxing.
Summary of Contents for PAPERPORT 5.0 SOFTWARE FOR MACINTOSH
Page 1: ...PaperPort 5 0 Software User s Guide F O R M A C I N T O S H...
Page 8: ...viii...
Page 42: ...2 Scanning Items 34 T a b l e o f C o n t e n t s...
Page 54: ...3 Viewing Items 46 T a b l e o f C o n t e n t s...
Page 88: ...6 Fine Tuning Images 80 T a b l e o f C o n t e n t s...
Page 110: ...7 Annotating Items 102 T a b l e o f C o n t e n t s...


