Working with Scan Modes
25
Table
of Contents
S
ELECTING
P
REDEFINED
S
CAN
M
ODES
OR
C
REATING
Y
OUR
O
WN
In the Scan Settings dialog box, you can select a different predefined scan
mode for a target application or you can customize a predefined mode by
selecting color, the number of grays, the resolution, or the brightness of
the scan. You can also create new scan modes.
▼
CAUTION: If you change a predefined scan mode, the changes are
applied to all target applications that use that scan mode. For example,
if you change the Storing Photos mode, target applications such as
image editors and the Page Viewer that are set by default to use the
Storing Photos mode, will be changed to use the new customized
mode. It’s a good idea to create a new mode for use with a specific
application or specific use instead of modifying a predefined mode.
To choose a predefined scan mode:
1. From the Visioneer menu, choose Scan Settings. The Scan Settings
dialog box appears.
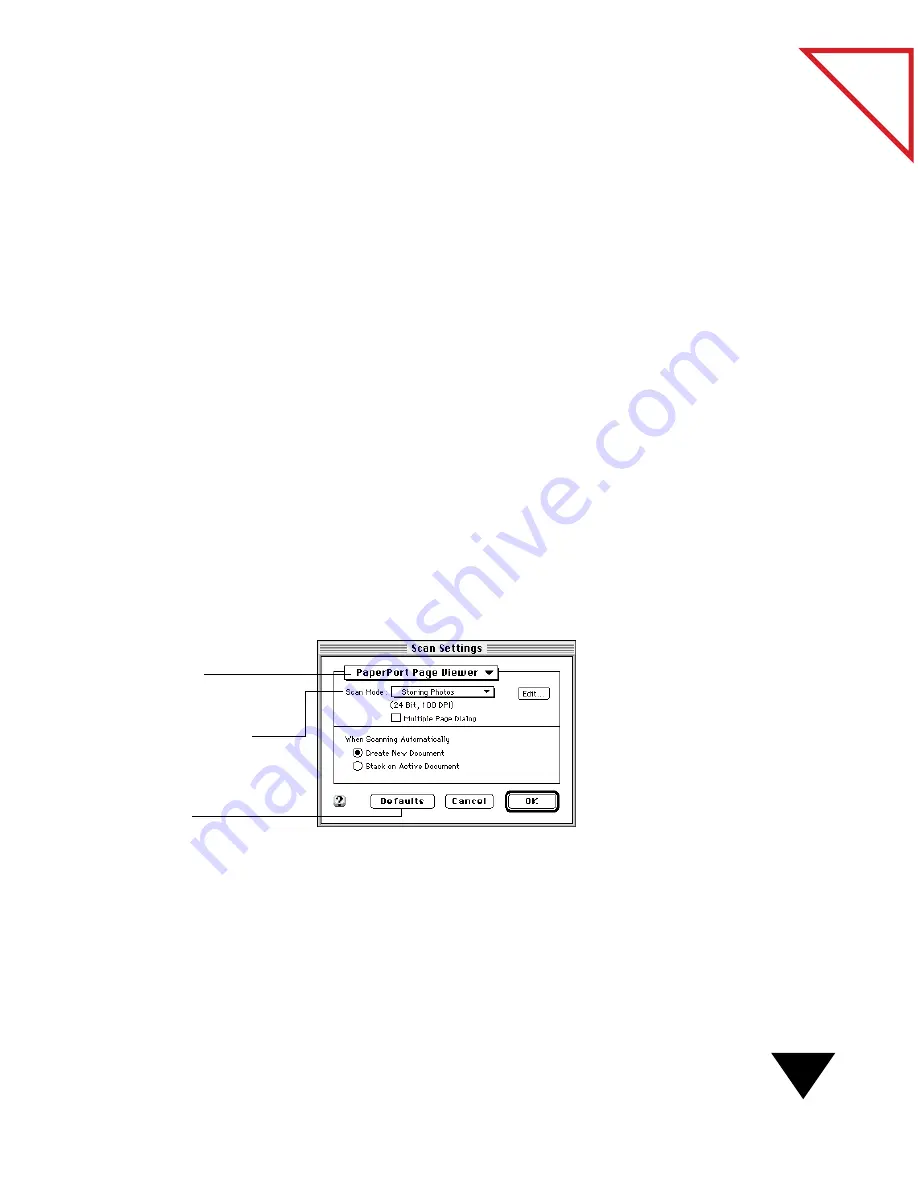
2. From the Target Application pop-up menu, choose the target
application for which you want to set the scan mode. Settings for the
application appear. The following figure shows the Page Viewer settings.
3. From the Scan Mode pop-up menu, choose the mode setting you
want. Notice that when you select a setting, the description below it
changes. For example, the previous figure shows the description for
the Storing Photos mode (24 bit, 100 dpi).
4. Click OK.
Target Application
pop-up menu.
Restores the
default settings.
Scan Mode pop-up menu.
Summary of Contents for PAPERPORT 5.0 SOFTWARE FOR MACINTOSH
Page 1: ...PaperPort 5 0 Software User s Guide F O R M A C I N T O S H...
Page 8: ...viii...
Page 42: ...2 Scanning Items 34 T a b l e o f C o n t e n t s...
Page 54: ...3 Viewing Items 46 T a b l e o f C o n t e n t s...
Page 88: ...6 Fine Tuning Images 80 T a b l e o f C o n t e n t s...
Page 110: ...7 Annotating Items 102 T a b l e o f C o n t e n t s...


