35
Basic Operations
Using the Preview Screen
U
SING
THE
P
REVIEW
S
CREEN
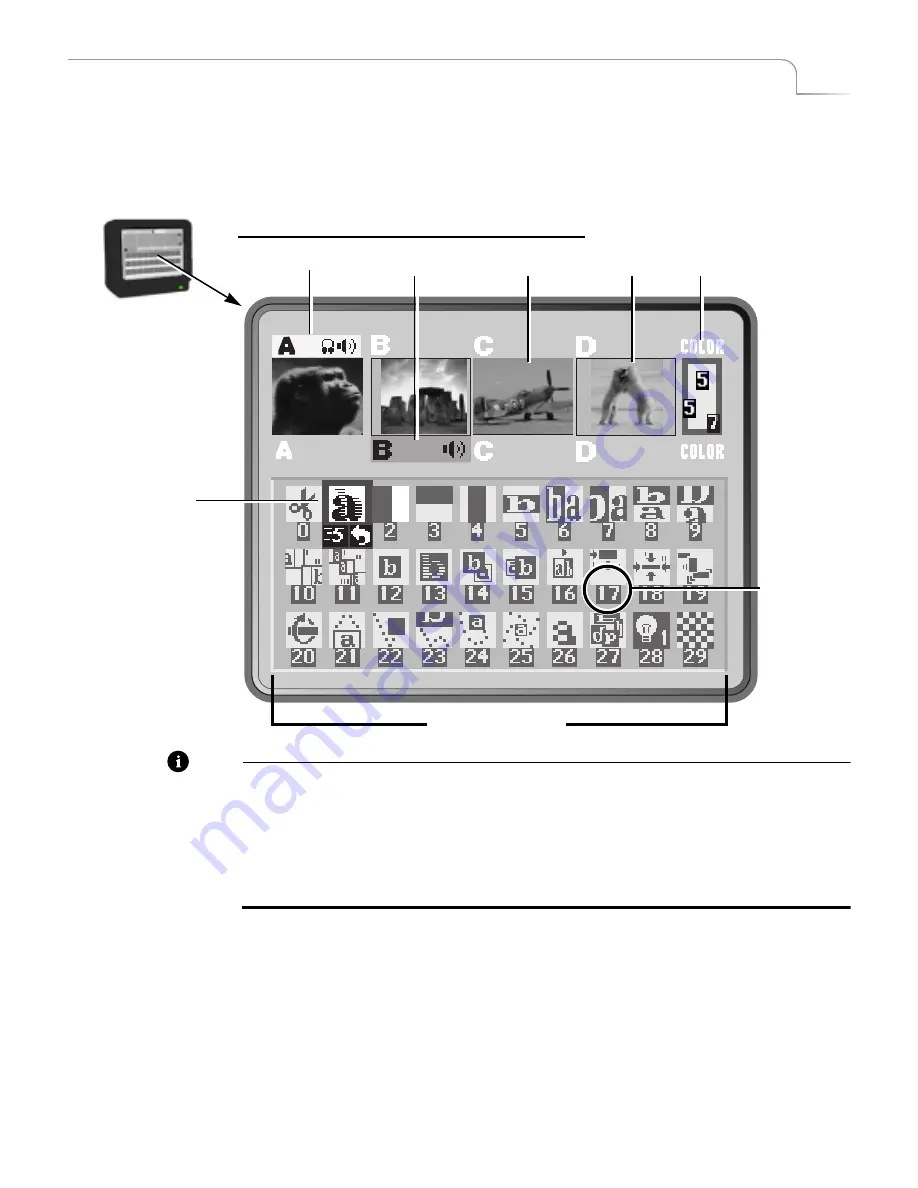
The Preview Screen is your control center for MXPro operations. This section describes
individual items on the Preview screen. The Preview screen appears on the monitor
attached to the MXPro PREVIEW OUT jack.
Note
MXPro always processes the output at the highest possible quality
. The Input
Source Previews, however, appear in reduced quality because MXPro must reduce the
images to fit the smaller window. Playback of the images is also of reduced quality
because MXPro must do a lot of additional work to play them. This becomes more evi-
dent when you display multiple moving images because MXPro must do even more
work to handle all of the images simultaneously. What you see on the Preview screen is
not
indicative of what gets recorded or displayed on the output.
Changing the Display Configuration
Press the
DISPLAY
button to repeatedly cycle through five different configurations for
the Preview screen, or use the shortcut key indicated for each:
•
STANDARD
— as shown above (
SHIFT+1
).
•
TWO CHANNEL
— Shows only enlarged CURRENT and NEXT Input Source Pre-
views and the first two rows of the Transitions Menu (
SHIFT+2
).
Preview Monitor and STANDARD Preview Screen
Input Source Previews
Active Source Highlights
Color
Selected
Transition
Transitions Menu
Selector
Transition
Number
Summary of Contents for MXPro
Page 1: ...MXPro User Guide...
Page 4: ...Notes...
Page 56: ...Notes...
Page 70: ...Notes...
Page 78: ...Notes...
Page 114: ...Notes...
Page 138: ...Notes...
Page 152: ...Notes...
Page 158: ...Notes...
Page 164: ...Notes...
Page 170: ...Notes...


