Page | 39
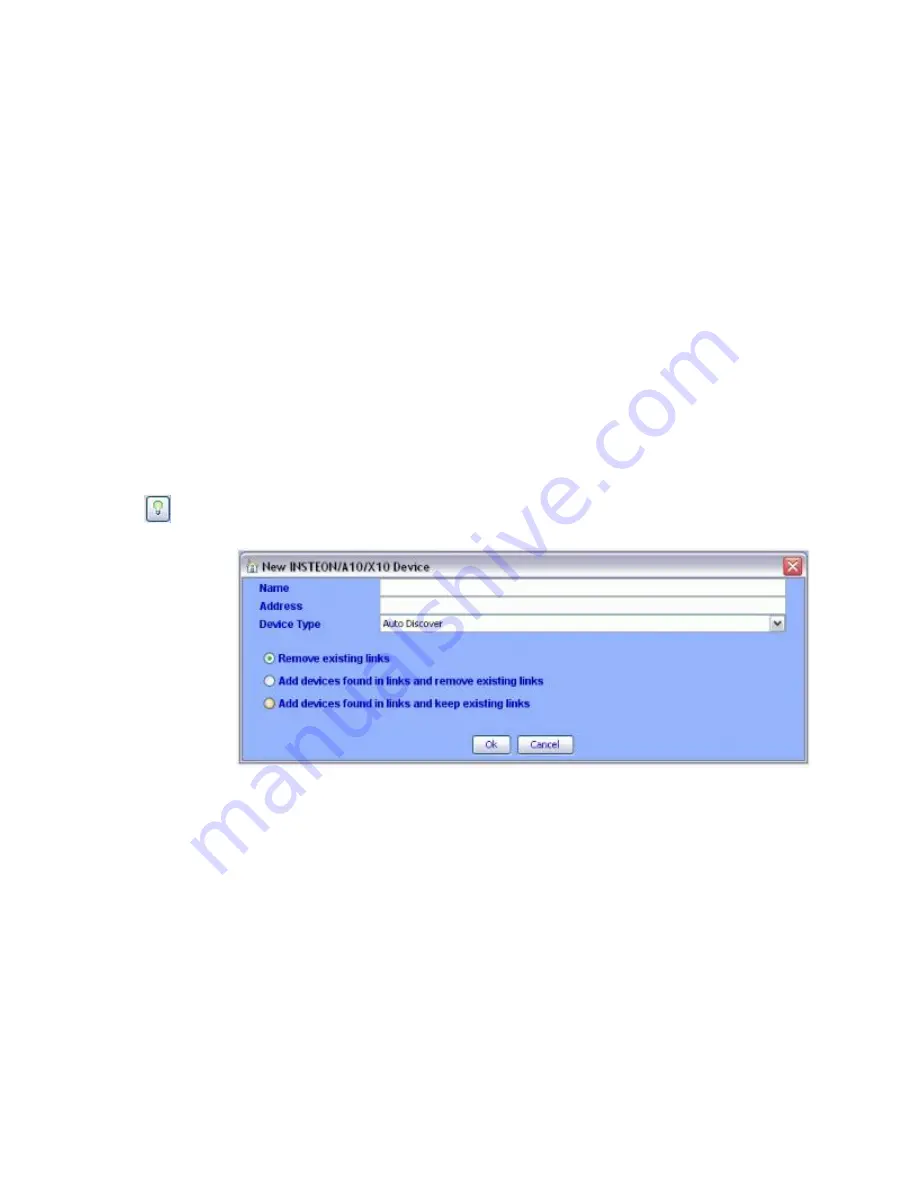
5.2.2.11New INSTEON/A10/X10 Device
NOTE:
This option is entitled
New INSTEON/X10/A10 Device
if the optional X10 Module
is installed. Please see
Choose this menu if you already know the INSTEON address of a device and if you do not
wish to use the regular linking method of pressing the “Set” button.
After selecting this menu option, the “New Insteon Device” dialog appears
as shown below:
•
Enter the INSTEON address of the device using the following format where A, B, and
C are the address parts as depicted on the INSTEON device itself
o
A B C or
o
A.B.C
•
Optionally you can select the Device Type from the drop-down list
•
Click on “
Ok"
This operation performs the same action as the New INSTEON Device button on the tool
bar (
).
Figure 35: New INSTEON/A10/X10 Screen
5.2.2.12New Scene
Creating Scenes in ISY allows the user to set ramp rates, set on level, link or group devices
without physically going to each device(s) to manually set, link or group them. Let’s say you
want to link a device in a bedroom to a device in the kitchen. When manually linking these
devices, you will have to physically go to the bedroom device set it to linking mode then go
to the kitchen device set it to linking mode. This process can be done via the ISY by creating
a scene, naming it, then placing the bedroom and kitchen devices into the scene. The
system will automatically link and program the devices.
Once you select this menu you will be presented with the “New Scene” dialog requesting a
name for the new Scene. Enter the name you prefer (the name can be changed at a later
time) and click on “Ok”. The new scene will be added to
the tree view on the left pane.
Summary of Contents for ISY-994i Series
Page 1: ...The ISY 994i Home Automation Cookbook ...
Page 35: ...Page 12 Figure 6 UDAjax Main Screen ...
Page 36: ...Page 13 Figure 7 UDAjax Devices Scenes Screen ...
Page 68: ...Page 45 Figure 44 NodeServer Configuration popup 5 2 5 Tools Menu Figure 45 Tools Menu ...
Page 102: ...Page 79 6 6 3 2Activate My OpenADR Portlet Figure 77 OpenADR My OpenADR Menu Option ...
Page 103: ...Page 80 6 6 3 3Configure OpenADR Settings Figure 78 OpenADR Settings Menu Option ...
Page 104: ...Page 81 Figure 79 OpenADR Settings Display ...
Page 108: ...Page 85 6 6 3 7Issue an Event Figure 84 OpenADR Issue and Event ...
Page 110: ...Page 87 Figure 86 OpenADR Event Viewer ...
Page 116: ...Page 93 Figure 92 ElkRP2 Account Details M1XEP Setup Button In the M1XEP Setup Window ...
Page 267: ...Page 244 Figure 189 State Variables ...
Page 268: ...Page 245 Figure 190 Programs and Folders ...
Page 292: ...Page 269 Figure 192 Irrigation Folders Figure 193 Irrigation Devices ...
Page 376: ...Page 353 Figure 209 Save Topology File ...
Page 433: ...Page 410 Figure 242 X 10 recognized as Living Room East Device ...
Page 540: ...Page 517 Figure 357 In Car Detection 12 Figure 358 In Car Detection 13 ...
Page 602: ...Page 579 Figure 382 SecureCRT SSH Raspberry PI Session ...
Page 685: ......


