Page | 368
13.11.2
Linking an I/OLinc – Garage Door Control & Status Kit
60
13.11.2.1How to add the SmartHome I/O Linc - INSTEON Garage Door Control & Status Kit (74551)
In this tutorial I will be demonstrating how to control and monitor a Garage Door using
keypad buttons on two separate KeypadLinc controllers. You can open or close the garage
door using either keypad, with the button providing positive feedback that the command is
being sent by flashing a few times. After this, the real-world status of the garage door will
be indicated by the light on the button. When the door is open, the keypad light will be on.
You must update your ISY-99i to firmware 2.7.4 or greater. This firmware addresses an
issue with the I/OLinc not showing the correct status after a Query and other issues related
to the I/OLinc.
•
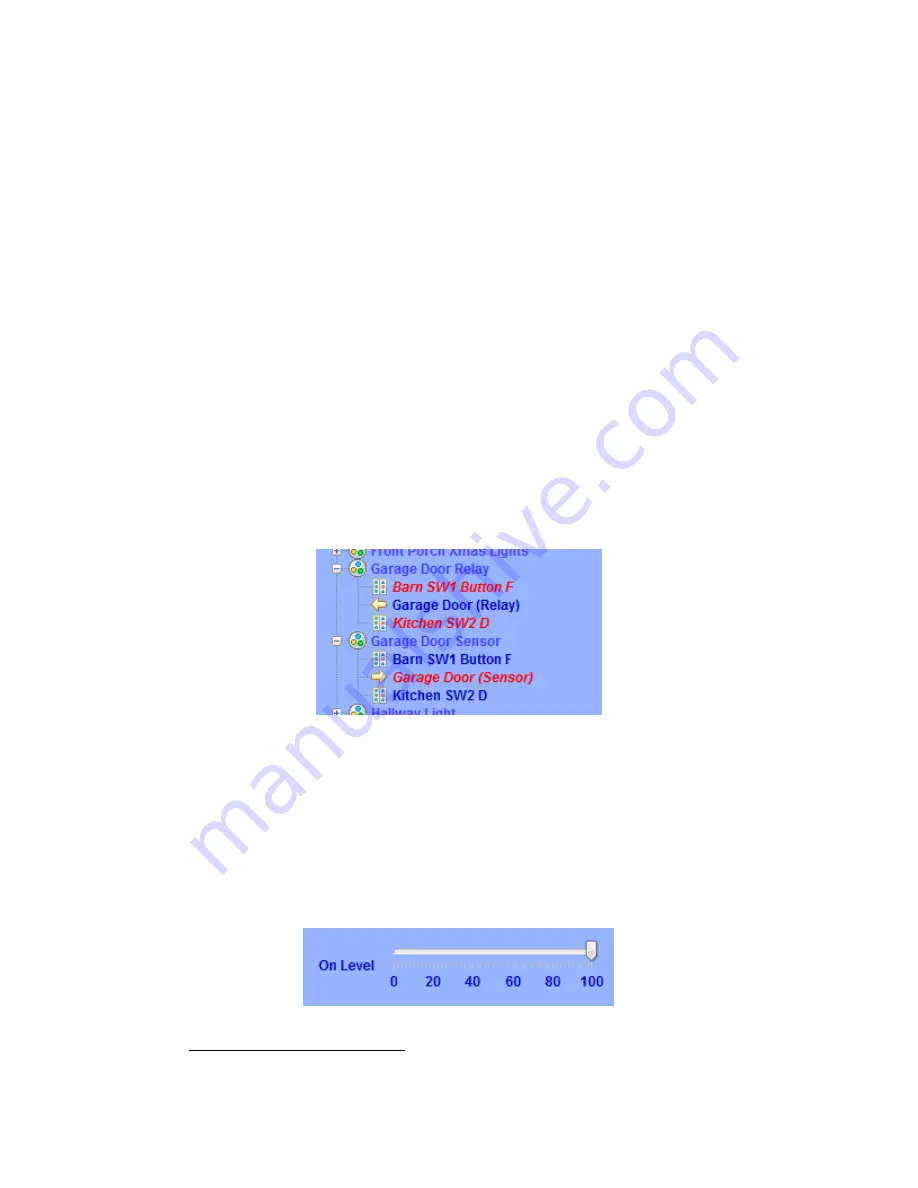
Create a scene called Garage Door Relay. Add the KeypadLinc buttons as controllers
and I/OLinc Relay as the responder. You can add as many controllers as you like.
•
Create another scene called Garage Door Sensor. Add the KeypadLinc buttons as
responders (you won’t have a choice if you did step 1 correctly) and the I/O Linc
Sensor as the controller. This will allow the sensor to control whether the button is
lit or not, giving positive feedback as to the status of the garage door.
Figure 216: Scenes
Since you are controlling a relay, you need to set the On Level for each button and the scene
to 100%. You will also need to change the toggle mode of the KeypadLinc button to Non-
Toggle [On] so that it only sends the ON command when pressed.
•
In the Garage Door Relay scene select each controller and be sure the On Level in the
view pane is set to 100%. Also, set the On Level for the scene itself to 100%.
60
(Universal Devices)
Summary of Contents for ISY-994i Series
Page 1: ...The ISY 994i Home Automation Cookbook ...
Page 35: ...Page 12 Figure 6 UDAjax Main Screen ...
Page 36: ...Page 13 Figure 7 UDAjax Devices Scenes Screen ...
Page 68: ...Page 45 Figure 44 NodeServer Configuration popup 5 2 5 Tools Menu Figure 45 Tools Menu ...
Page 102: ...Page 79 6 6 3 2Activate My OpenADR Portlet Figure 77 OpenADR My OpenADR Menu Option ...
Page 103: ...Page 80 6 6 3 3Configure OpenADR Settings Figure 78 OpenADR Settings Menu Option ...
Page 104: ...Page 81 Figure 79 OpenADR Settings Display ...
Page 108: ...Page 85 6 6 3 7Issue an Event Figure 84 OpenADR Issue and Event ...
Page 110: ...Page 87 Figure 86 OpenADR Event Viewer ...
Page 116: ...Page 93 Figure 92 ElkRP2 Account Details M1XEP Setup Button In the M1XEP Setup Window ...
Page 267: ...Page 244 Figure 189 State Variables ...
Page 268: ...Page 245 Figure 190 Programs and Folders ...
Page 292: ...Page 269 Figure 192 Irrigation Folders Figure 193 Irrigation Devices ...
Page 376: ...Page 353 Figure 209 Save Topology File ...
Page 433: ...Page 410 Figure 242 X 10 recognized as Living Room East Device ...
Page 540: ...Page 517 Figure 357 In Car Detection 12 Figure 358 In Car Detection 13 ...
Page 602: ...Page 579 Figure 382 SecureCRT SSH Raspberry PI Session ...
Page 685: ......


