51
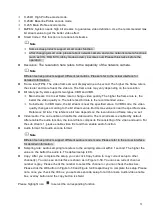
H.264H: High Profile encode mode.
H.264B: Baseline Profile encode mode.
H.265: Main Profile encode mode.
MJPEG: System needs high bit streams to guarantee video definition. Use the recommended max
bit stream value to get the better video effect.
⚫
Smart Codec: This function is to reduce bit streams.
Note
Some series products support smart codec function.
After changing smart code, please reboot network camera and some network camera functions
(such as IVS, ROI, SVC, lobby mode and etc.) becomes null. Please think twice before the
operation.
⚫
Resolution:
The resolution here refers to the capability of the network camera.
Note
Different series products support different resolutions. Please refer to the actual interface for
detailed information.
⚫
Frame rate (FPS): The video frame amount displayed in each second. The higher the frame rate is,
the clearer and more fluent the video is. The frame rate may vary depending on the resolution.
⚫
Bit rate type: System supports two types: CBR and VBR.
Main stream: It is to set frame rate to change video quality. The higher the frame rate is , the
better the video quality is. The referenced bit rate is the recommended va lue.
Sub stream: In CBR mode, the bit stream is near the specified value. In VBR mode, the video
quality changes according to the bit stream value. But its max value is near the specified value.
Reference bit rate: The reference bit rate depends on the resolution and frame rate you set.
⚫
Video/audio: You can enable or disable the video/audio. The main stream is enabled by default.
After enable the audio function, the record file is composite file consisting of the video and audio. For
the sub stream 1, please enable video first and then enable audio function.
⚫
Audio format: Set audio encode format.
Note
Different series products support different audio encode mode. Please refer to the actual interface
for detailed information.
⚫
Sampling rate: Audio sampling rate refers to the sampling amount within 1 second. The higher the
value is, the better the audio is. The default setup is 8K.
⚫
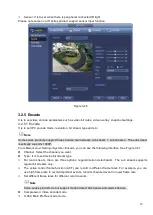
Copy: After you complete the setup, you can click Copy button to copy current setup to other
channel(s). You can see an interface is shown as in Figure 3-50. You can see current channel
number is grey. Please check the number to select the channel or you can check the box ALL.
Please click the OK button in Figure 3-50 and Figure 3-48 respectively to complete the setup. Please
note, once you check the All box, you set same encode setup for all channels. Audio/video enable
box, overlay button and the copy button is shield.
Please highlight icon
to select the corresponding function.
Summary of Contents for EmPower NVR
Page 1: ...EmPower NVR User s Manual V4 4 3...
Page 36: ...23 Figure 3 16 Step 2 Click device display edit interface See Figure 3 17...
Page 97: ...84 Figure 3 91 Figure 3 92...
Page 120: ...107 Figure 3 110 Figure 3 111 Figure 3 112...
Page 131: ...118 Figure 3 123 Figure 3 124...
Page 133: ...120 Figure 3 126 Click draw button to draw the zone See Figure 3 127...
Page 137: ...124 Figure 3 130 Click Draw button to draw a zone See Figure 3 131 Figure 3 131...
Page 142: ...129 Figure 3 136 Click draw button to draw the zone See Figure 3 137...
Page 155: ...142 Figure 3 149 Figure 3 150...
Page 156: ...143 Figure 3 151 Figure 3 152...
Page 174: ...161 Figure 3 172 Figure 3 173...
Page 277: ...264 Figure 4 61 Figure 4 62 Figure 4 63...
Page 303: ...290 Figure 4 101 Figure 4 102...
Page 327: ...314 Figure 4 136 Note For admin you can change the email information See Figure 4 137...

