


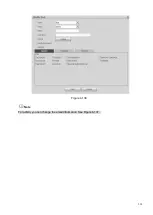

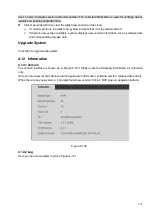


319
Figure 4-143
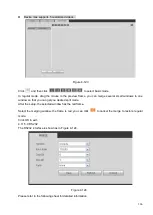
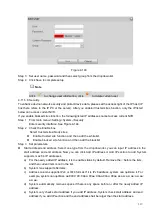
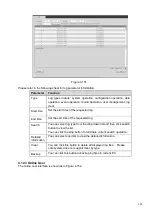
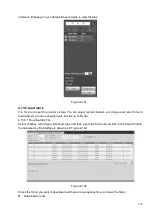
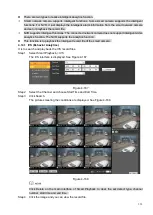
Step 3 Set user name, password and then select group from the dropdown list.
Step 4 Click Save to complete setup.
Note
Click
to change user information, click
to delete current user.
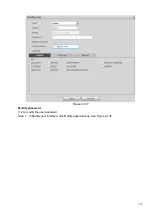
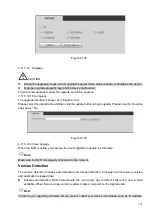
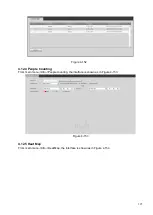
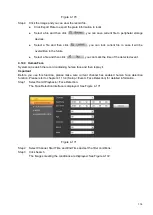
4.11.5.8 Security
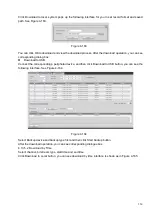
To enhance device network security and protect device data, please set the access right of the IP host (IP
host here refers to the IP PC or the server). After you enabled trusted sites function, only the IP listed
below can access current NVR.
If you enable blocked sites function, the following listed IP addresses cannot access current NVR.
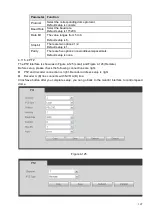
Step 1 From main menu->Setting->System->Security.
Enter security interface. See Figure 4-144.
Step 2 Check the Enable box.
Select trusted sites/block sites.
⚫
Enable trusted site function and then add the whitelist.
⚫
Enable blocked site function and then add the blacklist.
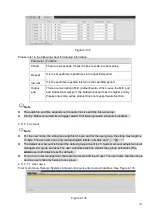
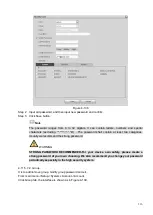
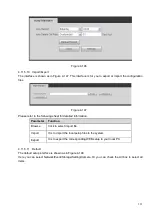
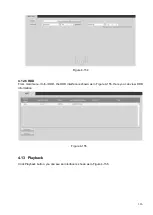
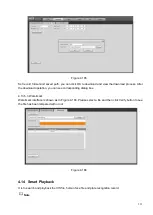
Step 3 Set parameters.
⚫
Start address/end address: Select one type from the dropdown list, you can input IP address in the
start address and end address. Now you can click Add IP address or Add IP section to add. System
supports max 64 IP addresses.
a) For the newly added IP address, it is in enable status by default.
Remove the √ before the item,
and then current item is not in the list.
b) System max supports 64 items.
c) Address column supports IPv4 or IPv6 format. If it is IPv6 address, system can optimize it. For
example, system can optimize aa:0000: 00: 00aa: 00aa: 00aa: 00aa: 00aa as aa:: aa: aa: aa: aa:
aa: aa.
d) System automatically removes space if there is any space before or after the newly added IP
address.
e) System only checks start address if you add IP address. System check start address and end
address if you add IP section and the end address shall be larger than the start address.
Summary of Contents for EmPower NVR
Page 1: ...EmPower NVR User s Manual V4 4 3...
Page 36: ...23 Figure 3 16 Step 2 Click device display edit interface See Figure 3 17...
Page 97: ...84 Figure 3 91 Figure 3 92...
Page 120: ...107 Figure 3 110 Figure 3 111 Figure 3 112...
Page 131: ...118 Figure 3 123 Figure 3 124...
Page 133: ...120 Figure 3 126 Click draw button to draw the zone See Figure 3 127...
Page 137: ...124 Figure 3 130 Click Draw button to draw a zone See Figure 3 131 Figure 3 131...
Page 142: ...129 Figure 3 136 Click draw button to draw the zone See Figure 3 137...
Page 155: ...142 Figure 3 149 Figure 3 150...
Page 156: ...143 Figure 3 151 Figure 3 152...
Page 174: ...161 Figure 3 172 Figure 3 173...
Page 277: ...264 Figure 4 61 Figure 4 62 Figure 4 63...
Page 303: ...290 Figure 4 101 Figure 4 102...
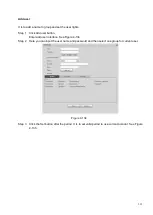
Page 327: ...314 Figure 4 136 Note For admin you can change the email information See Figure 4 137...


