234
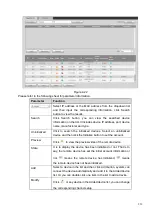
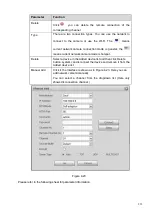
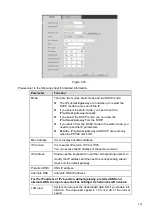
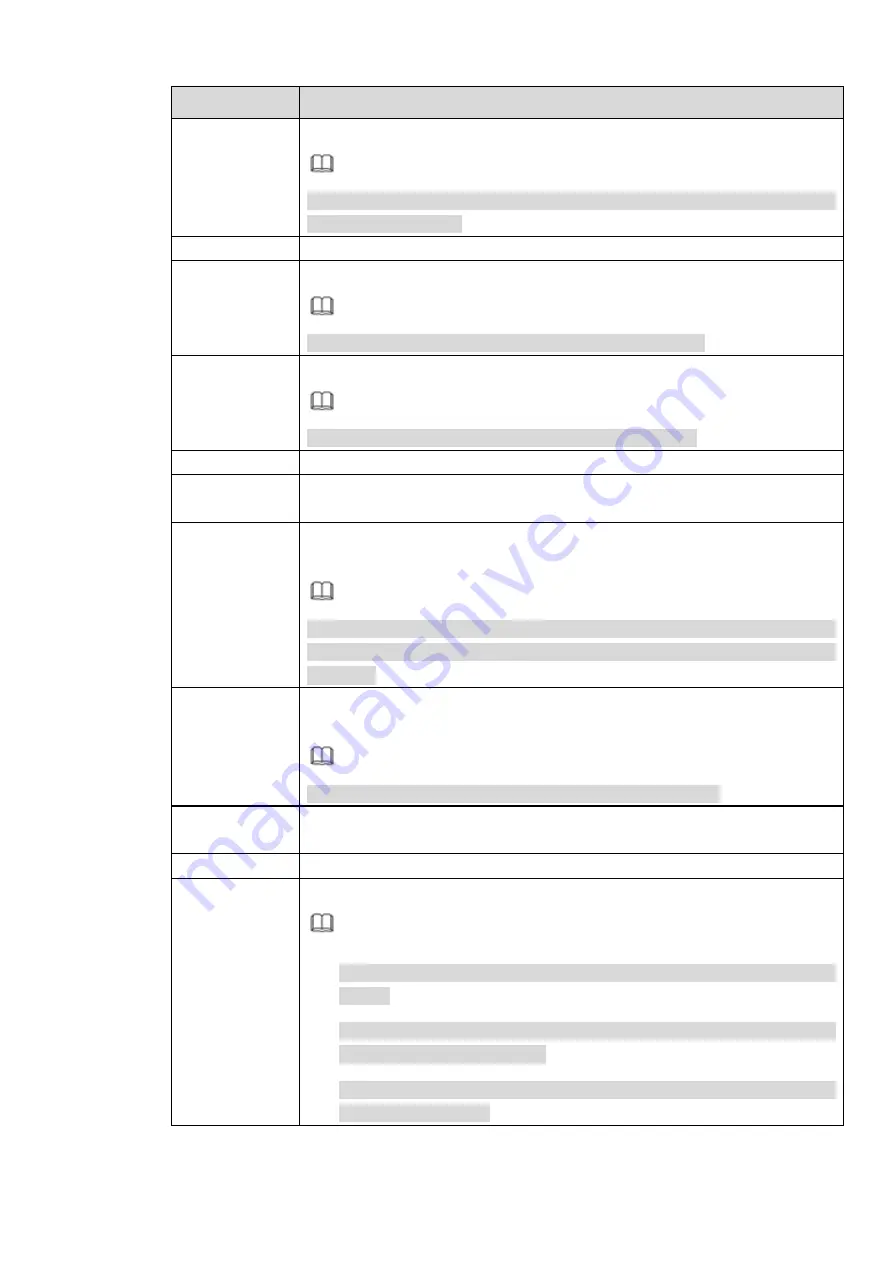
Parameter
Function
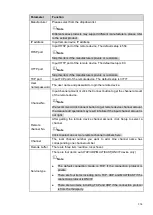
Manufacturer
Please select from the dropdown list.
Note
Different series products may support different manufacturers, please refer
to the actual product.
IP address
Input remote device IP address.
RTSP port
Input RTSP port of the remote device. The default setup is 554.
Note
Skip this item if the manufacture is private or customize.
HTTP port
Input HTTP port of the remote device. The default setup is 80.
Note
Skip this item if the manufacture is private or customize.
TCP port
Input TCP port of the remote device. The default setup is 37777.
User
name/password
The user name and password to login the remote device.
Channel No.
Input channel amount or click the Connect button to get the channel amount
of the remote device.
Note
We recommend click Connect button to get remote device channel amount,
the manual add operation may result in failure if the input channel amount is
not right.
Remote
channel No.
After getting the remote device channel amount, click Setup to select a
channel.
Note
Click to select one or more remote channel numbers here.
Channel
The local channel number you want to add. One channel name has
corresponding one channel number.
Decode buffer
There are three item: realtime, local, fluent.
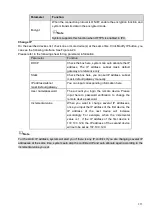
Service type
There are four items: auto/TCP/UDP/MULTICAST(ONVIF device only)
Note
⚫
The default connection mode is TCP if the connection protocol is
private.
⚫
There are four items including Auto, TCP, UDP and MULTICAST if the
connection protocol is ONVIF.
⚫
There are two items including TCP and UDP if the connection protocol
is from the third-party.
Summary of Contents for EmPower NVR
Page 1: ...EmPower NVR User s Manual V4 4 3...
Page 36: ...23 Figure 3 16 Step 2 Click device display edit interface See Figure 3 17...
Page 97: ...84 Figure 3 91 Figure 3 92...
Page 120: ...107 Figure 3 110 Figure 3 111 Figure 3 112...
Page 131: ...118 Figure 3 123 Figure 3 124...
Page 133: ...120 Figure 3 126 Click draw button to draw the zone See Figure 3 127...
Page 137: ...124 Figure 3 130 Click Draw button to draw a zone See Figure 3 131 Figure 3 131...
Page 142: ...129 Figure 3 136 Click draw button to draw the zone See Figure 3 137...
Page 155: ...142 Figure 3 149 Figure 3 150...
Page 156: ...143 Figure 3 151 Figure 3 152...
Page 174: ...161 Figure 3 172 Figure 3 173...
Page 277: ...264 Figure 4 61 Figure 4 62 Figure 4 63...
Page 303: ...290 Figure 4 101 Figure 4 102...
Page 327: ...314 Figure 4 136 Note For admin you can change the email information See Figure 4 137...

