


22
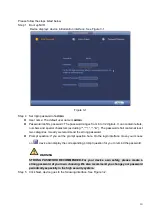
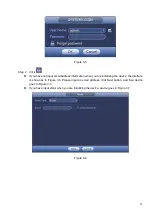
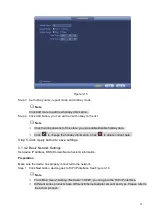
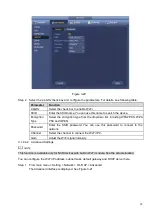
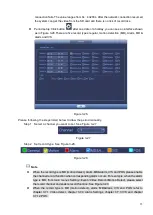
Figure 3-15
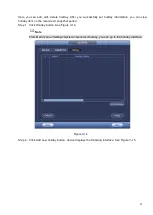
Step 3 Set holiday name, repeat mode and holiday mode.
Note
Click Add more to add new holiday information.
Step 4 Click Add button, you can add current holiday to the list.
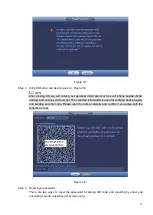
Note
Click the dropdown list of the state; you can enable/disable holiday date.
Click
to change the holiday information. Click
to delete current date.
Step 5 Click Apply button to save settings.
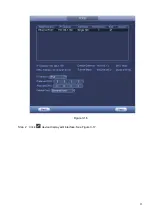
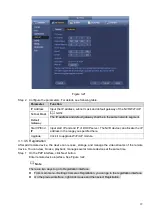
3.1.4.2 Basic Network Settings
Set device IP address, DNS (Domain Name System) information.
Preparation
Make sure the device has properly connected to the network.
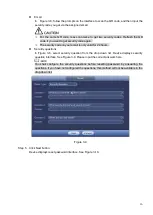
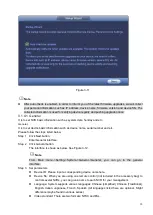
Step 1 Click Next button, device goes to TCP/IP interface. See Figure 3-16.
Note
From Main menu->Setting->Network->TCP/IP, you can go to the TCP/IP interface.
Different series products have different Ethernet adapter amount and type. Please refer to
the actual product.
Summary of Contents for EmPower NVR
Page 1: ...EmPower NVR User s Manual V4 4 3...
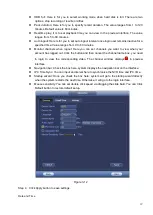
Page 36: ...23 Figure 3 16 Step 2 Click device display edit interface See Figure 3 17...
Page 97: ...84 Figure 3 91 Figure 3 92...
Page 120: ...107 Figure 3 110 Figure 3 111 Figure 3 112...
Page 131: ...118 Figure 3 123 Figure 3 124...
Page 133: ...120 Figure 3 126 Click draw button to draw the zone See Figure 3 127...
Page 137: ...124 Figure 3 130 Click Draw button to draw a zone See Figure 3 131 Figure 3 131...
Page 142: ...129 Figure 3 136 Click draw button to draw the zone See Figure 3 137...
Page 155: ...142 Figure 3 149 Figure 3 150...
Page 156: ...143 Figure 3 151 Figure 3 152...
Page 174: ...161 Figure 3 172 Figure 3 173...
Page 277: ...264 Figure 4 61 Figure 4 62 Figure 4 63...
Page 303: ...290 Figure 4 101 Figure 4 102...
Page 327: ...314 Figure 4 136 Note For admin you can change the email information See Figure 4 137...


