


VIDEO PAINT: CHAPTER TWO
261
To record a macro:
1.
Click the Macro button on the Attribute toolbar (for Paint and Retouch
tools only). A message box appears preparing for recording.
Note:
When you record a macro, Video Paint clears the previous Undo history to
help free up system resources. If you want to retain any previous edits, first save
the file before recording.
2.
Click OK. Video Paint centers the edit window and you can start
painting on the image.
You can paint as slowly as you like, changing tools and attributes as
you go. You can also undo any actions which are ignored when you
play the macro back.
3.
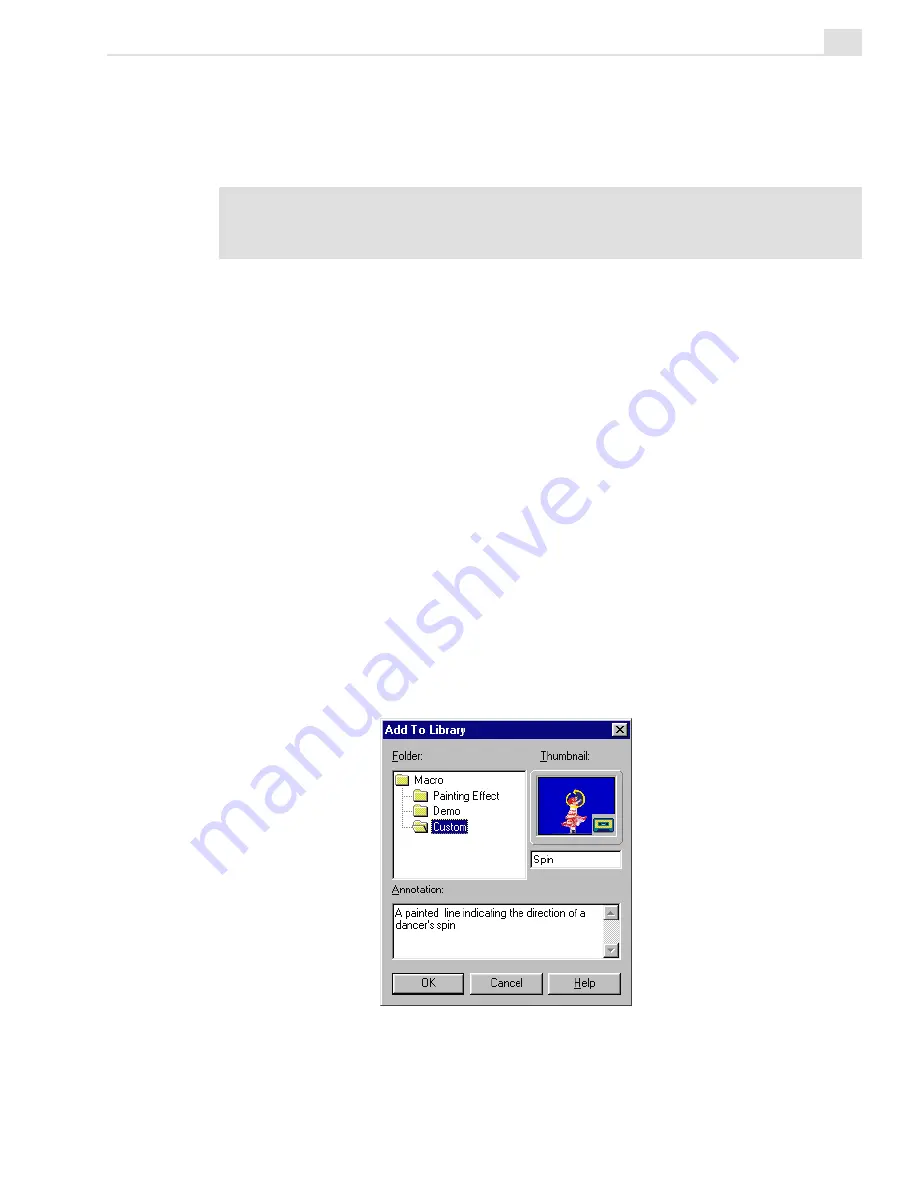
When finished, click the Macro button again to end the recording. The
Add To Library dialog box opens.
4.
Select the folder in the Macro gallery where you want to store the
macro and then enter a name for the macro in the entry line below the
thumbnail image as well as a brief description in the Annotation box.
5.
Click OK. The macro is now saved to the Production Library and the
edits removed from the edit window. (For applying a macro, see the
following procedure.) If you have selected the Play macro after
recording option in the Preferences dialog box (see page 231), the
Macro Playing Options dialog box opens allowing you to specify how
you want the macro to be applied.
Add To Library dialog box
Summary of Contents for MEDIASTUDIO PRO 6
Page 1: ...User Guide MediaStudio Pro Ulead Systems Inc January 2000 VERSION 6 0 ...
Page 22: ...MEDIASTUDIO PRO USER GUIDE 22 ...
Page 23: ...Tutorials Tutorials ...
Page 24: ......
Page 71: ...Video Capture Video Capture ...
Page 72: ......
Page 101: ...Video Editor Video Editor ...
Page 102: ......
Page 211: ...Video Paint Video Paint ...
Page 212: ......
Page 267: ...CG Infinity CG Infinity ...
Page 268: ......
Page 303: ...Audio Editor Audio Editor ...
Page 304: ......
Page 335: ...Appendix Appendix ...
Page 336: ......
Page 345: ...Index Index ...
Page 346: ...MEDIASTUDIO PRO USER GUIDE 346 ...


