MEDIASTUDIO PRO USER GUIDE
282
Defining an object’s style
When you create an object, it takes its form from the path or shape you
draw and its appearance from a number of attributes which make up its
style. These attributes are defined in the Object Style Panel which you
can view by clicking the Object Style Panel button on the Attribute
toolbar or by right-clicking over a toolbar and selecting the Object Style
Panel command. The panel has three tabs: General, Color, and Shadow.
By experimenting with the various options available, you can quickly learn
the types of effects and results you can create using CG Infinity.
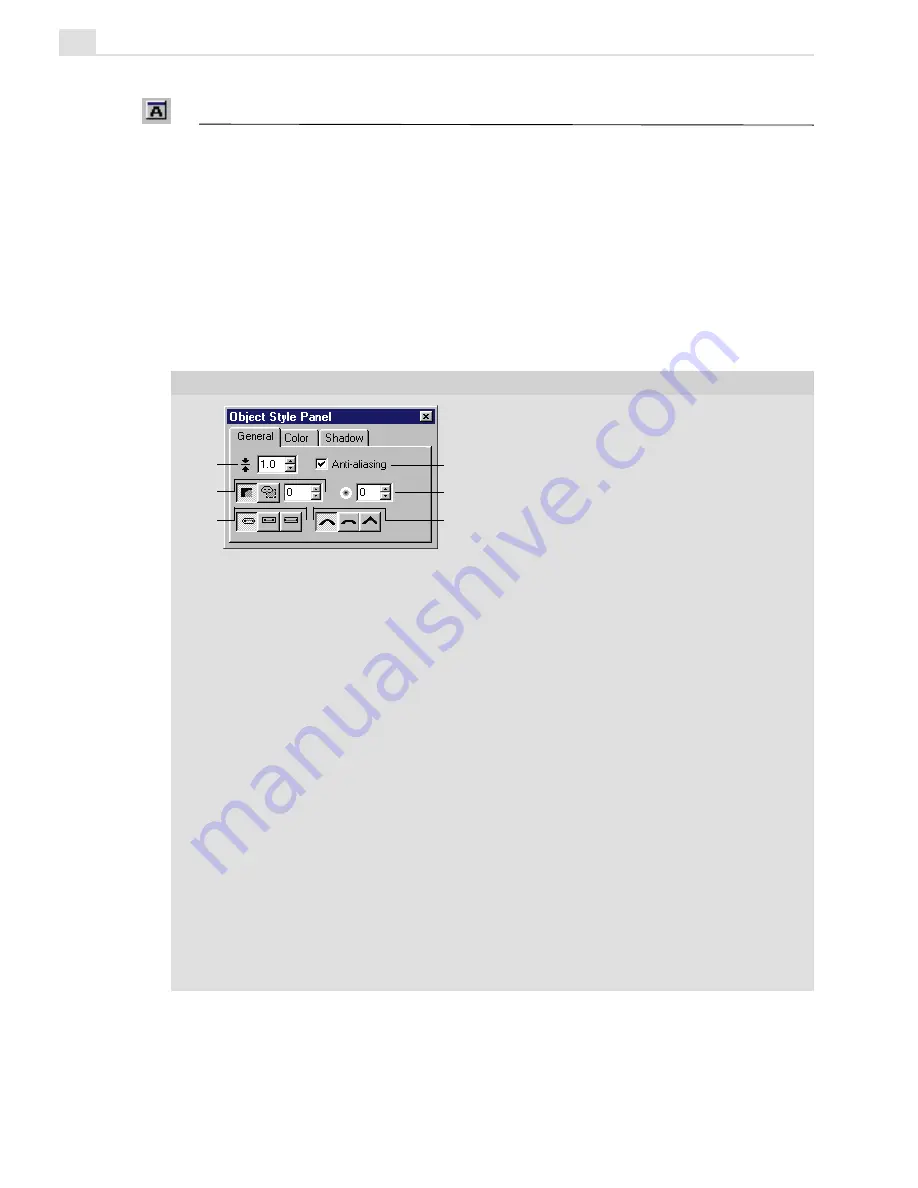
OBJECT STYLE PANEL: GENERAL TAB
1. Line Width defines the thickness of a line when applied to an object. You can
enter sub-pixel values up to 1/10
th
of a pixel. The line is centered over the path,
with half appearing on the outside, half on the inside.
2. Anti-aliasing smooths the edges of non-rectangular objects by blending the
areas with the background. This is particularly useful for text objects. Leave this
clear if you want a sharp edge such as with square or rectangular objects.
3. Transparency controls how transparent an object appears. The first option,
Normal Transparency, provides an even transparency over the entire object
based on the value entered in the neighboring Transparency spin box. A value of
0 has no transparency and 100 full transparency. The second option, Gradient
Transparency, controls an object’s transparency based on the pattern indicated
in the neighboring gradient square. The darker the area, the less transparent the
object while the lighter the area, the more transparent the object. To change the
gradient pattern, click on the gradient square to display the Gradient Transpar-
ency dialog box. Here you can control the start and end values of the gradient as
well as the pattern, either linear or bidirectional. (A value of 0 is white, full
transparency and 100 is black, no transparency.) To toggle between applying a
linear or bidirectional gradient, click the Gradient Style button at the bottom of
the dialog box. You can also change the direction and extent of the gradient by
dragging on the sample image.
1
2
3
4
5
6
Summary of Contents for MEDIASTUDIO PRO 6
Page 1: ...User Guide MediaStudio Pro Ulead Systems Inc January 2000 VERSION 6 0 ...
Page 22: ...MEDIASTUDIO PRO USER GUIDE 22 ...
Page 23: ...Tutorials Tutorials ...
Page 24: ......
Page 71: ...Video Capture Video Capture ...
Page 72: ......
Page 101: ...Video Editor Video Editor ...
Page 102: ......
Page 211: ...Video Paint Video Paint ...
Page 212: ......
Page 267: ...CG Infinity CG Infinity ...
Page 268: ......
Page 303: ...Audio Editor Audio Editor ...
Page 304: ......
Page 335: ...Appendix Appendix ...
Page 336: ......
Page 345: ...Index Index ...
Page 346: ...MEDIASTUDIO PRO USER GUIDE 346 ...


