Note:
If the maximum number of tracking points is reached, you
will be warned. The track will continue to be recorded with the
earlier tracking points being overwritten.
Erasing a track
In the chart application:
1. Select the
PLANNING
softkey.
2. Select the
MY TRACKS
softkey.
3. Highlight the required track from the list.
4. Select the
ERASE TRACK
softkey.
5. Select the
YES
softkey to confirm the action, or
NO
to cancel.
Note:
You can also erase all tracks at once, using the
DATA >
ARCHIVE AND TRANSFER
function.
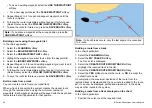
Reviewing and editing a track
You can review and edit aspects of the tracks stored.
You can:
• Erase a track.
• Create a route from a track.
• Show or hide a track on the chart (only available from the chart
application).
• Change the name of a track.
• Change the color of a track.
• Erase a track.
Selecting a track to review or edit
1. Do one of the following to select the required track:
• With the chart application active, select a track on screen.
• With the chart application active, use the following softkey
sequence,
Navigation options > Planning > My Tracks
.
• From the home screen, select
My tracks
.
You can then proceed and review or edit the required track using
the options available.
Track interval
The track interval specifies the time period or distance between
the points in a track.
You can adjust the interval between points which can help ensure
best use of the available storage.
The settings are available from the
Chart Setup Menu
:
•
Record Vessel Track By
— specifies the interval type (Auto /
Time / Distance).
•
Track Interval
— specifies the interval value (for example, 15
minutes).
For example when creating a track for a long journey, an interval
set to Auto could result in rapid use of all of the storage available
for track points. In this case selecting a higher value for the Track
Interval would provide capacity for a longer track.
Setting the track interval
In the chart application:
1. Press the
MENU
button.
2. Select
Chart Setup
.
3. Select the
Record Vessel Track By
option and set to the
appropriate value:
• Auto— The track interval is automatically set.
• Time— The track points are placed at regular intervals of time.
• Distance— The track points are placed at regular intervals of
distance.
4. Select the
Track interval
and set to the appropriate value:
Using waypoints, routes and tracks
67
Summary of Contents for E-Series
Page 1: ......
Page 2: ......
Page 4: ......
Page 16: ...16 E Series Widescreen User reference...
Page 42: ...42 E Series Widescreen User reference...
Page 148: ...148 E Series Widescreen User reference...
Page 164: ...164 E Series Widescreen User reference...
Page 204: ...204 E Series Widescreen User reference...
Page 214: ...214 E Series Widescreen User reference...
Page 224: ...224 E Series Widescreen User reference...
Page 228: ...228 E Series Widescreen User reference...
Page 240: ...240 E Series Widescreen User reference...
Page 252: ...252 E Series Widescreen User reference...
Page 260: ......

