


163
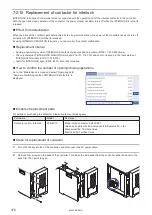
7-2-2 Replacement of the protection glass
In case that any contamination that cannot be cleaned adhering to the protection glass of laser emission port or any
damage on the glass surface, replace the protection glass according to the following procedure.
Models of replacement parts
Part name
Model
Remarks
Protection glass of laser emission port
LP-ACV60
5 gaskets (O-rings) are included.
Replacement procedure
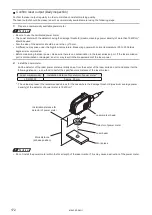
1.
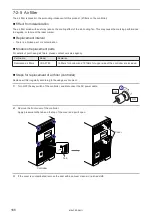
Turn off the key switch of controller and
disconnect AC power cable.
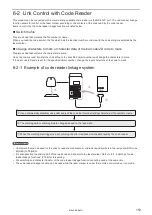
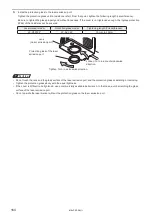
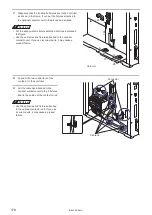
2.
Remove the protection glass from the laser
emission port.
ワㄐㄕㄊㄆ
• Do not touch the lens and the glass surface of the laser emission port and the protection glass at installing or removing.
• If the cover is difficult to be loosened, use a commercially available belt wrench. In that case, avoid scratching the glass
surface of the laser emission port.
• When the protection glass is removed, check that the O-ring is not left in the scanner unit.
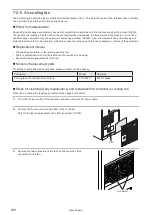
3.
Make sure that there is no dirt on the new protection glass. If any dust or dirt are on the glass, remove them with an air
duster for optics.
WARNING
• Never use an inflammable air duster. The laser beam may ignite the gas,
resulting in fire.
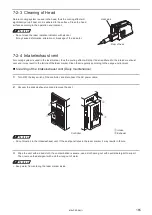
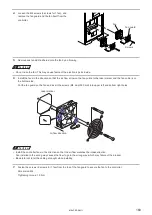
4.
Install a new O-ring in the inside groove of the protection glass.
O-ring
Groove
ワㄐㄕㄊㄆ
• The O-ring cannot be reused. When you replace the protection glass, change the O-ring, too. Replacement O-rings are
attached with the replacement protection glass (Optional item).
• Be sure to fit an O-ring in the inside groove of the protection glass without twisting it.
• To keep the sealing performance of the O-ring, store it following the below notes.
• Do not expose the O-rings to the direct sunlight and high humidity.
• Store the O-rings in a dustless area and pay attention that no organic solvents is applied to them.
• To prevent the deforming, do not hang the O-ring during storage.
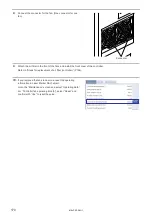
Protection glass of
the laser emission
port
Loosen: Turn in a
counter-clockwise
direction.
Tighten: Turn in a
clockwise direction.
Lens (Laser
emission port)
ME-LPRF-SM-11
Summary of Contents for LP-RF Series
Page 17: ...1 Product Overview ME LPRF SM 11...
Page 34: ...2 Laser Marker Installation ME LPRF SM 11...
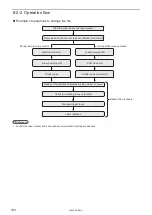
Page 57: ...3 Operation Method ME LPRF SM 11...
Page 81: ...4 External Control Using I O ME LPRF SM 11...
Page 126: ...5 External Control by Communication Commands ME LPRF SM 11...
Page 135: ...6 Link Control with External Devices ME LPRF SM 11...
Page 160: ...7 Maintenance ME LPRF SM 11...
Page 186: ...Troubleshooting ME LPRF SM 11...
Page 214: ...Index ME LPRF SM 11...
Page 216: ...216 USB 32 55 W Warning 205 ME LPRF SM 11...
Page 217: ......


