


7
Contr
oller system settings
7-7
7. Safety setting
The safety parameters are set to safely perform the work with the programming box within the movement
range (the safety enclosure) of the system using the robot.
WARNING
• In "Safety setting", changing the settings from their default values is likely to increase hazards to the robot operator
during maintenance or operation. Although customers can change these settings based on their own
responsibility, adequate consideration should first be given to safety.
• Set the control setting "GET" to enable the SAFETY SETTING.
On the "SAFETY SETTING" screen, you can set five items described below.
Item name
Setting
Remarks
1
Hold to Run For Auto
VALID/INVALID
The robot operation (including the program execution) is executed while holding down
the key on the programming box.
2
Deceleration Control
VALID/INVALID
When set VALID, the maximum robot movement speed is limited to its 3%.
3
Exclusive IO
VALID/INVALID
Sets the dedicated input of the I/O interface VALID or INVALID.
* Even when set INVALID, the general-purpose inputs and outputs can be used.
4
RS-232C
VALID/INVALID
Sets the RS-232C interface VALID or INVALID.
5
Ethernet
VALID/INVALID
Sets the Ethernet interface VALID or INVALID.
■
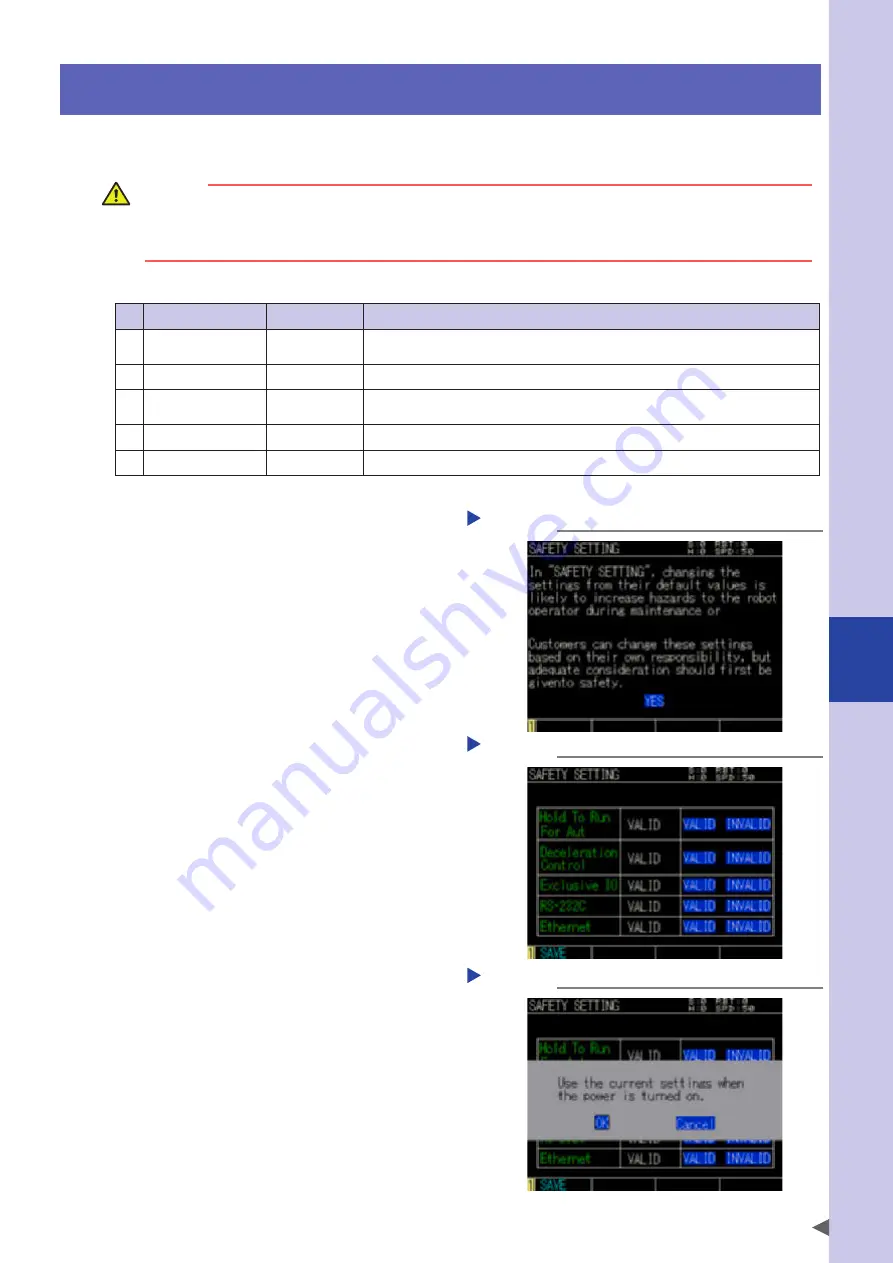
Setting procedure
Step 1
Select [System] - [Safety Setting]
from the initial screen.
When the warning screen appears, agree to
the contents and press the ENTER key.
Step 1
Warning message
Step 2
Set [VALID] or [INVALID].
Use the cursor keys to select [VALID] or
[INVALID] of the item to set, and then press
the ENTER key.
To set the setting valid even after the power
shut-down, perform the operation stated in
Step 3.
Step 2
Setting the safety parameters
Step 3
Save the settings.
When pressing the F1 key (SAVE) on
the "SAFETY SETTING" screen, the setting save
confirmation screen will appear.
Select [OK], and then press the ENTER key to
save the settings.
When selecting [Cancel], the settings are
not saved.
This setting will be valid after turning on the
power again.
Step 3
Saving the safety parameters
Summary of Contents for R6YXC1000
Page 1: ...7 6HULHV DW 1R 1 5 5RERW RQWUROOHU 86 5 6 0 18 6 5 5RERWV 5 6HULHV...
Page 2: ......
Page 10: ......
Page 40: ......
Page 42: ......
Page 46: ......
Page 48: ......
Page 54: ......
Page 56: ......
Page 64: ......
Page 80: ......
Page 82: ......
Page 102: ......
Page 108: ......
Page 110: ......
Page 136: ......
Page 168: ......
Page 170: ......
Page 174: ...8 Periodic inspection 8 4...
Page 176: ......
Page 182: ......
Page 256: ......
Page 258: ......
Page 259: ......
Page 260: ...DW 1R 1 XWKRUL HG LVWULEXWRU 3ULQWHG LQ XURSH...