3-8
Area Designation (Using the Edit Pen)
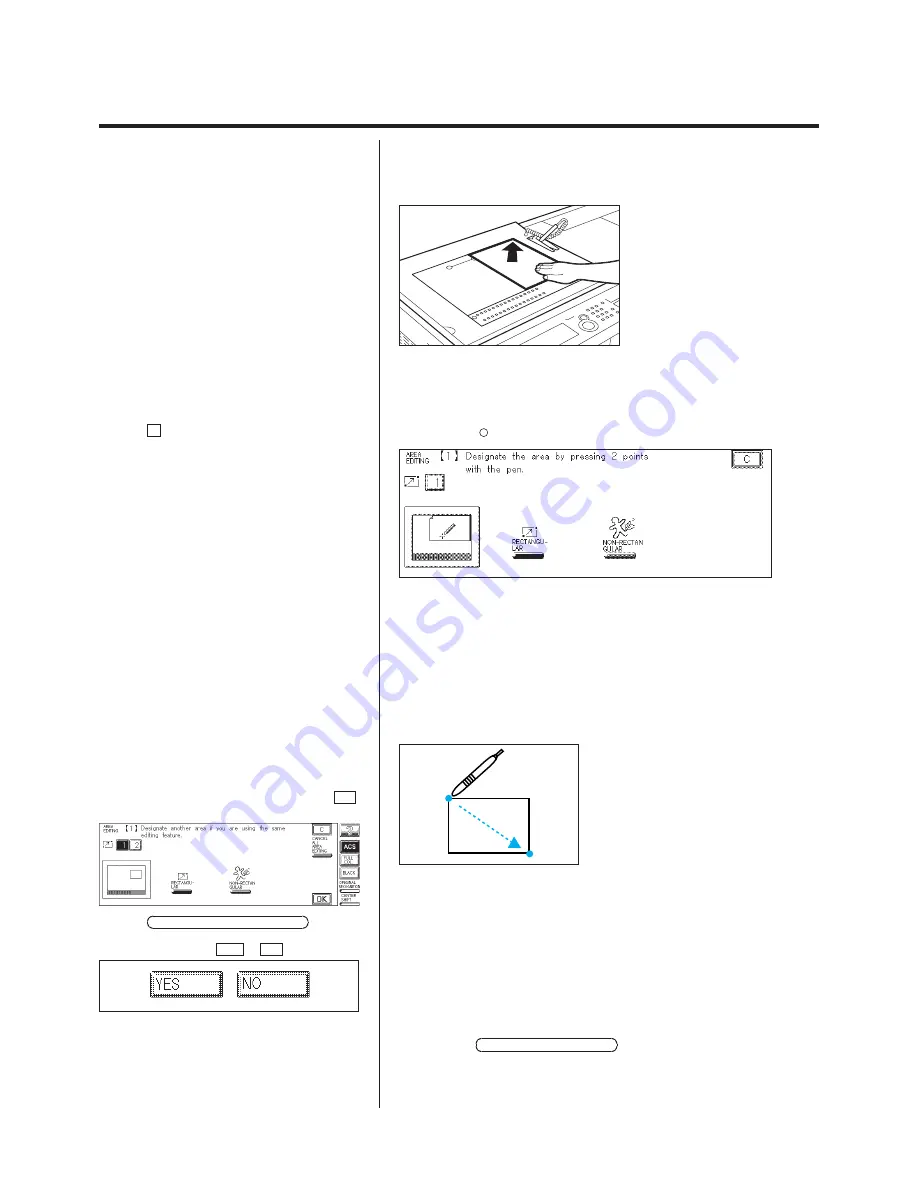
Designating Areas
1.
Place the original face up on the Editor and align the original with the V
mark.
P
For details on how to program the basic copy
settings, see p. 2-4 of chapter 2 “Basic Copying” in
the Basic Operations Manual.
2.
Press the
Area
Designation
key.
P
If the C key is pressed, the screen returns to
the standard display.
3.
Designate the area, using the edit pen.
N
Designating a rectangular area
Use the edit pen to designate two of the opposing corners of the
rectangle.
P
A maximum of 200 areas can be designated on
one original. When a non-rectangular area is
designated, the maximum number of areas that can
be designated depends on the number of points
designated for the area. A maximum of 4,000 points
can be designated.
P
Areas or lines can be checked on the screen
while in the process of being designated.
P
The Area Designation screen is displayed
again. To designate another area for the same area
editing, designate the area before pressing the OK
key.
P
If the CANCEL ALL AREA EDITING key is
pressed, all areas designated up to that point are
canceled. Select either YES or NO .
N
Designating a non-rectangular area
Press the NON-RECTANGULAR key.
To designate non-rectangular areas, see “Non-rectangular Area
Designation,” on p. 3-12.
Summary of Contents for Color System 200
Page 2: ...ic...
Page 84: ...1 72...
Page 190: ...4 48...
Page 191: ...I 1 Offset Plate Original Creating Color Separations of a Color Original Index Index I 2...


