


Upgrading Your Server 9-27
From Installation to Setting
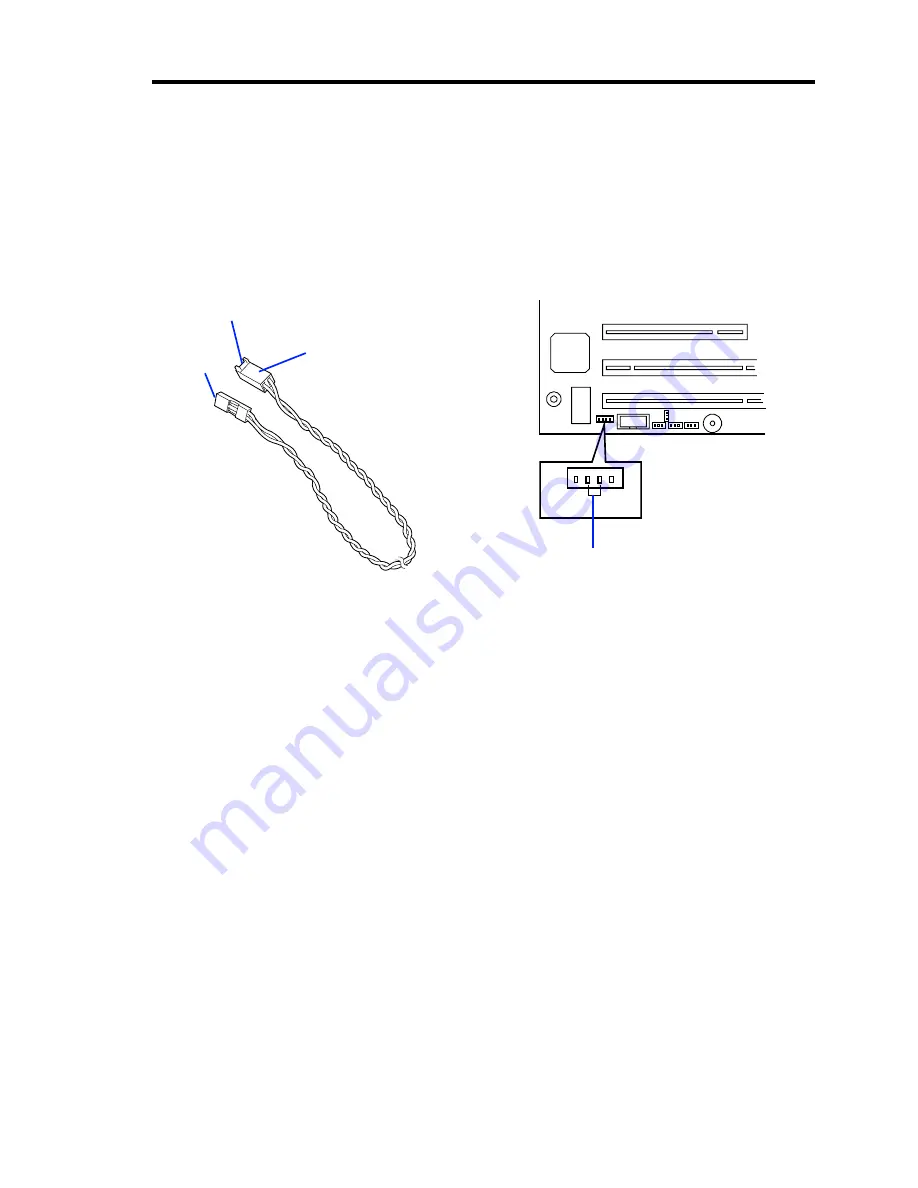
For the installation of the SCSI controller board, see "PCI board". The DISK access lamp on the
front panel of the server indicates the access status of the hard disk drive connected to the SCSI
controller board. Before the access status can be indicated, the LED connector on the SCSI
controller board and the LED connector on the mother board must be connected through the LED
cable supplied with the Express server.
Mother Board
The LED connector is at the position shown in the figure below. It can be connected in
either direction.
SCSI Controller Board
The red cable of the LED cable comes out from the connector hole. Connect the connector
hole to "LED Active" of the LED connector on the disk array controller board. For the
position of the LED Active pin, see the manual supplied with the disk array controller
board.
For the connection of the interface cable, see the manual supplied with the SCSI controller board.
After installing the SCSI controller board, make settings such as the transfer rates of the board and
connected devices, using the SCSI BIOS utility of the SCSI controller board. For details on the
setting procedures, see the manual supplied with the SCSI controller board.
Face this side
upward.
To the mother board
LED cable
To the SCSI
controller
Connect 2-pin LED cable.
Summary of Contents for N8100-1078F
Page 16: ...x This page is intentionally left blank...
Page 34: ...2 6 General Description Rear View 1 2 3 13 12 11 10 9 8 7 6 5 4...
Page 36: ...2 8 General Description Internal View 1 2 4 4 4 3 4 2 4 1 5 6 7 8 3...
Page 100: ...4 32 Configuring Your Server This page is intentionally left blank...
Page 150: ...5 50 Installing the Operating System with Express Setup This page is intentionally left blank...
Page 170: ...6 20 Installing and Using Utilities This page is intentionally left blank...
Page 182: ...7 12 Maintenance This page is intentionally left blank...
Page 257: ...Chapter 10 Internal Cabling Diagrams Internal cable connections of the server are shown below...
Page 266: ...10 10 Internal Cabling Diagrams This page is intentionally left blank...
Page 268: ...A 2 Specifications This page is intentionally left blank...
Page 278: ...C 4 IRQ and I O Port Address This page is intentionally left blank...
Page 328: ...F 18 Installing Windows 2000 This page is intentionally left blank...


