


Display Element
Description
COPY
This copies the selected Sample.
PASTE
This pastes the selected Sample.
DUPLICATE
This duplicates the selected Sample.
11.1.3 Slicing a Sample (Hardware)
Hit
SAMPLING
and press Button 3 to enter the
SLICE
tab. The right display will show you the
waveform of the Sample with the Slices pictured as vertical lines. Depending on how you set
up the Slice settings, the Slice Markers will move.
Use Knob 5 and 6 to navigate and zoom the Slices!
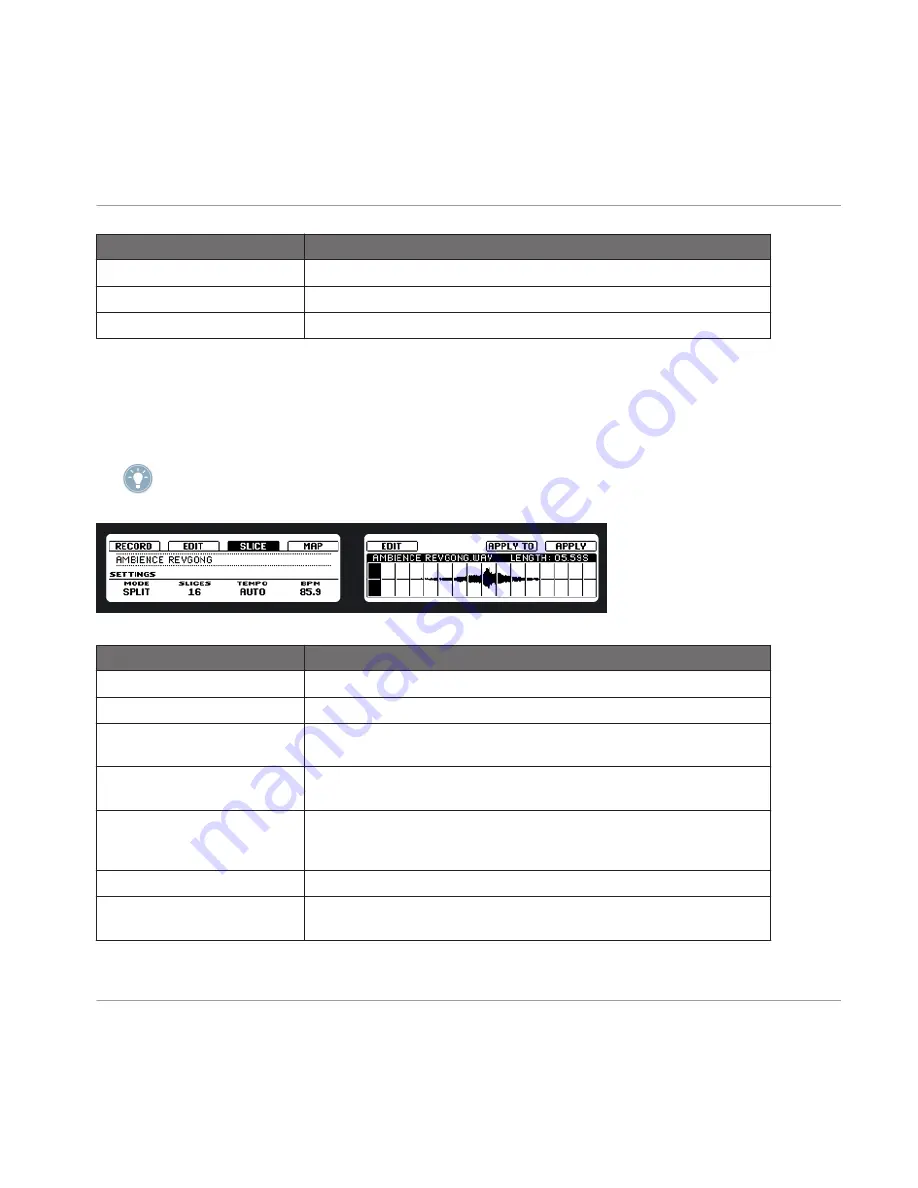
The SLICE tab on the hardware.
Display Element
Description
MODE
Using Knob 1, you can select either
SPLIT
,
GRID
or
DETECT
here.
SPLIT MODE
In Split mode, the Sample will be sliced into equally spread Slices.
SLICES
Here you can choose how many slices you want the Sample to be split into:
4, 8, 16 or 32.
TEMPO
Determines the tempo of the Sample: available options are
AUTO
and
MANUAL
.
BPM
Shows the BPM based on the Tempo settings above; if
MANUAL
is select-
ed, you can dial in a BPM value using Knob 4; if
AUTO
is selected, you
can choose from multiples of the tempo calculated by MASCHINE.
GRID MODE
In Grid mode, the Sample will be sliced according to musical values.
LENGTH
Select the musical value using Knob 2: available lengths are 4th, 8th16 th
and 32 nd notes.
Sampling and Sample Mapping
Controlling Sampling from the Hardware
MASCHINE - Manual - 209


