


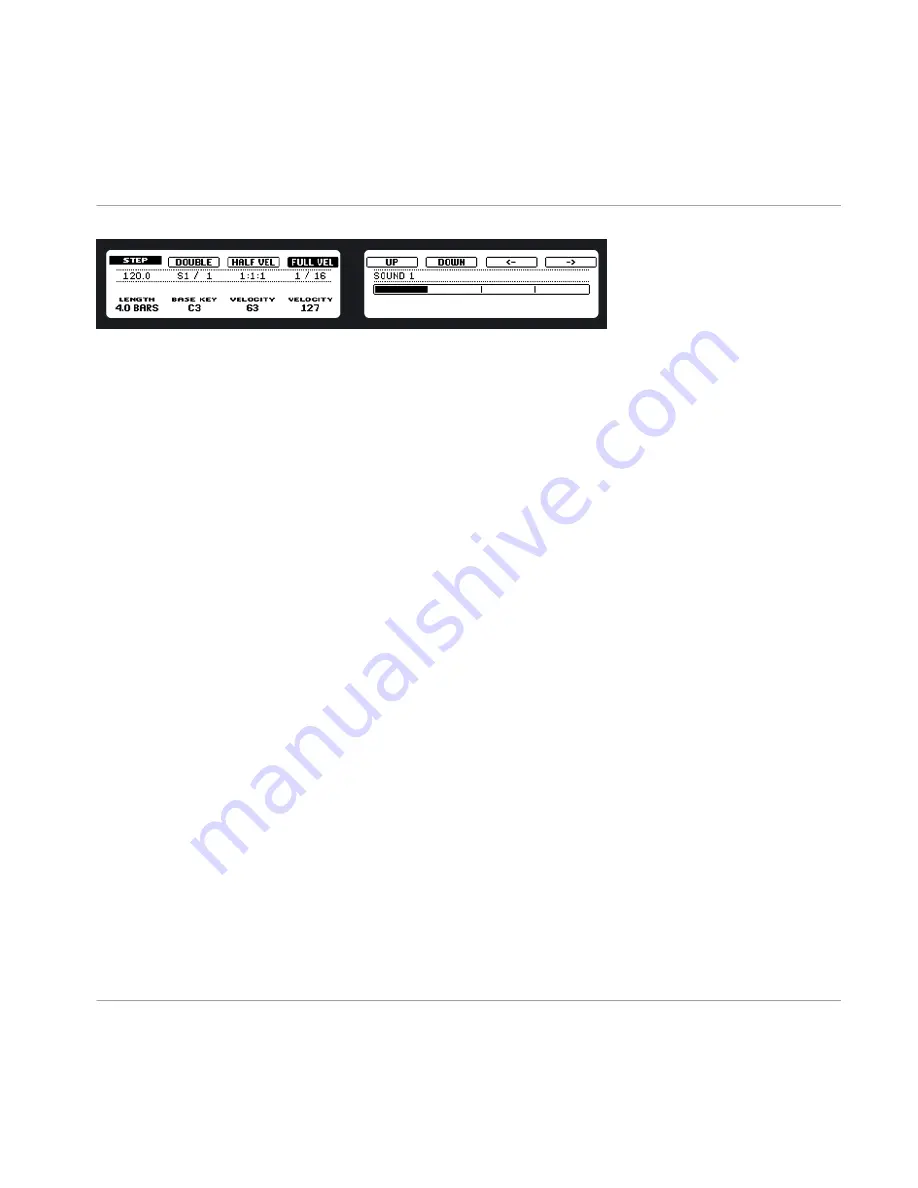
The Step Sequencer on the hardware displays the first bar of a four-bar pattern.
1.
Press the pad with the Sound you want to record to select it and press
PLAY
.
2.
Press
STEP
. Now you will see a light chasing through the pads, starting from pad
1
, going
up all four rows from left to right and ending at pad
16
. All of this is recorded immediate-
ly, even if
REC
is not enabled.
3.
Each pad now represents one step of a 16-step sequence: you can activate that step by
pressing the pad once, lighting it up. If you hit it again, the step is gone.
This way it's easy to quickly put some drums together. By default the first 16 steps of a pattern
will be represented on the Pads. If you want to program a longer pattern, increase the pattern
length with Knob 1. You will see a bar on the right display, representing the length of the pat-
tern . The currently selected 16 steps of the pattern are highlighted here. Use Buttons 7 and 8
to select the next or previous 16 steps of the pattern. To switch to another Sound, use Buttons
5 and 6 located above the right display, or press
SELECT
and the pad of the Sound you want
to switch to.
Working with Patterns (Hardware)
Creating Patterns
MASCHINE - Manual - 115


