3-178
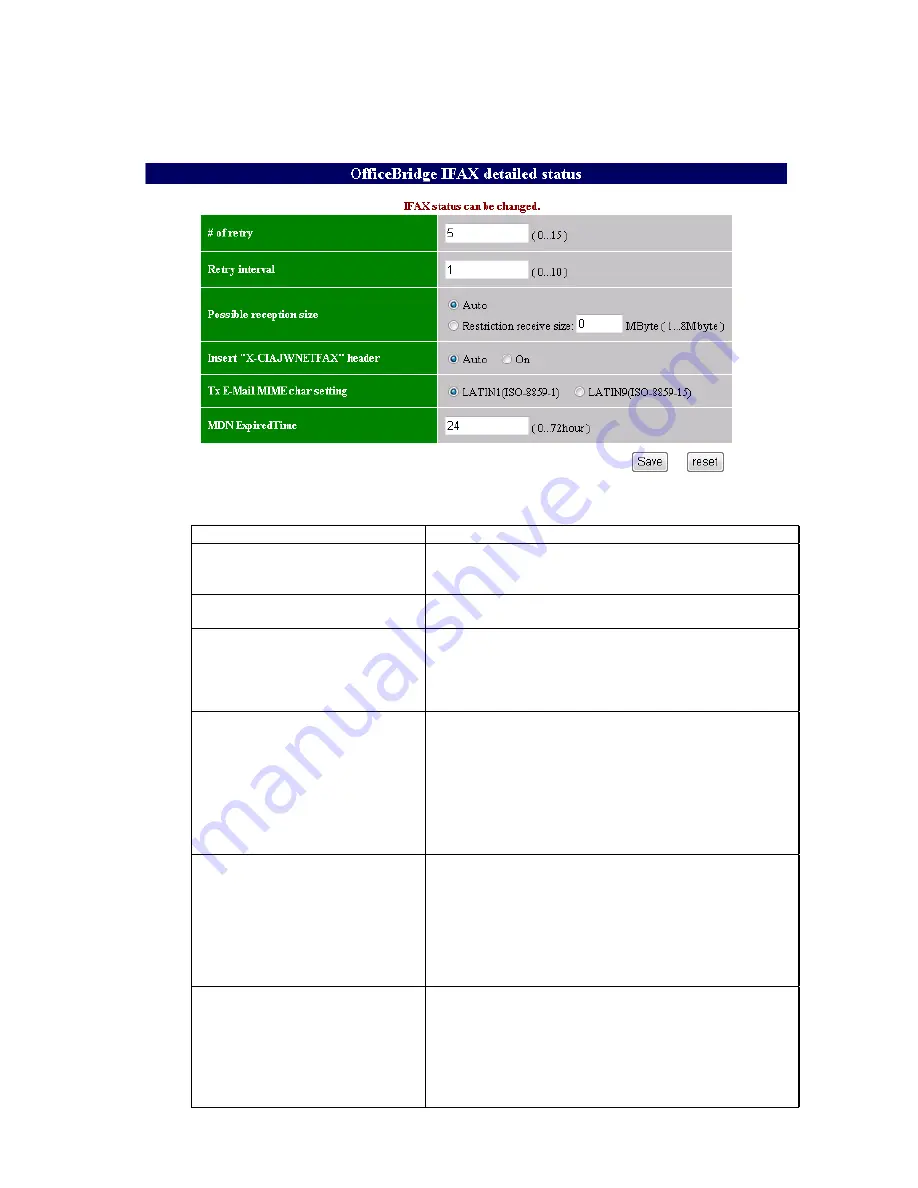
3.32.5 OfficeBridge IFAX detailed status
1. Open the network service screen. (see page 3-174)
2. Click “OfficeBridge IFAX detailed status”.
Items
Instructions
# of retry
Set the number of times to retry sending the internet
fax when a memory overflow occurred or a socket error
occurred.
Retry interval
Set the retry interval sending the internet fax when a
memory overflow occurred or a socket error occurred.
Possible reception size
To restrict the mail size, set it here. The available range
is from 1 – 8 MB. When “Auto” is selected, the size will
be distinguished from the image memory capacity of
the Host and the capacity of SDRAM of the NGP board
automatically.
Insert “X-CIAJWNETFAX” header
To add a X-CIAJWNETFAX header always, set this
function to “On”.
This header is usually added only to IFAX that default body
and message are edited, so that the other machine will not
print the message.
When this function is “On”, the body and message will not
be printed on the partner's IFAX machine even if the user
has edited them. (Other companies IFAX may print them.)
Tx E-Mail MIME char setting
Select which code to use when transmitting characters
other than ASCII code.
Select “LATIN9(ISO-8859-15)” only when the user wants to
use this code.
When only ASCII code is used, the message is transmitted
with US-ASCII regardless of this setup.
Note
: See the codes on the next page.
MDN Expired Time (This function is
effective only with OB2 models)
Set the time which after that the MDN will be printed
respectively. The available time is from 0 to 72 hours.
When MDN is demanded in IFAX transmission for several
addresses, MDN, which will be received within this set up
time, will be printed together in one list.
If the time is set up to 0, MDN will be printed every time
when it is received.
Summary of Contents for F-525
Page 65: ...2 12 2 4 Interconnect Block Diagram See the attached files...
Page 188: ...3 104 3 8 3 How to see the print out Example for fax transmission...
Page 252: ...3 168 6 Click OK 7 Click Next The driver will be installed on the PC...
Page 253: ...3 169 8 Click Finish and finish the Found New Hardware Wizard...
Page 263: ...3 179...
Page 264: ...3 180...
Page 353: ...5 63 6 Remove one bearing and slide out the ROLLER FEED DUPLEX ROLELR FFED DUPLEX...
Page 382: ......
Page 383: ......


