MSI-3750 Digital Weight Indicator
◆
User Guide
Page 77
M E A S U R E M E N T S Y S T E M S I N T E R N A T I O N A L
of the cabinet. Screw down the 10 front panel screws in a criss-cross pattern
to seat the gasket evenly.
6)
Tighten the watertight feedthrough around the outer insulation to ensure the
water seal.
RS-485 Cable Installation, Comm Port2
1)
Remove the 10 screws holding the front panel on.
2)
Strip the outer insulation 1.5” (40mm) from the cable. Peel back the foil
shield (if any) being careful not to nick the conductors. Cut off the foil
shield leaving the drain wire intact. Strip 3/16” (5mm) from each conductor
and tin the wires. Slip a 1 5/16” (33mm) piece of sleeving over the drain
wire and tin the end of the drain wire. It is wise to shrink a short piece of
heat shrink tubing over the end of the outer jacket to further insulate the
shield.
3)
Loosen the center watertight feedthrough and remove the white plug. Feed
the RS-485 cable through the center watertight feedthrough. If the center
watertight feedthrough is occupied, install the 2nd Comm Port cable through
the watertight feedthrough on the rear panel.
4)
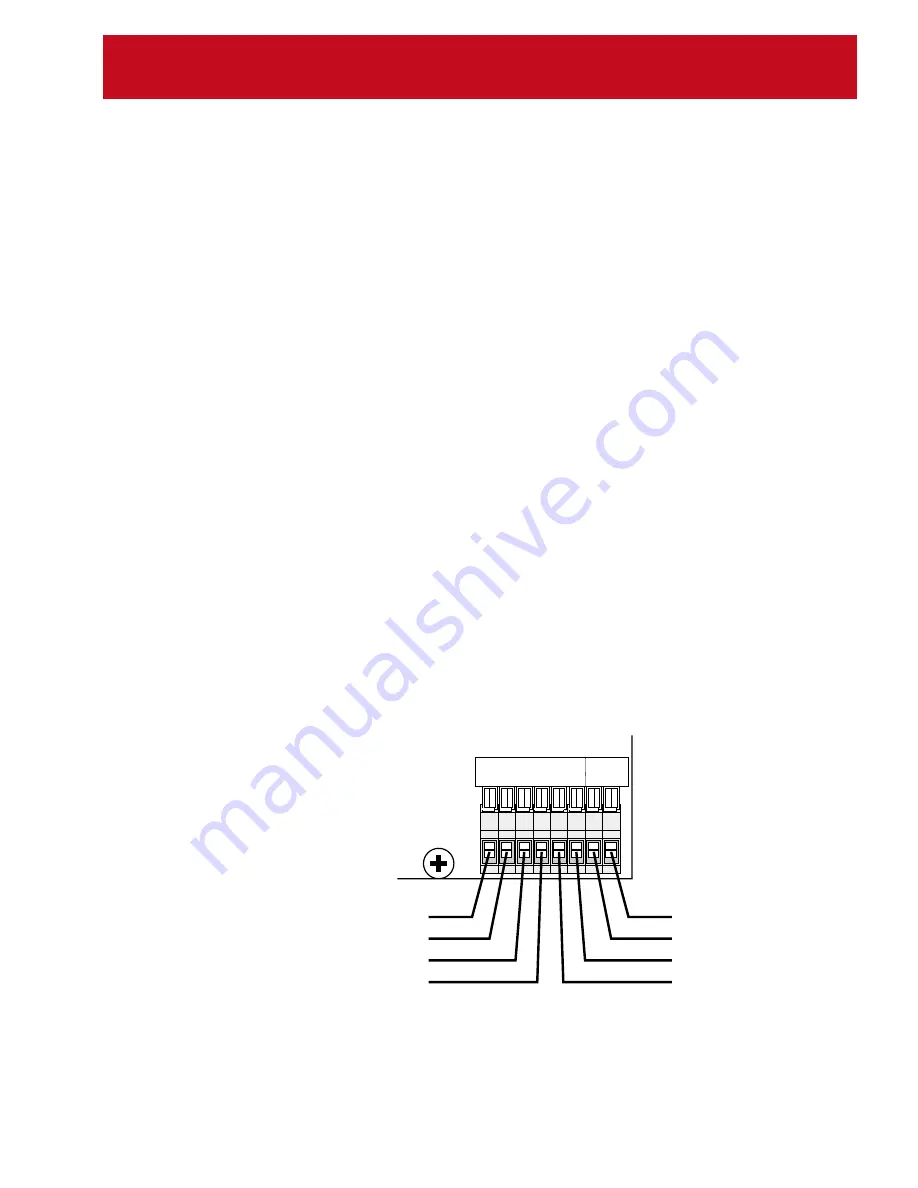
Insert the wires as shown in the following diagram. Insert a small flat bladed
screwdriver in the white lever and push down to insert the wire. Connect
wire 1A to I/O+ and wire 2A to I/O-. Connect the shield to pin 3 ground
After all the pins are connected, lightly wiggle and tug on each wire to
ensure that they are securely attached. Reposition the wires as necessary.
5)
Replace the front panel being careful to seat the gasket evenly around the lip
of the cabinet. Screw down the 10 front panel screws in a criss-cross pattern
to seat the gasket evenly.
6)
Tighten the watertight feedthrough around the outer insulation to ensure the
water seal.
TB5
1
Fiber-Optic X
Fiber-Optic Xmitter –
RS-485/232 Signal Ground
RS-232 RTS (Output)
RS-232 RXD (Input)
RS-485 I/O+
RS-485 I/O–
RS-232 TXD (Output)
OPTION
BOARD
COMM PORT 2
2nd Comm Port Option
FO OUT
+
–
GND
TXD
RT
S
RXD
TXD+
TXD-
8
Summary of Contents for MSI-3750
Page 145: ......


