121
BA023001-en
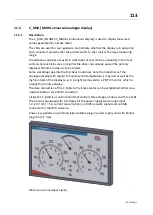
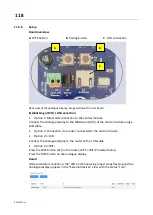
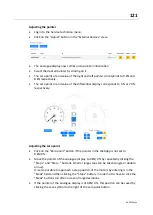
Adjusting the pointer
•
Log in to the Service technician menu.
•
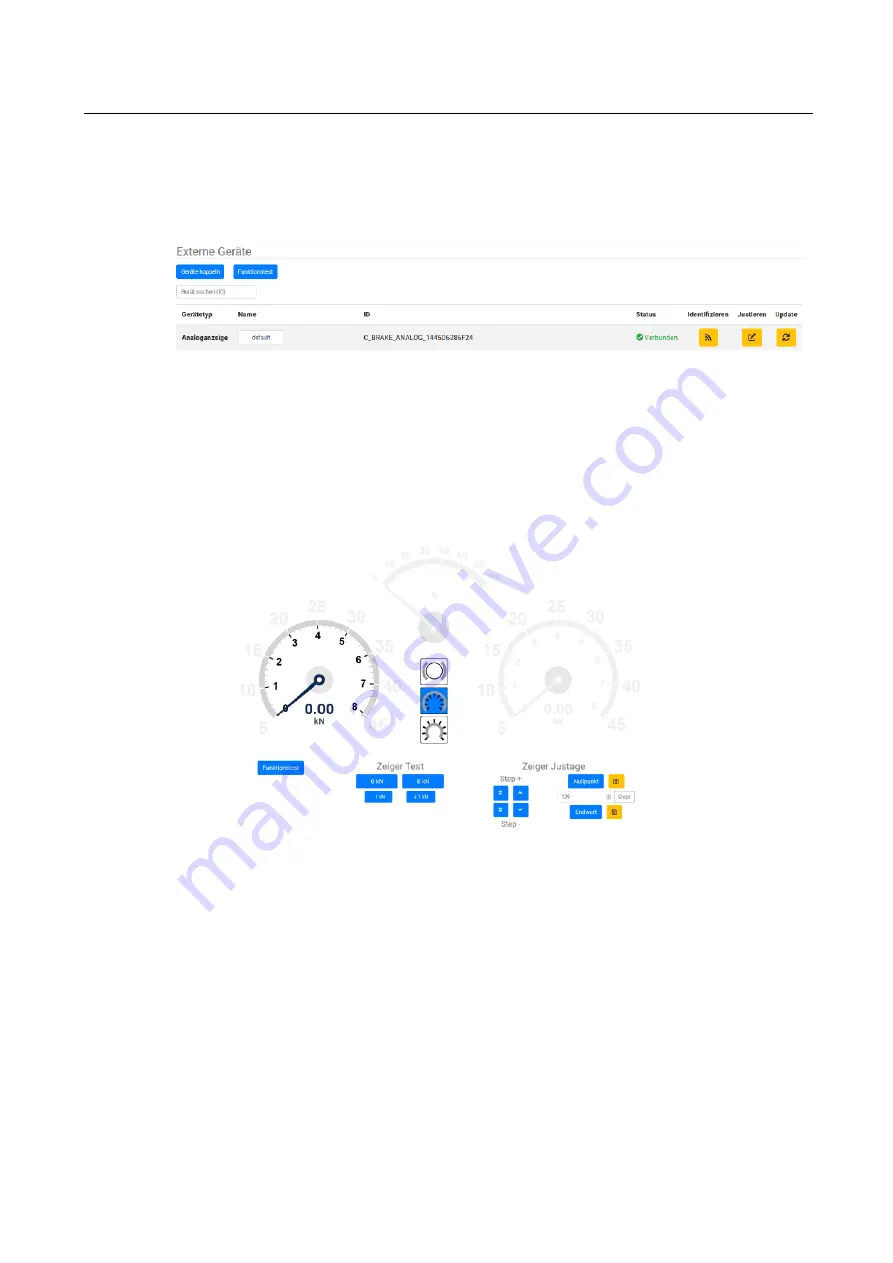
Click on the "Adjust" button in the "External devices" view.
•
The analogue display now carries out a pointer initialisation.
•
Select the desired pointer by clicking on it.
•
The zero point or end value of the right and left pointer corresponds to 0 kN and
8 kN respectively.
•
The zero point or end value of the differential display corresponds to 0 % or 70 %
respectively.
Adjusting the zero point
•
Click on the "Zero point" button if the pointer in the WebApp is not set to
0 kN/0 %.
•
Move the pointer of the analogue display to 0 kN/0 % by repeatedly clicking the
"Step +" and "Step
–
" buttons. Small or large steps can be taken (single or double
arrow).
It is also possible to approach a step position of the motors by entering it in the
"Steps" field and then clicking the "Steps" button, in order not to have to click the
"Steps" buttons too often in case of large deviations.
•
If the pointer of the analogue display is at 0 kN/0 %, this position can be saved by
clicking the save symbol to the right of the zero point button.
Summary of Contents for CONNECT Series
Page 19: ...19 BA023001 en 2 3 2 Set up diagram Set up diagram I ...
Page 20: ...20 BA023001 en Set up diagram II ...
Page 22: ...22 BA023001 en 2 4 1 Wiring diagram ...
Page 23: ...23 BA023001 en 2 4 2 Control cabinet structure Basic variant ...
Page 24: ...24 BA023001 en 2 4 3 Control cabinet structure Full equipment ...
Page 25: ...25 BA023001 en ...
Page 53: ...53 BA023001 en ...
Page 138: ...138 BA023001 en 13 Annex 13 1 Naming convention ...

