background image

J630D

188

26.7.02

5. Functions of the machine

5.10.4 Editing stored batch programs

Press the "Program Jung" softkey.

Press the "File" softkey.

Press the "Filemanag. open" softkey.

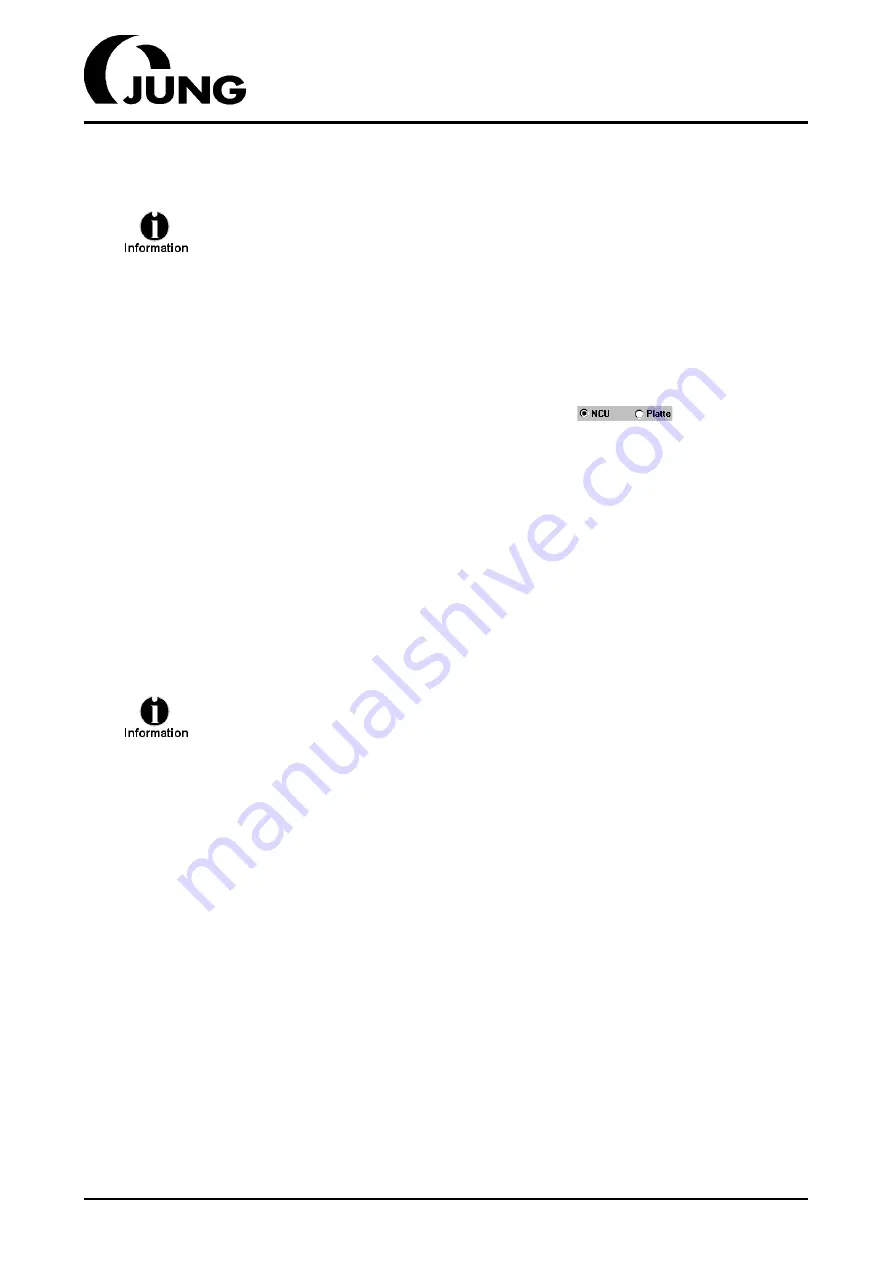
Select either the NCU or your hard disk here

depending on

where you have saved the programs.

Select a program in the folder called "Batch1".

Press the "Open" softkey.
– The selected program is loaded.

Press the "Previous" key (see section 3.1 “Control unit” on page 47, position
2).
– The selected program is opened.

Press the "Previous" key (see section 3.1 “Control unit” on page 47, position
2).
– The main "Program Jung" screen is opened..

Please also refer chapter "file manager" (see section 5.1.6.2 “File
manager” on page 89)
.

You can load the selected batch program again in the standard pro-
gram by pressing the "Grinding program" and/or "Dressing pro-
gram" softkey. It can then be edited and started in the same way as
any other standard grinding or dressing program. In addition, you
can save all changes as a batch program as described in chapter
"Saving programs for batch mode (see section 5.10.1 “Saving pro-
grams for batch mode” on page 185).

Summary of Contents for J630D

Page 1: ...2 Technical data transportation commissioning 25 2 1 Technical data 25 2 2 Noise measurement 27 2 3 Floor space drawing 29 2 4 Transport dimensions machine only 31 2 5 Transport instructions 33 2 5 1...

Page 2: ...tting up and semi auto matic mode 73 5 1 3 Function tree structure of the Machine Jung module in automatic mode 75 5 1 4 Machine Jung module 76 5 1 4 1 System data 78 5 1 4 2 Statistics 79 5 1 4 3 Sim...

Page 3: ...ocedure with an MA65 optional 174 5 6 8 Dressing procedure with a Diaform DG 5 1 grinding wheel profile dresser optional 175 5 7 Dressing contours created in Grips 177 5 7 1 Creating a contour saving...

Page 4: ...9 7 6 Grinding wheel flange optional 231 7 6 1 Flanging and balancing a grinding wheel 232 7 6 1 1 Flanging a grinding wheel 232 7 6 1 2 Balancing a flanged grinding wheel statically 233 7 7 Grinding...

Page 5: ...e unit for optional equipment 282 9 3 9 Lubricating points on the PA 31K optional 283 9 4 Hydraulic plan 285 9 4 1 Charging extracting the hydraulic oill 287 9 5 Pneumatic plan 289 9 6 Grinding spindl...

Page 6: ......

Page 7: ...Operating Instructions J630D...

Page 8: ......

Page 9: ...7161 612 213 Spare parts and customer service See address above Service Department Telephone 49 0 7161 612 224 Telefax 49 0 7161 612 169 Hotline 49 0 7161 612 131 or 49 0 7161 612 207 Spare parts 49 0...

Page 10: ...172 Safety Through Instructions taking account of the technical docu mentation and all statutory requirements The descriptions and specifications contained in these Operating Instructions are subject...

Page 11: ...n accordance with statutory requirements Nevertheless the risk of personal injury or in extreme cases death to the operator or third par ties as well as damage to the machine or other equipment cannot...

Page 12: ......

Page 13: ...the machine system is accepted and reported immedi ately to the insurer and K Jung GmbH In the event of damage that has occurred not being detected until the machine system is unpacked leave the mach...

Page 14: ......

Page 15: ...nditions for new machines We furnish a full 12 month warranty on all new JUNG grinding machines delivered for one shift operation up to a maximum of 2000 operating hours The warranty period shall term...

Page 16: ...servicing appropriate to the specific use made of the machinery The customer be ars sole responsibility for selecting the correct machining technology as well as for high quality machining results Ot...

Page 17: ...to a potentially dangerous situation which could result in minor personal injury This symbol is also used if there is a risk of damage to the machine or equipment Draws attention to a potentially pro...

Page 18: ......

Page 19: ...of any kind on or with the machine Observance of all servicing and maintenance intervals All other forms of use which deviate from the above and in particular failure to heed the information contained...

Page 20: ......

Page 21: ...heels Fastening and dressing grinding wheels Entering workpiece machining data and optimizing the machining process Special hazard precautions and safety requirements Any special procedures or machini...

Page 22: ...he Operating Instructions is not heeded Moreover the recognized rules practices and legislation relating to occupational safety must be studied and heeded The Operating Instructions must be kept close...

Page 23: ...ntion regulations Study and heed the original instructions provided by the manufacturer before transporting accessories or other items of equipment e g coolant systems clam ping fixtures extraction de...

Page 24: ...our particular machine is not fitted with the necessary fire and explosion protection de vices Aluminium and all alloys with at least 70 percent aluminium by weight Magnesium and all alloys with at le...

Page 25: ...grips steps railings floors windows and safety devices free from dirt and other forms of contamination such as coolant residues oil or grinding dust Failure to do so may cause your view to be obstruc...

Page 26: ...s Always adjust the dressing diamond and or your follower to the diameter of your actual grinding wheel for all machines Caution If the dressing diamond follower is not adjusted correctly or if the gr...

Page 27: ...hether or not persons with active implants or ferromagnetic foreign bodies should be allowed to work in this area must be decided on a case to case basis Persons wearing a pacemaker are not allowed to...

Page 28: ...accessories work equipment As the owner of the machine you must fit an extraction device if the quantity of dust and or smoke and or mist produced during grinding is such that it could rep resent a he...

Page 29: ...atutory and general requirements valid in the country in which the machine is to be used All persons who have not yet received the appropriate training or instruction or who have not yet completed the...

Page 30: ......

Page 31: ...r 9 84 inch inch 14 41 Maximum load including magnetic chuck kg 130 Height above floor inch 42 72 Main spindle drive Speed range RPM 800 4200 Others on request Motor power KW 5 at max RPM 10 at max RP...

Page 32: ...limit switches with JC JCE guard inch 10 63 10 43 Resolution of measuring system mm 0 0002 Installation data Width inch 133 86 Depth without machine controller inch 106 3 Height depending on equipment...

Page 33: ...h DIN 45 635 Parts 1 and 16 is less than 70 dB A when the machine is idling idle reciprocating motion with grinding spindle motor active The value may increase to 75 dB A during grinding if the machin...

Page 34: ......

Page 35: ...J630D 2 Technical data transportation commissioning 26 7 02 29 2 3 Floor space drawing...

Page 36: ......

Page 37: ...J630D 2 Technical data transportation commissioning 26 7 02 31 2 4 Transport dimensions machine only...

Page 38: ......

Page 39: ...statutory requirements must be observed when the machine is transported e g accident prevention regulations Drain off all liquids e g coolants and oils before transporting the machine The machine must...

Page 40: ...sories necessary for crane transport 4 threaded bolts 1 HF 50 1624 4 ring nuts M 30 x 2 DIN 582 2 steel pipes or rods outside diameter 1 97 x 0 2 x 51 18 inch 4 continuous poly hoisting slings 196 85...

Page 41: ...e bed Screw in the threaded bolts Insert the steel pipes rods through the eyes of the threaded bolts Take steps to prevent the steel pipes rods from being moved accidentally Suspend the machine as sho...

Page 42: ...lift truck Transport the machine as shown in the Transport by fork lift truck dia gram The maximum carrying capacity of the fork lift truck must be greater than the weight of the machine plus the wei...

Page 43: ...electrical connectors and connect the power supply This step must always be carried out by a qualified electrician in accordance with the generally recognized rules of sound electrical practice See s...

Page 44: ...ssioning Transportation safeguards Mount the enclosed accessories on the machine after studying the original in structions provided by the manufacturers These accessories include Magnetic chuck Coolan...

Page 45: ...ling the dresser To do so unscrew the two hexagon socket bolts in each safeguard and remove the locking elements Keep the locking elements in a safe place in case you need to transport the dres ser ag...

Page 46: ......

Page 47: ...ion requirements Note the permissible floor load Connection and installation requirements See section 2 1 Technical data on page 25 Make sure sufficient floor space is available See section 2 3 Floor...

Page 48: ......

Page 49: ...e from a second person who can then press the EMERGENCY STOP button or the main switch to release the voltage in an emergency Cordon off the working area with a red and white chain and a war ning sign...

Page 50: ...ans that direct currents can flow in the event of a fault Consequently safe ope ration cannot be guaranteed with conventional residual current operated circuit breakers Connection of the r c c b circu...

Page 51: ...wnwards towards the grinding wheel upwards away from the grinding wheel E axis Rotary motion of the dressing arm PA 31K forward backwards U axis Infeed motion of the dressing diamond PA 31K toeards th...

Page 52: ...and Z axes The tool reference point is located on the front edge of the grinding wheel Please remember when you program the positioning paths in the X axis that from the point of view of the operator...

Page 53: ...to main screen 2 Key for returning one screen at a time 3 10 Horizontal softkey row 11 Shift key for activating second horizontal softkey row 12 Dual function key Change module key click this key once...

Page 54: ...48 26 7 02 3 Machine control unit remot control panel C Alphanumeric key block Keys Function 1 7 A 2 8 B 3 9 C 4 D 5 E 6 4 F 7 5 G 8 6 H 9 I 10 J 11 1 K 12 2 L 13 3 M 14 N 15 O 16 P 17 0 Q 18 R 19 S...

Page 55: ...channel W 4 Acknowledge alarm X 5 Help Y 6 Z 7 Change input area 8 Cursor up 9 Scroll up 10 Delete to left 11 Blank space bar 12 Cursor left 13 Select key advance through marked area select 14 Cursor...

Page 56: ......

Page 57: ...e in steps 5 8 S3 Magnetic gripping force OFF 6 8 S2 Magnetic gripping force ON 7 0 S3 EMERGENCY STOP button 8 0 S2 Control unit OFF 9 0 S1 Control unit ON 10 12 S30 Override switch for the sum of the...

Page 58: ...hining at breakpoint 27 12 S7 Cancels a function 28 12 S6 Measurement 29 12 S5 Traverses to the grinding wheel change position 30 12 S4 Traverses to the workpiece change position 31 12 S20 Key operate...

Page 59: ...les e g traverse to reference point are started with this key 38 12 S21 Key operated switch for control unit 1 position not relevant for the operator 39 Key operated switch for control unit 2 position...

Page 60: ......

Page 61: ...tion in selec ted axis 3 not activ 4 Handwheel increments of 0 00001 inch 5 Rapid traverse key in combination with a direction key or 7 Handwheel increments of 0 0001 inch 8 not activ 9 Handwheel incr...

Page 62: ......

Page 63: ...ode Exception If a guard door is fitted and you close it before changing the operating mode the function or program is not interrupted Safety regulations There is a risk of collision when the axes are...

Page 64: ......

Page 65: ...n on the remote control panel Select the infeed value per handwheel increment on the remote control panel 4 0 00001 inch 7 0 0001 inch or 9 0 001 inch See section 3 3 Remote control panel on page 55 T...

Page 66: ......

Page 67: ...should remain aware of the risks of working in this mode at all times Please bear the potential hazards and the safety regulations in mind while working on the machine When you probe a workpiece do no...

Page 68: ...u release the rapid traverse key 5 the axis will continue po sitioning at the normal feed rate If you release the direction key or the axis will stop immediately 4 3 1 4 Positioning the axes increment...

Page 69: ...6 NC reset See section 3 2 Machine control unit on page 51 position 36 The reciprocating motion in the X Z axis stops immediately The reciprocating W axis traverses to the start position before stoppi...

Page 70: ...op pos softkeys Alternatively you can set the values for the reciprocating X axis using the scroll bars Set the right hand reversing position X with the top slider control Set the left hand reversing...

Page 71: ...axis directly Press the Recip Value Z Axis softkey You can enter the current position values for the reciprocating Z axis in the input boxes directly by pressing the Teach Pos Teach Pos and Teach Sto...

Page 72: ...s reversing position with the remote control panel Traverse to a future reversing position with the X or Z axis Press the teach key See section 3 3 Remote control panel on page 55 po sition 12 on the...

Page 73: ...tomatic program cycle The program is interrupted immediately The Y axis grinding head is traversed to the safety position If you want to continue machining at the breakpoint you must press key start a...

Page 74: ...rogram start dressing program See section 3 2 Machine control unit on page 51 posi tion 35 Until you do so you will not be able to continue machining at the breakpoint and complete the program This op...

Page 75: ...nt If you do not want to correct the measurement click on the End softkey 4 4 2 Sequence of operations in an automatic program cycle Example You want to grind a groove with a profile in a workpiece of...

Page 76: ...Dressing function Create the dressing technology Start the dressing program a contour negative is created for the grinding wheel Measure the workpiece in order to enter the grinding geometry Fix the...

Page 77: ...47 D17 The active input line has a yellow background while the value field in this line has a blue background The dialog line of the display contains a short description of the selected input line So...

Page 78: ...ns of the machine 5 1 1 Important warning for all programs Moving axes are dangerous Keep workpieces and other objects of all kinds clear of the axis traverse paths Keep your hands well away while the...

Page 79: ...ble Set X axis Set Y axis Set Z axis AT Y axis NC Start AT Z axis NC Start AT ON Select dia station Set dress head Chapter5 4 1 Chapter 5 4 3 Chapter 5 4 2 Nominal pos indication MCS System Data Set d...

Page 80: ......

Page 81: ...C Start AT Z axis NC Start AT ON Teach current value Set dress table Set X axis Set Y axis Set Z axis AT Y axis NC Start AT Z axis NC Start AT ON Select dia station Set dress head Nominal pos indicati...

Page 82: ...ction 5 10 Batch mode on page 185 Warm up follow up see section 5 11 Warm up follow up program on page 189 Settings change positions Recip value X axis see section 4 3 Semi automatic mode on page 61 T...

Page 83: ...oordinate system the distance from the reference point of the NC axes is displayed as an absolute value If you press the WCS softkey workpiece coordinate system the distance from the zero point after...

Page 84: ...the current axis if the softkey Teach cur rent value is actual Finally press the Accept values softkey The values you have entered are now transferred to the NCU 5 1 4 1 System data You can set the da...

Page 85: ...s values e g the wheel number to their defaults If you press the Software version softkey the current software version is dis played 5 1 4 2 Statistics Press the Statistic softkey in the Machine Jung...

Page 86: ...as well as the total time and reset them again by pressing the Clear old data softkey 5 1 4 3 Simulation If you press the Simulation OFF ON softkey the dressing operation defined by the currently act...

Page 87: ...mulation OFF ON soft key again 5 1 4 4 Program overview You can select a machining program on the program overview screen It is active if it appears above in the program overview Press the Program ove...

Page 88: ...J630D 82 26 7 02 5 Functions of the machine To reload the overview press the Load overview softkey Select a machining program and press the Program selection softkey The selected program is now active...

Page 89: ...ure of the Program Jung module File Software Version Read NCU data Write NCU data Dressing program Grinding program Program Jung The various subordinate branches of the Grinding program Dressing progr...

Page 90: ......

Page 91: ...active program data in the MMC is copied to the NCU All the data you enter via the programming interface is thus transferred to the NCU This is also possible during a machining operation in other word...

Page 92: ......

Page 93: ...ructure of the File Manager File File new Value to clipboard Value from clipboard Filemanag open Filemanag save Load NCU Unload NCU Cancel Open Load NCU Unload NCU Cancel Save Software Version Read NC...

Page 94: ......

Page 95: ...n open files and save them Files can be de leted in the Services menu Press the File softkey in the Program Jung module Create a new file Press the File new softkey If you want to make changes to a fi...

Page 96: ...e active grinding and dressing programs are reset set to 0 You can also enter a comment for the new file if you wish Opening a file Press the Filemanag open softkey Select either NCU or Hard disk MMC...

Page 97: ...en softkey Saving a file in BATCH 1 Press the Filemanag save softkey Select either NCU or Hard disk MMC here A list of the files stored in the NCU or on the hard disk MMC then appears If you select a...

Page 98: ...iece in which you want to save the file and enter a file name program Press the Save softkey Please adhere to the following rule in order to prevent name con flicts use an _ underline as the third cha...

Page 99: ...chine 26 7 02 93 5 1 7 Bereich Dienste Bedienbaum Struktur Services Archiv Disk PG V24 Interface Data selection Manage data Data in Data out Clip board Disk Programs data Log Copy Proper ties Delete U...

Page 100: ......

Page 101: ...anage data softkey Open the Workpieces folder Then open the STD_GEO folder You can load unload delete or copy existing files here and create new ones The Unload key only removes the standard geometrie...

Page 102: ...elect Subprogram SPF here in the Type box 2 Press the OK softkey Then press the Load softkey on the Manage data screen This geometry program is now saved as a loaded SPF program and you can select and...

Page 103: ...to the reference point Switch the master switch on the machine on Wait until the control unit has booted up approx 2 3 min The message Important Traverse to machine reference point then ap pears on t...

Page 104: ...sing the OK softkey If a guard door is fitted close it Press the RESET key see section 3 2 Machine control unit on page 51 position 36 Press NC Start see section 3 2 Machine control unit on page 51 po...

Page 105: ...OK Start change Cancel change Cancel OK Cancel OK Actual New Cancel OK Tool Management Grinding wheels Dresser New Copy Delete Selection OK Cancel OK Start change Cancel change Cancel OK OK Structure...

Page 106: ......

Page 107: ...y The main tool management screen is then displayed You can select either grinding wheel or dresser management here 5 3 3 Grinding wheel management You can manage up to 100 different grinding wheels i...

Page 108: ...n is displayed when you press the Selection OK softkey in the grinding wheel management mask The data of the selected grinding wheel and the active grinding wheel is dis played here You can modify thi...

Page 109: ...lected in the grinding wheel management mask is not necessarily the same as the wheel that is active in the pro gram You can make the selected grinding wheel the active grin ding wheel by pressing the...

Page 110: ...ways proceed in the order described above After you have changed the grinding wheel the SUG confirmation screen should be displayed If it is not please press the Confirm SUG softkey You can only chang...

Page 111: ...ain 5 3 4 Dresser management You can manage up to 30 different dressers in the dresser management mask Select dresser management in the tool management menu The correction values you enter in the dres...

Page 112: ...oftkey if you want to create a new dresser record You can copy or delete records with the Copy and Delete softkeys The Parameter dresser screen is displayed when you press the Selection OK softkey You...

Page 113: ...you enter here must never be higher than the diamond values entered in the Grips program for calculating the swi vel angle If you ignore this warning a collision will occur It is best to use the same...

Page 114: ......

Page 115: ...eset state i e no pro grams must be executing The function tree structure for setting actual values is shown in chapters 5 1 1 and 5 1 2 for all operating variants The full actual value setting functi...

Page 116: ...while the numeric field inside it containing the dresser has a blue background Select the dressing tool you want to set Confirm your choice of dressing tool by pressing the Select diamond sta tion so...

Page 117: ...s you must probe it with the front edge of the grinding wheel Now press the Set Z Axis softkey Now select Diamond 2 Confirm your choice of dressing tool by pressing the Select diamond sta tion softkey...

Page 118: ...oing so trip the probing signal the colour of the box in the Status probing control field will change from green to red Now set the actual values for the axis in which you have just probed You can dea...

Page 119: ...e key see section 3 1 Control unit on page 47 po sition 12 Press the Services softkey Press the Manage data softkey The Subprograms directory contains two programs called AT_Y SPF and AT_Z SPF AT_Y SP...

Page 120: ...the grinding wheel and the dressing diamond The dressing di amond is positioned to the grinding wheel before the actual values are set This is a basic prerequisite of all automatic program cycles Acti...

Page 121: ...V axis You can deactivate the Status probing control field again by pressing the AT OFF softkey 5 4 3 Setting actual values for the PA 31K dressing head optional The Actual values dressing head PA 31...

Page 122: ...ound while the numeric field inside it for selecting the dressing tool has a blue background Select the required dressing tool PA 31K D7 D8 D9 or D10 Station1 Confirm your chosen dressing tool by pres...

Page 123: ...the same as the machining area you selected on the main Grinding pro gram screen This input selects the actual value system for grinding Select either the front or the back wheel edge using one of th...

Page 124: ...there is a probing travel of 0 079 inch You must receive the probing signal during these 0 079 inch or an error message will be output You can carry out the probing operation manually using the electr...

Page 125: ...you have just probed Proceed to the next axis To change the default values for probing with the machine before setting ac tual values Press the Change module key see section 3 1 Control unit on page...

Page 126: ...a value is entered the grinding head positions upwards by this amount value in m as soon as a probing signal is received RS 133 2 Maximum probing travel Important The sign determines the direc tion i...

Page 127: ...rregular spacing If you change the geometry or technology data during a program cycle you can cause it to take effect immediately in the active program by pressing the Write act data softkey 5 5 1 Gri...

Page 128: ...in the grinding program select Automati cally with probing cont Enter the required Prob feed rate in inch min and if necessary a suitable Probing correction value in 0 00001 inch Then press the Write...

Page 129: ...regular spacing Uniform spacing Plunge grinding Dressing program Value to clipboard Value from clipboard Write act data Main screen Selection Face grinding Stat Plunge grinding Programm functions Writ...

Page 130: ......

Page 131: ...table cams The infeed motion is control led via the Y axis vertical axis of the grinding head It is effected at the cams in the Z axis Activating surface grinding Set the key switch to the automatic p...

Page 132: ...gy r surface softkey If you activate the check box for Change reference edge the reference edge of the grinding wheel changes automatically between the front and back reversing positions during recipr...

Page 133: ...Now press the Write act data softkey Meaning of the Dr after N input field Input 0 Dressing in the roughing area according to the roughing depth Dressing at the roughing finishing transition accordin...

Page 134: ......

Page 135: ...acing Irregular spacing Irregular spacing Uniform spacing Dressing program Value to clipboard Value from clipboard Write act data Main screen Selection Program Jung back to Program Jung Chapter 5 5 Ch...

Page 136: ......

Page 137: ...then ground in the workpiece by means of a relatively slow ta ble motion in the X axis longitudinal axis An optimum coolant supply is essenti al This method permits a relatively large quantity of mate...

Page 138: ...tion softkey Now press the Write act data softkey Now select the required grinding technology namely reciprocating plunge grinding or creep feed grinding optional 5 5 5 1 Reciprocating plunge grinding...

Page 139: ...Input 0 Dressing in the roughing area according to the roughing depth Dressing at the roughing finishing transition according to the Y S allowance Input 1 Dressing after every groove Input 2 Dressing...

Page 140: ...proportionally up to the preselected maximum limit The roughing feed is in other words controlled as a function of the preselected power limit of the grinding spindle motor Description of the most im...

Page 141: ...Press the Change module key 12 on the control unit Press the Machine Jung softkey Press the AC correction softkey You can change the nominal value for the current consumption in increments by pressing...

Page 142: ......

Page 143: ...ce grinding Technology r face Dressing program Value to clipboard Value from clipboard Write act data Main screen Selection Stat Plunge grinding Programm functions Write act data Dressing program Act...

Page 144: ......

Page 145: ...ol unit on page 51 position 33 Press the change module key see section 3 1 Control unit on page 47 position 12 Press the Program Jung softkey Press the Grinding program softkey Press the Face grinding...

Page 146: ...nology data Press the Selection softkey Now press the Write act data softkey Meaning of the Dr after N input field Input 0 Dressing in the roughing area according to the roughing depth Dressing at the...

Page 147: ...ding Technology plunge Uniform spacing Irregular spacing Uniform spacing Irregular spacing Dressing program Value to clipboard Value from clipboard Write act data Main screen Selection Programm functi...

Page 148: ......

Page 149: ...al values for X and X Activating stationary plunge grinding Set the key switch to the automatic position see section 3 2 Machine control unit on page 51 position 33 Press the change module key see sec...

Page 150: ...he Plunge N unif spacing or Plun ge N irregular spacing screen You can also teach the current value for a selected axis if the Teach current va lue softkey is active black lettering Press the Selectio...

Page 151: ...ent values for X and X in the geometry data a cor responding oscillating reciprocating motion will be effected in the X axis In this case you are not allowed to enter values for Fy finishing and Fy ro...

Page 152: ...ite act data softkey Meaning of the Dr after N input field Input 0 Dressing in the roughing area according to the roughing depth Dressing at the roughing finishing transition according to the Y S allo...

Page 153: ...ding Face grinding Stat Plunge grinding Technology r path Z Y Dressing program Value to clipboard Value from clipboard Write act data Main screen Selection Programm functions Write act data Dressing p...

Page 154: ......

Page 155: ...ition 33 Press the change module key see section 3 1 Control unit on page 47 position 12 Press the Program Jung softkey Press the Grinding program softkey Press the Recip path Z Y softkey The Z Y path...

Page 156: ...d in the Y axis either to the relative relief value or to the workpiece change position depending on the settings in the Grinding program functions menu It is always positioned via the maximum workpie...

Page 157: ...Fb finishing Path infeed during the finishing cycle outside the workpiece in the region of the reversing position Tx Tx Precision stop at the X or X reciprocating position 2 OFF Value Dwell time in se...

Page 158: ......

Page 159: ...grinding Stat Plunge grinding Technology r path X Y Dressing program Value to clipboard Value from clipboard Write act data Main screen Selection Programm functions Write act data Dressing program Ac...

Page 160: ......

Page 161: ...nit on page 51 position 33 Press the change module key see section 3 1 Control unit on page 47 position 12 Press the Program Jung softkey Press the Grinding program softkey Press the Recip path X Y so...

Page 162: ...our direc tory or unload a loaded file Press the Selection softkey Then press the Write act data softkey Press the Technology r path X Y softkey Enter the required technology data Description of the m...

Page 163: ...ammed feed rate Both The path is machined in both directions starting in down cut mode CD dressing selected If CD dressing is activated the dressed value is compensated outside the path before the nex...

Page 164: ...Selection softkey Then press the Write act data softkey 5 5 14 Special programs optional Activating special programs Press the Special programs softkey in the Machine Jung module Press the softkey for...

Page 165: ...g wheel several parallel recesses are plunge ground in order to cut as much material as possible within a short period Second program step finish grinding The machined surface is then reground in a re...

Page 166: ...other things The true overlap value may be slightly higher than the value pro grammed here The control unit calculates an equivalent overlap value on the basis of the surface to be ground and the num...

Page 167: ...logy data here Dr Tech No This input technology appears for both plunge grinding and reci procating surface grinding You can thus assign a suitable dres sing technology to each of these program steps...

Page 168: ...echnologies in just one program Advantages of the program You can write a program with up to four different areas This is easier and quicker than writing a batch program You can also optimize the chro...

Page 169: ...nge grinding Press the Special programs softkey in the Machine Jung module Mark the check box for Activate multiple plunge grinding If your machine has two or more special programs you will now see a...

Page 170: ...xis if the Teach current va lue softkey is active black lettering After you have entered all the data press the Accept values softkey This option allows you to machine areas with different heights At...

Page 171: ...from clipboard Tool and geometry Write act data Main screen Write act data Selection Geometry circumfer Geometry freefrm 01 Grinding program Value to clipboard Value from clipboard Write act data Mai...

Page 172: ......

Page 173: ...key see section 3 1 Control unit on page 47 position 12 Press the Program Jung softkey Press the Dressing program softkey Press the Program functions softkey Position the grinding wheel over the work...

Page 174: ...ta softkey 5 6 4 Setting up PA 31K optional You can display the setting up mask for the PA 31K by pressing the Settings change positions key on the extended Machine Jung screen see section 5 1 4 Machi...

Page 175: ...in the U axis is relative to the workpiece depending on the diameter of the grinding wheel while in the W and E axes it is an absolute value based on the reference point Press the Change Dia number s...

Page 176: ...ntrol unit on page 51 position 33 Press the change module key see section 3 1 Control unit on page 47 position 12 Press the Program Jung softkey Press the Dressing program softkey You can create and s...

Page 177: ...peed relation dressing roll grinding wheel Feed rate Dressing speed in inch min Press the Selection softkey Now press the Write act data Selecting the dressing tools and the dressing technology Press...

Page 178: ...during plunge grinding reciprocating plunge grinding creep feed grinding or continuous path grinding In CD mode the wheel is dressed without interrupting the grinding process The CD option is there f...

Page 179: ...D mode Select a dressing technology on the Dressing Technology screen Enter your technology data in the CD line 5 6 6 Selecting a geometry for face dressing Select the required face dressing option on...

Page 180: ...rupted at the programmed point The dressing sleeve effects the programmed dressing infeed motion The message Operate MA65 manually press Cancel key appears on the display Operate the dressing lever on...

Page 181: ...ing the Diaform DG 5 1 grinding wheel profile dresser Set the key switch to the automatic position see section 3 2 Machine control unit on page 51 position 33 Press the change module key see section 3...

Page 182: ...ge 51 position 35 By pressing the Start dressing program see section 3 2 Machine con trol unit on page 51 position 35 at any time during a grinding program If a grinding program is already active it i...

Page 183: ...SPF You must then copy this contour paste it into the Workpieces STD_GEO folder and load it 5 7 1 Creating a contour saving it and transferring it to the NC by means of a postprocessor run 1 Grips 2 F...

Page 184: ...er to dress a loaded contour program you must enter it on the Tool and geometry screen see section 5 6 5 Dressing technology input on page 170 The contour program which is entered there can then be st...

Page 185: ...dressing in the Setups menu enter your dressing data and press OK Select V24 in the Setups menu Then select To NC check the setups you have entered and press OK Setups Baud rate 9600 Data bits 7 Stop...

Page 186: ...ed Press the Yes softkey The message Job is ready appears at the bottom of the display Press the Log softkey Press the Delete log softkey Press the Manage data softkey Mark the transferred contour e g...

Page 187: ...e 95 Press the Manage data softkey Mark a contour e g TEST SPF in the Workpieces STD_GEO folder and then press the Delete softkey Press the Yes softkey Press the Delete log softkey If you do not have...

Page 188: ......

Page 189: ...e contours you create to be accepted by the machine control unit Open the Settings menu in GRIPS 32 and select Directories If your GRIPS 32 directories are not already defined automatically as shown a...

Page 190: ......

Page 191: ...gram under any name To prevent name conflicts please use an _ underline as the third character of all batch program names Load all the programs you want to combine in your batch program in the NCU To...

Page 192: ...am and press the Value to clipboard softkey Then select the position 1 5 in the Machining cy cles at which you want to insert the program and press the Value from clipboard softkey The program is inse...

Page 193: ...e program in the Batch folder More steps for both programs Select Batch mode in the Machine Jung module Activate batch mode Enter 1 as the Start no and 2 as the End no Select your program 1 from the l...

Page 194: ...e selected program is opened Press the Previous key see section 3 1 Control unit on page 47 position 2 The main Program Jung screen is opened Please also refer chapter file manager see section 5 1 6 2...

Page 195: ...me after the end of the program before switching off Select the Machine Jung screen see section 3 1 Control unit on page 47 position 12 an Press the Warm up follow up softkey Select the warm up progra...

Page 196: ...am Press NC Reset see section 3 2 Machine control unit on page 51 position 36 This terminates the warm up program and you can then activate any other programs or functions Activating the warm up progr...

Page 197: ...grinding wheels are being dressed The reason for this is to prevent wheel particles from flying off and coolant from spattering and cau sing injuries If an extraction device is installed it must be ac...

Page 198: ......

Page 199: ...depending on the application It is usually mounted on the left hand side of the magnet You should adjust its height either to your particular ma gnet or if necessary to the workpiece you want to grin...

Page 200: ......

Page 201: ...gle of 45 You can use these diamonds to dress the outer contours of the grinding wheel You must remove the no 3 diamonds of the roughing and finishing station including the diamond blocks beforehand T...

Page 202: ...0 25 mm 54 25 mm The best way to set this value accurately is to use an optical setting device If you cannot set it exactly you must reset the actual values again every time you change the diamond Mou...

Page 203: ...maintained at a constant value also automatically as the grinding wheel radius decreases If you traverse the dressing sleeve V axis manually key on the remote con trol panel there will be no compensat...

Page 204: ...nit on page 51 Position 37 Starting a dressing program during a grinding program Press the Start automatic program key see section 3 2 Machine control unit on page 51 position 37 The configured grindi...

Page 205: ...ntograph ratio 10 1 Maximum profile width 32 mm Maximum profile depth 13 mm Please study the manufacturer s original operating manual enclosed with the Diaform profiling tool carefully before starting...

Page 206: ...sing technology input on page 170 This is necessary to ensure that the dressed value is calculated and compensated in the Y axis The procedure for dressing with the Diaform DG 5 1 is described in chap...

Page 207: ...r s original operating manual enclosed with the Mafra profiling system carefully before starting up the machine If you dress using the Optidress E you must open the right hand side of the machine cove...

Page 208: ......

Page 209: ...axis Maximum dressing stroke approx 65 mm The dresser axes can also be positioned using the mobile remote control panel Exceptions Before you start a dressing program the dressing diamond must be posi...

Page 210: ......

Page 211: ...hnical data Working envelope Profile width 50 mm Profile depth inside outside 15 20 mm Contour precision 0 0025 mm Traverse paths W axis 55 mm U axis 60 mm E axis 60 Max dressing speed 2000 mm Max dia...

Page 212: ...ndicates a deviation you must correct it by means of the single diamond holder If it is not possible to adjust the single diamond holder so that it is exactly concentric the calibrated ball insert is...

Page 213: ...adjustment by inserting the dividing head into the turret head of the PA 31K again and swivelling it 2 x 90 as described above 6 8 5 Adjusting the diamond reference dimension Swivel the dividing head...

Page 214: ...ing edge must always be perpendicular Fasten the diamond with the two screws provided 6 8 7 Adjusting and mounting the single diamond holders with the dia monds Mount the dividing head with diamond no...

Page 215: ...p the holder When the single diamond holder is aligned exactly in position tighten the clam ping screws again carefully Now re check the diamond Adjust the other three diamonds in the same way Adjust...

Page 216: ...ssage will appear on the display 5115 Important Dia mond holder clamped After reading off the diamond number mount the diamond holder at the centre point of the swivel axis of the PA 31K arm and press...

Page 217: ...J630D 6 Dressers 26 7 02 211 6 8 10 Changing the Erowa plate If you change the Erowa plate you must also readjust the diamonds in the preset ting device...

Page 218: ......

Page 219: ...ke sure that magnets with 210 V DC voltage are always connected to a 210 V DC supply Magnets with 360 V DC voltage are only allo wed to be connected to a 360 V DC supply If you ignore this war ning it...

Page 220: ...y new magnetic chucks supplied by K Jung GmbH They have already been ground in the factory so that they are slightly concave They must simply be cleaned and possibly honed with a fine oil stone Older...

Page 221: ...J630D 7 Accessories 26 7 02 215 Mount the magnetic chuck on the grinding table with the base facing down and regrind the active magnetic pole face...

Page 222: ......

Page 223: ...ungi bacteria toxicants and or other impurities may cause permanent damage to human health Your machine and workpieces may also suffer considerable damage if poor quality or contaminated coolant is us...

Page 224: ...ant sup ply see section 3 2 Machine control unit on page 51 position 13 The necessary pumps and solenoid valves are started or opened automatically during a program cycle 7 2 2 Functional description...

Page 225: ...nections 2 connections with 3 4 couplings 1 connection with 3 8 coupling Transparent coolant additives are only allowed to be mixed with ordinary tap water Do not use decalcified water or water which...

Page 226: ......

Page 227: ...e water not the other way round Avoid using coolants which contain the following Chloro organic substances Nitrite Secondary amines Free formaldehyde Requirements for the water used to prepare emulsio...

Page 228: ...n Interval Measurement Limit value Result Daily Concentration See manufacturer s specifications Concentration too low risk of corrosion Concentration too high machine becomes mis ted and sticky Weekly...

Page 229: ...upply all the materials necessary to enable staff to comply with the plan 7 3 2 Skin protection plan Apply special skin protection cream to your hands and forearms before starting work Hautschutz in E...

Page 230: ...Change all clothing that is wet with coolant immediately and have it cleaned If necessary wear a form of splash protection or a rubberized apron Do not touch your mouth eyes or nose with your hands af...

Page 231: ...drawn into the coarse filter chamber via the suction flange It is then filtered in three separate stages The liquid which is separated out collects in the drip pan and is then pumped back to the coola...

Page 232: ...page 51 position 17 Starting and stopping the extractor automatically during a program cycle The extractor is switched ON and OFF automatically during a program cycle Never open the unit when it is sw...

Page 233: ...ioning after prolonged downtimes and after the cooling circuit has been opened and subse quently re closed If the system operates with a frequency of 50 Hz you must add 0 5 anti corrosive agent If the...

Page 234: ...position Allow a minimum clearan ce of 12 inch between the suction screen on the end and all other objects or walls Connect the discharge line for the cooling circuit Fill the coolant tank up to the u...

Page 235: ...valve on the inlet line of the pump lever 1 horizontal Immerse the return hose in the tank Carry out a trial run until the coolant emerges without any bubbles Re fill the pump if necessary Fasten the...

Page 236: ......

Page 237: ...the grinding wheel flange on the grinding spindle Unscrew the locking bolt as far as the limit stop clockwise direction Fit the spindle nut anti clockwise direction Apply counter pressure with the loc...

Page 238: ...langed grinding wheel at the outside diameter and the flanks at ap proximately half speed until it runs absolutely true If you have a grinding machine with a dynamic balancer you can now fine balance...

Page 239: ...se the heaviest point of the grinding wheel was at the top If the balancing stand inclines towards the right clockwise the heaviest point of the grinding wheel was at the bottom Mark the heaviest poin...

Page 240: ...e weights symmetrically according to the inclination of the balancing stand Unlock the weighing frame Watch the inclination of the balancing stand Repeat this procedure until the stand is properly bal...

Page 241: ...wheel flange carefully onto the spindle The long lug must be inserted in the deep groove Position the ejectors on the screwed clamping mechanism To do so you must unscrew the clamping bolt hexagon soc...

Page 242: ...se as far as the limit stop Now hold the grinding wheel firmly and unclamp the locating flange from the spindle by jerking it anti clockwise Unscrew the clamping bolt 1 5 turns clockwise The ejectors...

Page 243: ...control unit of the balancer Keep the keys pressed down until your grinding wheel is within the prese lected tolerance range again Flange the grinding wheels in accordance with the instructions set o...

Page 244: ......

Page 245: ...ways switch off the main switch on the machine before disconnec ting the plug of the dividing head Please study and heed the original operating manual provided by the manufacturer This manual contains...

Page 246: ......

Page 247: ...cordingly Make sure that your workpieces are properly clamped and secured When you change the speed range no programs are allowed to be active and the grinding spindle drive must be switched off To ch...

Page 248: ......

Page 249: ...ct a valid dressing technology in Dressing Program What to do Either select a valid dressing technology or deselect dressing mode 65002 No grinding technology programmed Situation After Machining Grin...

Page 250: ...ta are no longer vailid as a result What to do Check the tool data for the active wheel and re enter it if necessary run the Actual Values Grinding function again 65006 Machining stopped reset Actual...

Page 251: ...tputs the message What to do Change the wheel and update the wheel data in the tool management mask You can cancel the internal lock again with Activate Data 65010 Change diamond limit not reached Sit...

Page 252: ...ng position can only be found with the reference diamond What to do Either mount the reference diamond or enter the diamond number in the tool management mask 65014 Cannot dress grinding wheel Situati...

Page 253: ...the probing control data is missing What to do Enter the data 65018 No probing control signal Situation Probing while setting actual values Probing during plunge grinding Conse quences Machining Actu...

Page 254: ...th grinding in accordance with the postprocessor specification 65039 Invalid dressing geometry no in tool management mask Situation Machining Dressing Conse quences The machining operation is cancelle...

Page 255: ...infeed or feed rates What to do Check the entry in the tool management mask for the dressers and change it if necessary 65052 G54 G55 not selected Situation Actual Values Grinding Conse quences The ma...

Page 256: ...eck the angle you entered in Face Geometry and change it if neces sary 65060 Angle entered for face geometry negative or zero Situation Machining Face Dressing Conse quences The machining operation is...

Page 257: ...65063 Reciprocating X axis active Situation When actual values are set in the X axis Conse quences The X axis is not set Meaning The X axis can only be set while it is stationary What to do Traverse...

Page 258: ......

Page 259: ...tuation Wheel management Response Press Reset to cancel Press NC START to delete the wheel data 67007 Change wheel residual sum Y SE419 Situation Machining Dressing This advance warning tells you that...

Page 260: ...Diamond Response Dressing Start 67020 Important E axis traversing to 60 deg Situation Adjust Diamond Response Dressing Start 67021 Important E axis traversing to 60 deg Situation Adjust Diamond Respo...

Page 261: ...w active Situation 2nd system query cf 5123 the new radius takes effect as soon as you confirm it Response Grinding Start Reset 67025 Machining of 1st side complete please turn part over Situation Whe...

Page 262: ......

Page 263: ...or circuit breakers Switch the master switch on 510101 Fault in fuse motor circuit breaker Situation Any Conse quences A feed lock is active in all the NC axes and a halt dwell is active for the NC bl...

Page 264: ...s been received from the spindle drive What to do Switch the machine OFF an then ON again Check the module connections Replace the module if defective 510116 Activate magnetic chuck Situation Automati...

Page 265: ...in the lubricant piping repair Air in the lubricant piping bleed 510120 Oil pressure too low to lubricate Z axis Situation During lubrication Conse quences A feed lock is active in all NC axes and a...

Page 266: ...Error and status messages 8 3 2 NC start locked 510300 510315 510300 Oil level too low Situation Any Conse quences The NC program cannot be started Meaning The oil level in the tank is too low What to...

Page 267: ...witch on the machine and traverse to the reference point 600101 Maximum temperature exceeded in X axis Situation Any Conse quences It is no longer possible to traverse in the X axis Meaning Overtemper...

Page 268: ...clear in this axis see Operating Manual Check the hardware limit switch Check the software limit switch Switch on the machine and traverse to the reference point 600208 Alter setting of key switch Sit...

Page 269: ...ion When traversing clear of the hardware limit position Conse quences It is no longer possible to traverse in the Z axis Meaning The key operated switch 6 S2 in the control cubicle is set to ON but t...

Page 270: ...es 26 7 02 264 600402 Spindle module error FC18 Situation After spindle ON or OFF Conse quences An error is indicated Meaning An error occurred when the spindle was activated or deactivated manu ally...

Page 271: ...es An error is indicated Meaning Data is being written to the NC What to do NC reset Switch the machine OFF and then ON again 700003 Data read error FB2 Situation After a data transfer is initiated Co...

Page 272: ...eady signal has been received from the stepping motor dri ver What to do Replace the board if defective 700032 Guard door closed Situation When the NC Program is started Conse quences The NC program c...

Page 273: ...have traversed clear in the Y axis and started an NC pro gram you must decide whether or not you want to continue machining at the breakpoint If so start the NC program again If not press the Reset ke...

Page 274: ...onfirm the wheel diameter after you entered it What to do Confirm the wheel diameter 700042 Operate W axis manually press Cancel key Situation After an automatic infeed motion in the V axis with the M...

Page 275: ...he axes What to do Switch on the air pressure 700047 Used oil level machine bed full Situation Always Conse quences Display only Meaning What to do Drain used oil from the machine bed 700049 PA130T dr...

Page 276: ......

Page 277: ...at to do Traverse clear of the software limit switch with the plus minus key 10720 Channel axis at software limit switch Situation After a program is started Conse quences The program stops Meaning Yo...

Page 278: ......

Page 279: ...lectricians A knowledge of the general safety regulations and rules of conduct is also essential these are not referred to specifically in the follo wing If it is necessary to dismantle or deactivate...

Page 280: ...to points 1 and 2 Check lubricating point 12 visual inspection and if necessary top up with oil Check the maintenance unit for optional equip ment visual inspection and if necessary top up with oil A...

Page 281: ...book and record the results of all tests in it every 12 months Replace the coolant hoses Perform a functional test for all safety devices Jung Customer Service If any defects faults or damage are det...

Page 282: ...sticky weekly pH value 8 5 9 4 Value too low risk of corrosion and microbial contamination Value too high skin irritation Nitrate content Less than 50 mg l Increased risk of cancer Nitrite content Les...

Page 283: ...machine bed Open the clamping bolt of the valve you want to adjust with a hollow hexagon wrench Turn the table reversal valve anti clockwise to make the reversal path shor ter and harder Turn it clock...

Page 284: ...ghten the clamping bolt again after adjusting the valve Be careful not to turn the valve too far clockwise because this could make the approach path so long and soft that the table no longer tra vels...

Page 285: ...e machine which results from failure to comply with this requirement Study and heed the general rules and requirements for working with oil Avoid direct contact between your skin and the oil by wearin...

Page 286: ...J630D 280 26 7 02 9 Maintenance servicing disposal 9 3 5 Lubrication instruction plate...

Page 287: ...ubrication system The oil level of the automatic central lubrication system is monitored by means of a float switch If oil needs to be topped up either the warning lamp on the machine control unit lig...

Page 288: ...ull enclosure for this purpose You should in any case drain off the used oil items 8 and 9 in the lubrication plan at the latest once every month or after 160 operating hours 9 3 8 Maintenance unit fo...

Page 289: ...A 31K optional Apply 2 to 4 strokes of lubricant to points 1 and 2 after 500 hours operation or after 3 months in single shift duty Use the following grease Kl ber ISO Flex NBU 15 Kl ber A grease gun...

Page 290: ......

Page 291: ...J630D 9 Maintenance servicing disposal 26 7 02 285 9 4 Hydraulic plan...

Page 292: ...Throttlevalve 9N 600 B 11 Parker Hanifin 14 1 4 2 wayvalveNG6 DG4V 3 2A M U H7 60 0810090469 Vickers Bosch 13 1 4 2 wayvalveNG6 0810090469 Bosch 12 1 Conenon returnvalve RHD10L1bar Ermeto 11 1 Pressur...

Page 293: ...pe 1 Remove the cover of the hydraulic fluid cooler 2 3 screws Additional steps which must always be carried out Remove the side cover 3 6 screws The hydraulic fluid cooler must not under any circumst...

Page 294: ...il the window 6 indicates half full approx 45 l Close the hydraulic fluid tank again and re assemble the dismantled units in re verse order The hydraulic oil can be extracted again through the same op...

Page 295: ...J630D 9 Maintenance servicing disposal 26 7 02 289 9 5 Pneumatic plan...

Page 296: ......

Page 297: ...ed an impact load If the runout of the grinding spindle is greater than 0 003 mm you must release the tension Screw two lock nuts onto the spindle left hand thread Loosen the round nut 1 left hand thr...

Page 298: ...oved beforehand Removing the grinding spindle Remove the bracket from the coolant pipe Remove the cover of the grinding wheel Remove the wedge for the grinding spindle Loosen the locking pins 1 Carefu...

Page 299: ...J630D 9 Maintenance servicing disposal 26 7 02 293 Install the spindle in reverse order Do not tighten the locking pins too far...

Page 300: ......

Page 301: ...the door of the control cubicle and set the key operated switch 6 S2 to the horizontal position i e turn it to the left roughly in the middle Press the illuminated NC reset key Traverse the axis clea...

Page 302: ......

Page 303: ...age by pressing NC reset In this case however the first error message is displayed again The servo motors can no longer be activated with the machine in this condition Correcting the error Select sett...

Page 304: ......

Page 305: ...ffered data has been lost and you will have to restart the control unit after you have replaced the battery 9 9 1 Replacing the battery for the MMC 103 display The back up battery for the MMC 103 disp...

Page 306: ...placing the battery for the NCU Battery backed SRAMs and clock chips are installed on the NCU The back up voltage is monitored by the NCU Battery designation Jung order no Siemens order no Lithium bat...

Page 307: ...press the catch 3 on the underside of the module upwards and grasp the module firmly Install the new module Switch on the control unit The battery alarm should have disappeared Siemens order number fo...

Page 308: ...remove the battery Insert the new battery and plug the connector into the socket in exactly the same position as the connector of the old battery Install the battery fan module again Switch on the con...

Page 309: ...of your District Authority 9 10 1 Disposal of the machine Draining Dispose of old coolants Drain off the oil collect it segregate it into types and dispose of it Remove and dispose of the coolants in...

Page 310: ......

Page 311: ...to us by fax or by post K Jung GmbH Enter your address here optional Abt Dokumentation Postfach 640 73006 G ppingen Germany Telefax 49 0 7161 612213 Please enter any errors points requiring clarifica...

Page 312: ......

Page 313: ...perating person nel are sufficiently familiar with the relevant safety regulations and instructions for operating the machine The checks should be repeated every six months The Safety and Coolants sec...

Page 314: ......

Page 315: ...Coolant supplier Product designation Concentration specified pH value specified Nitrite max 20 mg m3 nitrate max 50 mg m3 no of nuclei yeast fungus less than 104 no of nuclei bacteria less than 106 D...

Page 316: ......

Reviews: