______________________________________________
HARRIS
888-9058-001
WARNING: Disconnect and lockout AC primary power prior to servicing
79
STEP 16:
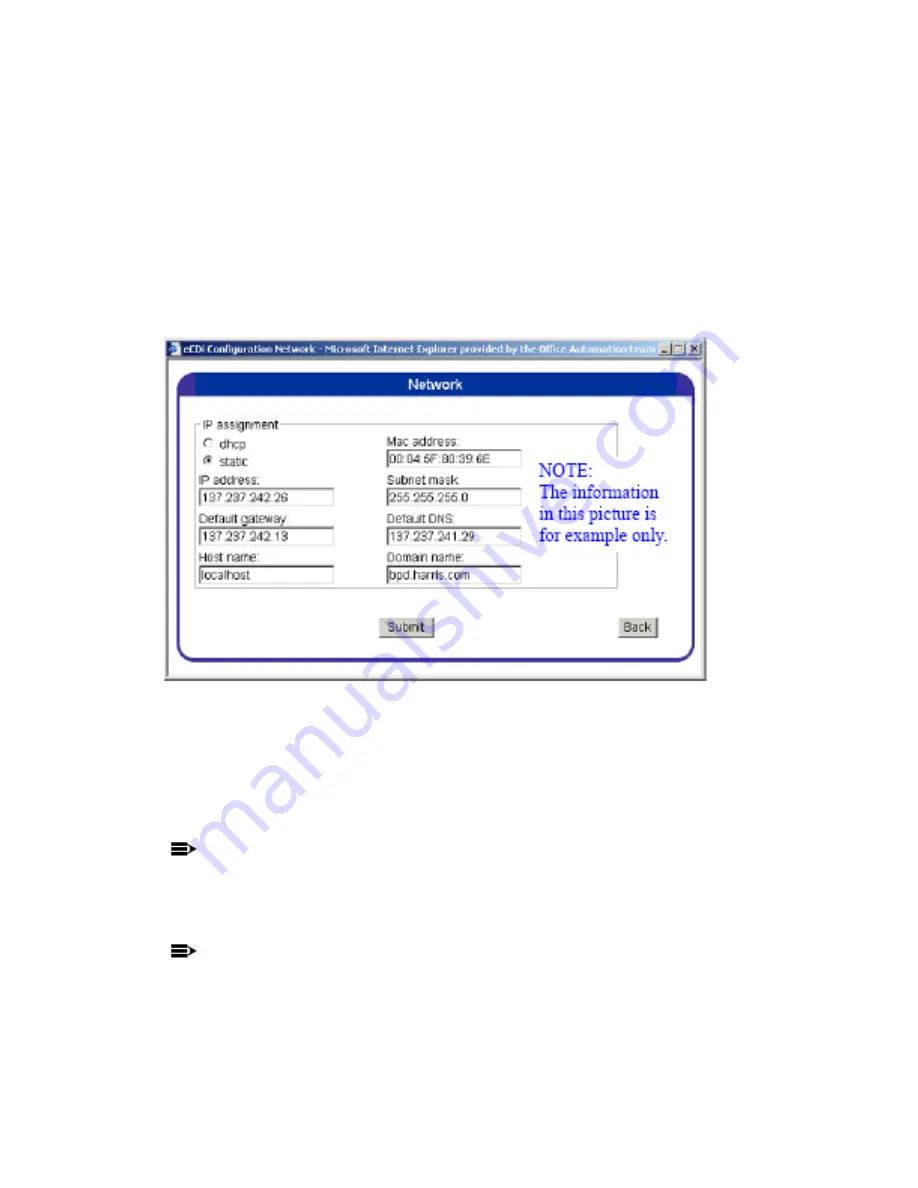
If you are connecting to a network (via the WAN connection on the
eCDi™) that supports DHCP then click the “dhcp” button and the dhcp
server should assign all of the required IP addresses automatically.
Problems with this function should be directed to the station network
administrator. If the network does not use dhcp, or if it is desired to have a
static IP address, then select “static” and manually enter at least the IP
Address and the Subnet mask.
Figure 3-11 Network Configuration Screen
STEP 17:
When all changes are made, press Submit and then press Back to return
to the main menu. Click on SNMP to access the screen in Figure 3-12.
IMPORTANT:
The SNMP Configuration screen only needs to be set up if an SNMP Network
Manager is going to be used to access the eCDi™. If the web browser is going to
be the only interface then skip to STEP 27, to continue the eCDi™ configuration.
NOTE:
If your network supports Default DNS then the host name can be used to access
the eCDi™. IF not, the IP address must be used. Example: http://137.237.242.26 or
http://my-ecdi.bpd.harris.com or whatever is enabled in HostName and Domain
Name).


