


Procedure
Lists Requested Procedure name.
Send
Saves your selections and sends the files to the selected host.
Browser
Cancels your selection, ends the Exam Split session, and returns you to the File
Manager.
○
The
Exam Split
menu appears with the selected images displayed in the upper
viewports. The system may display every image or skip some images depending on the
total number of images selected.
○
If the exam you selected does not have Multiple Procedures, a dialog message is posted
and Exam Split exits.
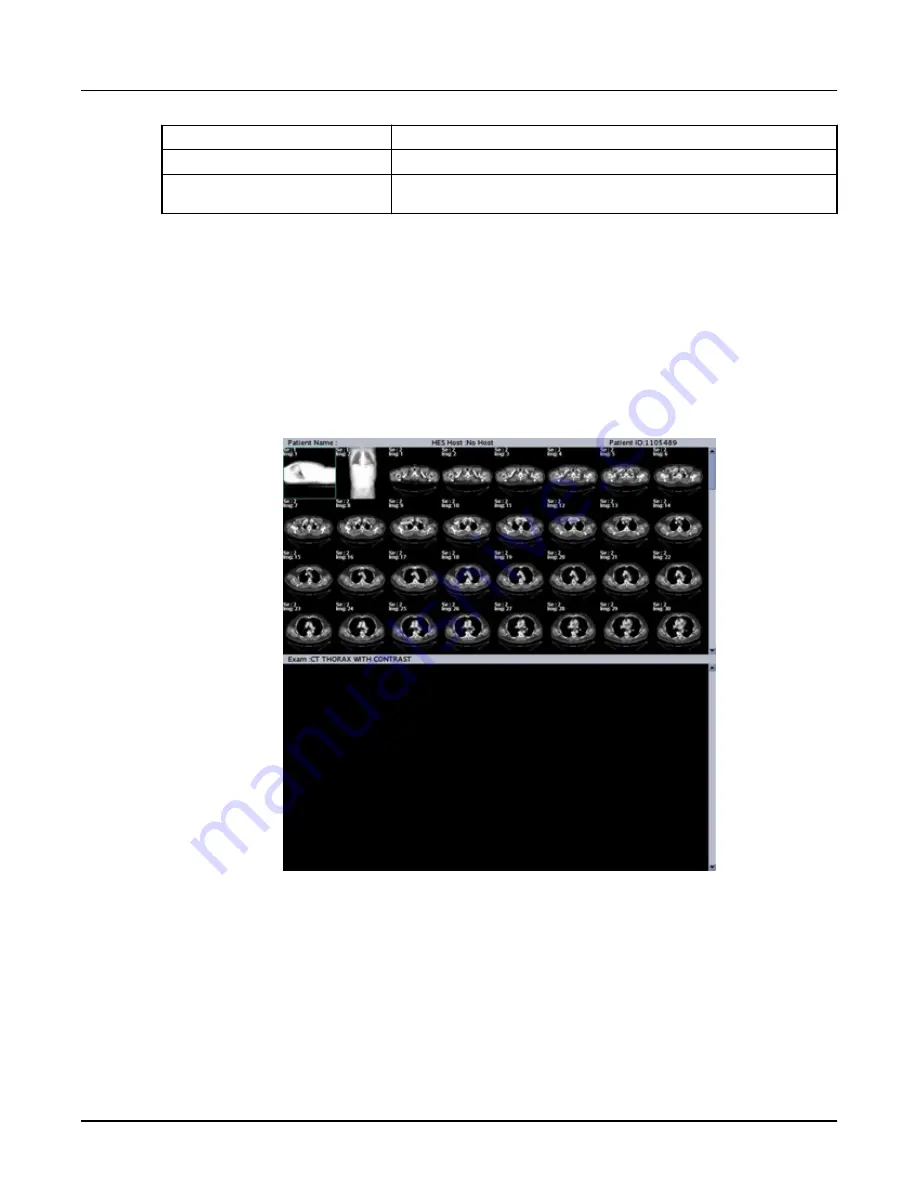
3. From the
Exam Split
window, click first image, press <Shift>, and click the last image to set
the range of images to be grouped together per procedure code.
Illustration 23: Example of the first slice highlighted for Exam Split range selection
procedure
4. From the
Procedures
list area, select a procedure that reflects the procedures selected from
Patient Schedule.
5. From the
Exam Split
control panel, click [Add].
Add select images to the procedure.
6. Adjust the W/L as needed in the exam area of the display.
To adjust the W/L use either the W/L Presets on the
Exam Split
control panel or use the
mouse.
Revolution CT User Manual
Direction 5480385-1EN, Revision 1
438
4 Exam Split


