Getting Started
p. 21
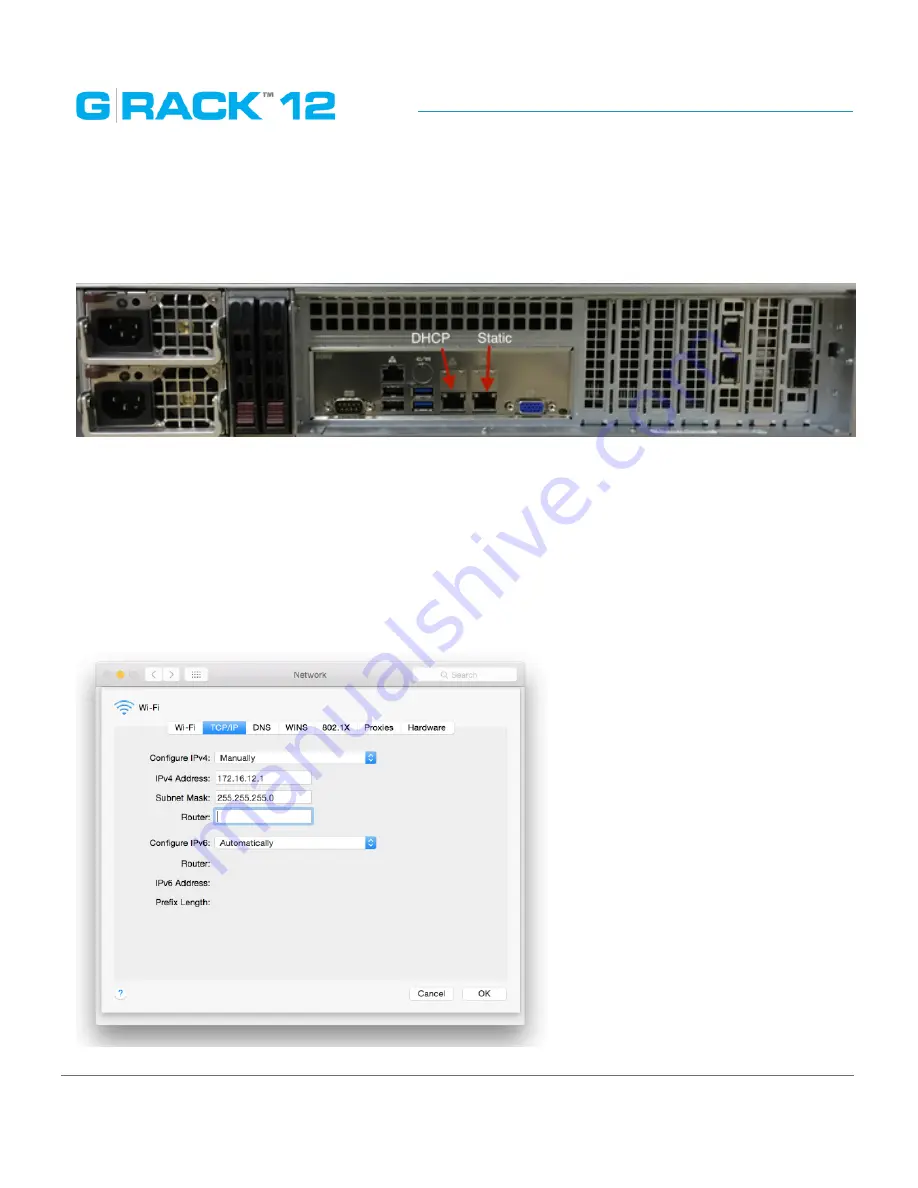
If not using DHCP, you can plug your primary network cable into [ETH1]. The default IP Address is
172.16.12.12. You can connect to the G-RACK 12 with this static IP address and with the G-RACK 12
Administration Tool you can change the IP address to what works best for you.
Using static IP, you will need to change your client computer’s IP address to match the static.
For OS X:
1. Open Network Preferences
2. Choose WiFi and click “Advanced”
3. Click on TCP/IP tab
4. Click the drop down menu and choose “manually”
5. Enter IP 172.16.12.12
6. Enter Netmask 255.255.255.0
Summary of Contents for G-RACK 12
Page 1: ......
Page 2: ...Copyrights...
Page 4: ...Introduction...
Page 9: ...Getting Started...
Page 12: ...Getting Started p 12 Front View Rear View...
Page 32: ...Administrative Tool...
Page 48: ...Administrative Tool p 48 Extended information from smartctl utility...
Page 92: ...Administrative Tool p 92 Comment Optional comment text box...
Page 109: ...Administrative Tool p 109 Example error message...
Page 124: ...Administrative Tool p 124 Memory usage Network interfaces...
Page 130: ...Hardware Description...
Page 159: ...Use Cases Tutorials...
Page 180: ...Use Cases Tutorials p 180...
Page 184: ...Use Cases Tutorials p 184 You need to click the enable slider to activate this option...
Page 191: ...Use Cases Tutorials p 191 Lastly a review is presented before the shares are created...
Page 192: ...Use Cases Tutorials p 192 Once you confirm the process starts...
Page 215: ...Use Cases Tutorials p 215 6 The RAID is ready...
Page 221: ...iSCSI Essentials...
Page 228: ...iSCSI Essentials p 228 Links and references https en wikipedia org wiki ISCSI...
Page 234: ...Troubleshooting...
Page 247: ...F A Q...
Page 272: ...Technical Support Warranty...
Page 283: ...Glossary...
Page 289: ...Appendices...


