


Hardware Description
p. 154
System Fans
Three 8-cm hot-swap fans provide the cooling for the system. It is very important that the chassis
top cover is properly installed and making a good seal in order for the cooling air to circulate
properly through the chassis and cool the components.
System Fan Failure
Fan speed is controlled by system temperature via IPMI. If a fan fails, the remaining fans will ramp up
to full speed and the overheat/fan fail LED on the control panel will turn on. Replace any failed fan
at your earliest convenience with the same type and model (the system can continue to run with a
failed fan). Remove the top chassis cover while the system is still running to determine which of the
fans has failed.
Caution:
Except for short periods of time, do not operate the server without the chassis cover in
place. The cover must be in place to allow proper air ow and prevent overheating.
Replacing System Fans
Three heavy-duty fans provide cooling for the chassis.
Replacing a System Fan
1. If necessary, open the chassis while the power is running to determine which fan requires
changing. Never run the server for an extended period of time with the chassis open.
2. Power down the server as described in section 4-1, lay the chassis on a fat, stable surface and
remove the chassis cover.
3. Remove the failed fan’s power cord from the motherboard.
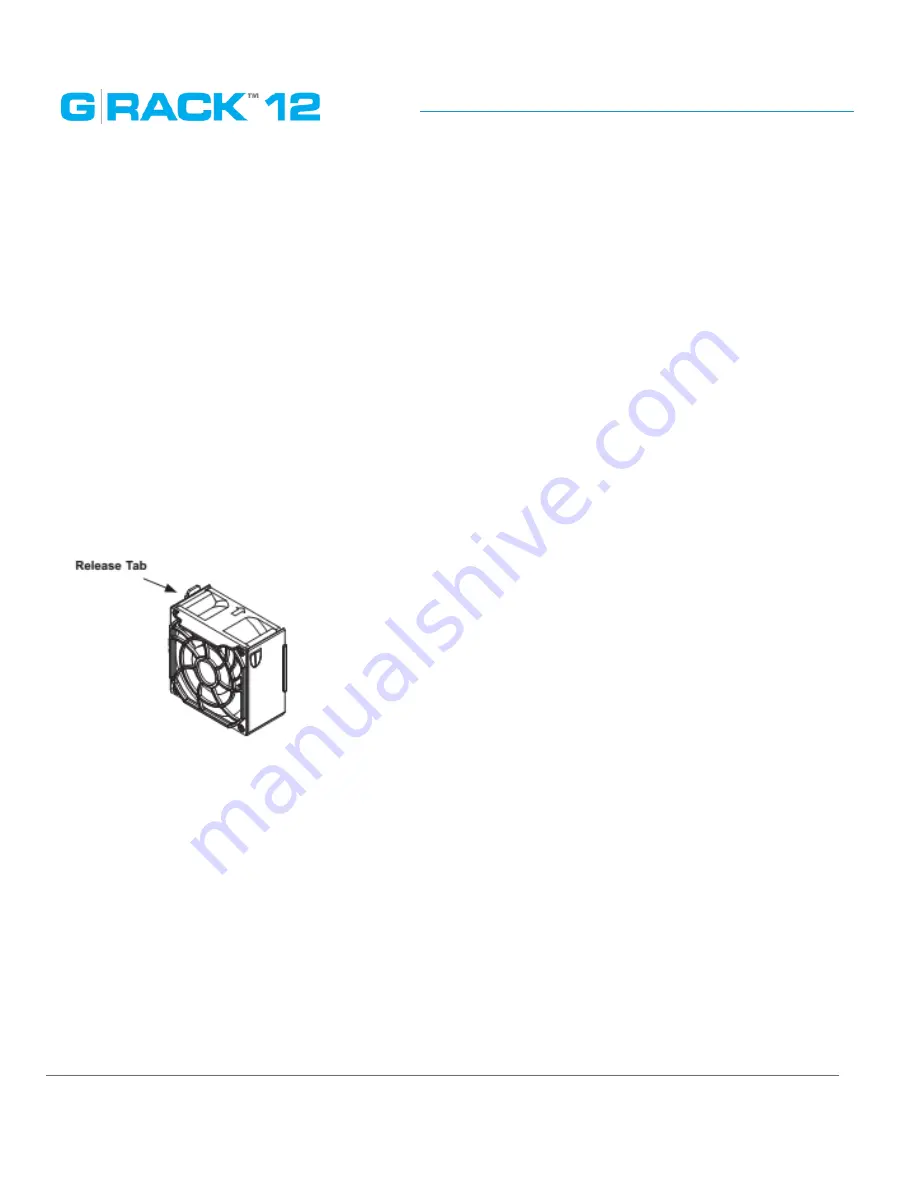
4. Press the fan release tab to lift the failed fan from the fan tray and pull it completely from the
chassis.
5. Place the new fan into the vacant space in the fan tray, while making sure the arrows on the top
of the fan (indicating air direction) point in the same direction as the arrows on the other fans.
6. Power up the system and check that the fan is working properly before replacing the chassis
cover.
Summary of Contents for G-RACK 12
Page 1: ......
Page 2: ...Copyrights...
Page 4: ...Introduction...
Page 9: ...Getting Started...
Page 12: ...Getting Started p 12 Front View Rear View...
Page 32: ...Administrative Tool...
Page 48: ...Administrative Tool p 48 Extended information from smartctl utility...
Page 92: ...Administrative Tool p 92 Comment Optional comment text box...
Page 109: ...Administrative Tool p 109 Example error message...
Page 124: ...Administrative Tool p 124 Memory usage Network interfaces...
Page 130: ...Hardware Description...
Page 159: ...Use Cases Tutorials...
Page 180: ...Use Cases Tutorials p 180...
Page 184: ...Use Cases Tutorials p 184 You need to click the enable slider to activate this option...
Page 191: ...Use Cases Tutorials p 191 Lastly a review is presented before the shares are created...
Page 192: ...Use Cases Tutorials p 192 Once you confirm the process starts...
Page 215: ...Use Cases Tutorials p 215 6 The RAID is ready...
Page 221: ...iSCSI Essentials...
Page 228: ...iSCSI Essentials p 228 Links and references https en wikipedia org wiki ISCSI...
Page 234: ...Troubleshooting...
Page 247: ...F A Q...
Page 272: ...Technical Support Warranty...
Page 283: ...Glossary...
Page 289: ...Appendices...