


Using the Printer Software with Windows
97
3
3
3
3
3
3
3
3
3
3
3
3
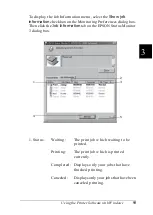
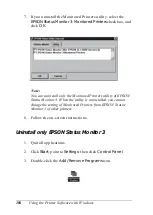
The following settings and buttons appear in the dialog box:
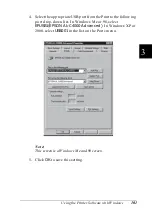
1.
Select Notification:
Use the check boxes in this area to
select the types of errors that you
wish to be notified about.
2.
Default
button:
Restores default settings.
3.
Select Shortcut Icon:
To use the shortcut icon, select the
Shortcut Icon
check box and
choose an icon. The icon you select
appears on the right side of the task
bar.
Once the shortcut icon is in the task
bar, you can double-click it to open
the EPSON Status Monitor 3 dialog
box. Alternatively, you can
right-click the shortcut icon and
select
Monitoring Preferences
to
open the Monitoring Preferences
dialog box, and
EPSON AL-C4000
Advanced
to open the EPSON
Status Monitor 3 dialog box.
4.
Show job information:* Displays the job information menu
in the EPSON Status Monitor 3
window.
5.
Notify when printing
completed:*
Displays the notification message
when your print job is finished.
6.
Allow monitoring of
shared printers
check
box:
To monitor a shared printer, select
this check box. You need to make
this setting on the server.
7.
OK
button:
Saves new changes.
8.
Cancel
button:
Cancels any changes.
Summary of Contents for AcuLaser C4000
Page 15: ...5 While the Data light is on or flashing While printing ...
Page 16: ...6 ...
Page 56: ...46 Paper Handling ...
Page 122: ...112 Using the Printer Software with Windows ...
Page 222: ...212 Functions of the Control Panel ...
Page 298: ...288 Maintenance and Transportation ...
Page 344: ...334 Troubleshooting ...
Page 370: ...360 Symbol Sets ...
Page 398: ...388 Working with Fonts ...
Page 420: ...410 Glossary ...


