NOTE:
Do not cover the ambient light sensor with any adhesive labels. If covered up, the ambient light sensor
automatically sets the display brightness to the minimum level.
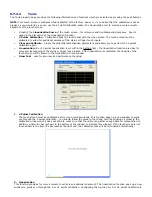
Figure 6 1 Ambient Light Sensor Location
1
Ambient light sensor
The ambient light sensor is disabled when your computer is shipped to you. If you enable the ambient light sensor and
then use any of the display brightness key combinations, the ambient light sensor is disabled and the display brightness is
increased or decreased accordingly.
Dell™ QuickSet allows you to enable or disable the ambient light sensor. You can also adjust maximum and minimum
brightness settings that are activated when you enable the ambient light sensor feature. For more information about
QuickSet, right-click the QuickSet icon in the taskbar, and click Help.
NOTE: Rebooting the computer returns the ambient light sensor to the last setting of enabled or disabled.
NOTE: The ambient light sensor adjusts the display backlighting on your portable computer only. It does not
control the brightness on any external monitors or projectors.
6.3
Switching the Video Image
When you start the computer with an external device (such as an external monitor or projector) attached and turned on,
the image may appear on either the computer display or the external device.
Press <Fn><F8> to switch the video image between the display only, the external device only, or the display and the
external device simultaneously.
6.4
Setting Display Resolution and Refresh Rate
To display a program at a specific resolution, both the graphics card and the display must support the program, and the
necessary video drivers must be installed.
Before you change any of the default display settings, make a note of the default settings for future reference.
NOTE: Use only the pre-installed video drivers, which are designed to offer the best performance with your pre-
installed operating system.
If you choose a resolution or color palette that is higher than the display supports, the settings adjust automatically to the
closest supported values.
1.
Click the Start button and click Control Panel.
2.
Under Pick a category, click Appearance and Themes.
3.
Under Pick a task..., click the area you want to change, or under or pick a Control Panel icon, click Display.
4.
In the Display Properties window, click the Settings tab.
5.
Try different settings for Color quality and Screen resolution.
NOTE:
As the resolution increases, icons and text appear smaller on the screen.
If the video resolution setting is higher than that supported by the display, the computer enters pan mode. In pan mode,

