


Adding and Replacing Parts
171
NOTICE:
Hard drives are extremely fragile; even a slight bump can damage the
drive.
NOTE:
Dell does not guarantee compatibility or provide support for hard drives
from sources other than Dell.
To replace the hard drive in the hard drive bay:
1
Follow the procedures in "Before You Begin" on page 149.
NOTE:
The number of hard drive screws may vary.
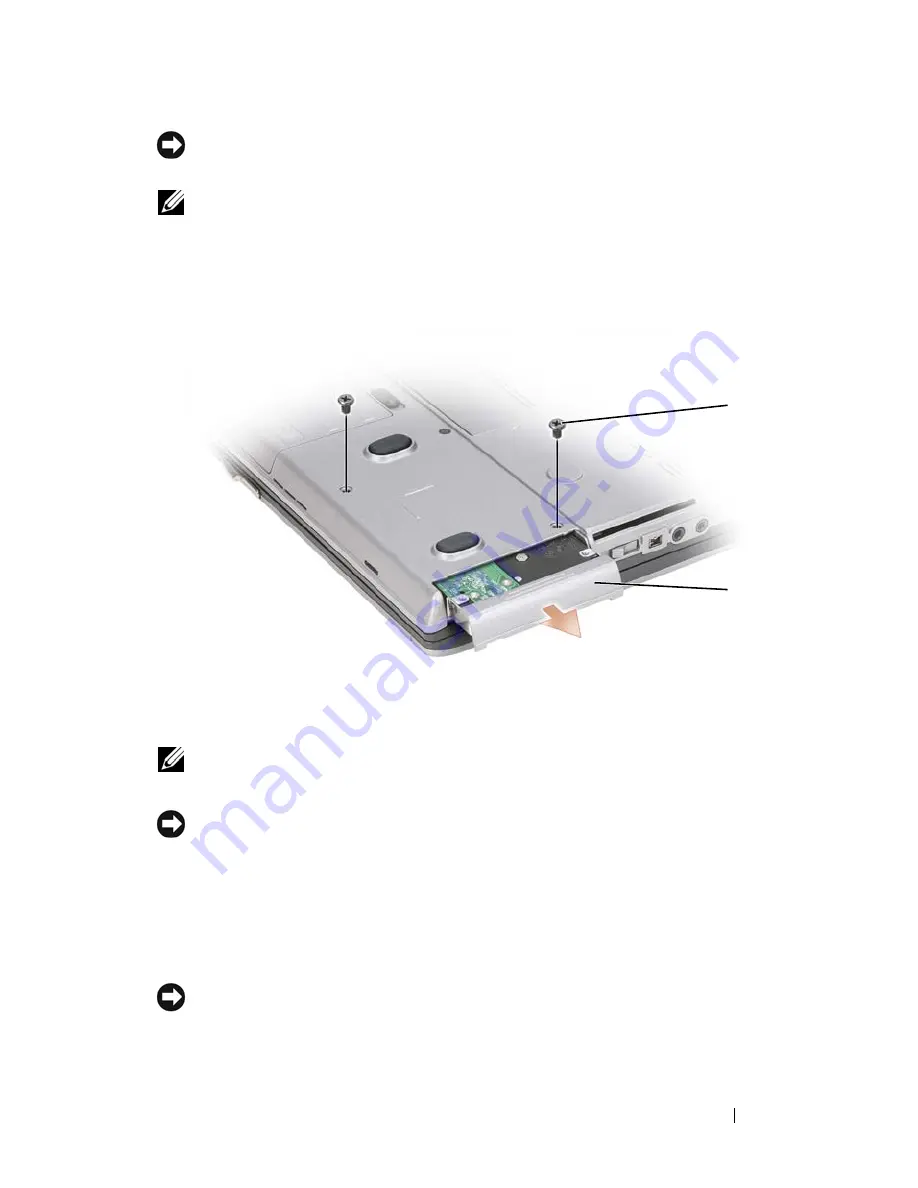
2
Remove the hard drive screws on the bottom of the computer.
NOTICE:
When the hard drive is not in the computer, store it in protective antistatic
packaging. See "Protecting Against Electrostatic Discharge" in the
Product
Information Guide
.
3
Slide the hard drive out of the computer.
4
Remove the new drive from its packaging.
Save the original packaging for storing or shipping the hard drive.
NOTICE:
Use firm and even pressure to slide the drive into place. If you use
excessive force, you may damage the connector.
5
Slide the hard drive into the bay until it is fully seated.
1
screws (2)
2
hard drive
1
2
Summary of Contents for D630 - LATITUDE ATG NOTEBOOK
Page 1: ...Dell Latitude D630 D630c User s Guide Model PP24L ...
Page 12: ...12 Macrovision Product Notice 202 Glossary 203 ...
Page 20: ...20 Finding Information ...
Page 21: ...About Your Computer 21 2 About Your Computer Front View 1 5 2 10 6 11 4 12 3 8 13 9 7 ...
Page 34: ...34 About Your Computer ...
Page 54: ...54 Using the Keyboard ...
Page 60: ...60 Using the Display ...
Page 72: ...72 Setting Up and Using Networks ...
Page 80: ...80 Using Multimedia ...
Page 98: ...98 ...
Page 130: ...130 Troubleshooting ...
Page 178: ...178 Dell QuickSet ...
Page 182: ...182 Traveling With Your Computer ...
Page 192: ...192Specifications ...
Page 200: ...200 Getting Help ...


