


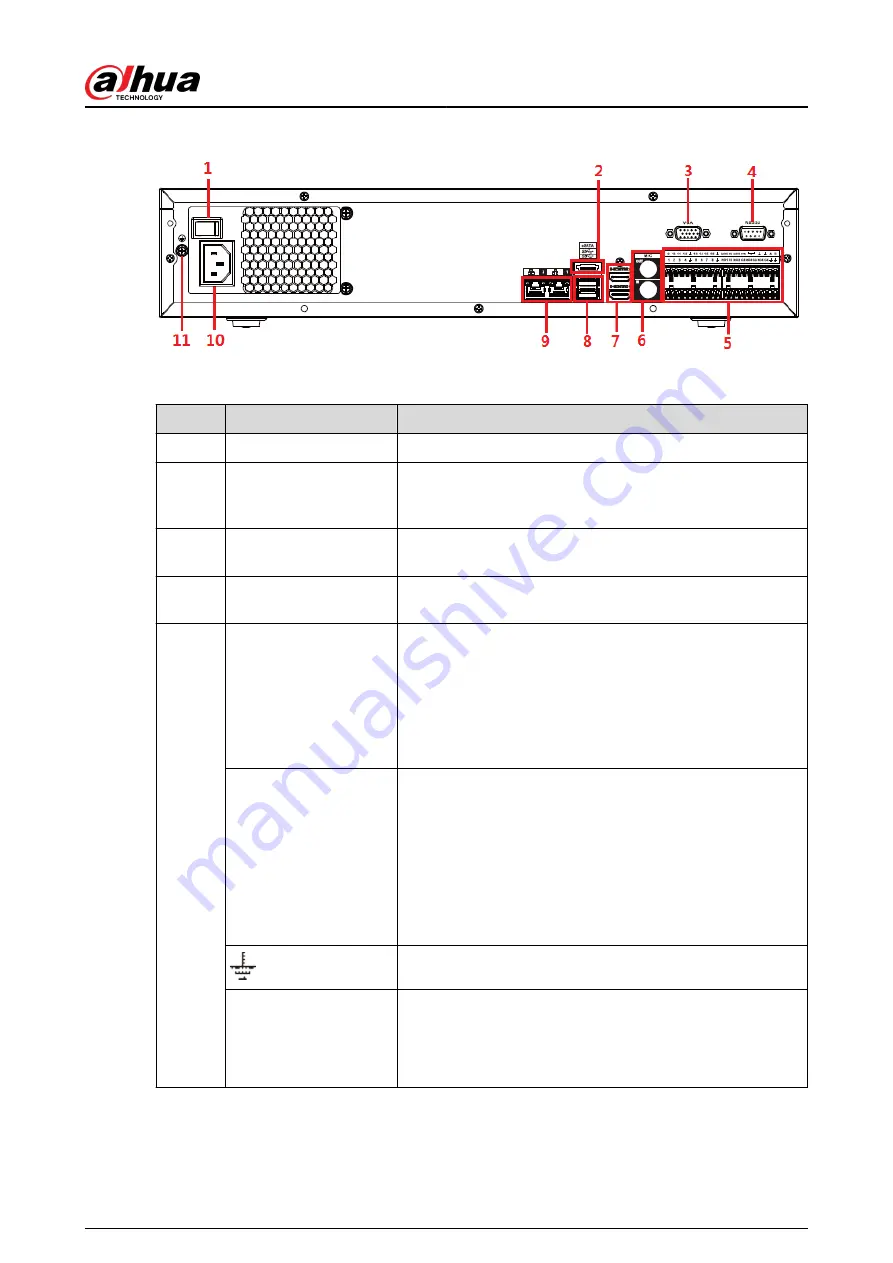
Figure 2-82 Rear panel
Table 2-39 Ports
No.
Port Name
Function
1
Power button
Turns on/off the NVR.
2
eSATA port
External SATA port. It can connect device with SATA port.
You need to jump the HDD when there is peripherally
connected HDD.
3
VGA port
VGA video output port. Output analog video signal. It can
connect to the monitor to view analog video.
4
RS-232 port
It is for general COM debugging to configure IP address and
transfer transparent COM data.
5
Alarm input port (1-16)
●
There are four groups: 1-4, 5-8, 9-12 and 13-16.
They receive signals from external alarm source. Alarm
input includes two types; NO (normal open) and NC
(normal close).
●
When your alarm input device is using external power,
make sure the device and the NVR have the same GND.
Alarm output port (NO1-
NO5, C1-C5, NC5)
●
Five groups of alarm output ports (Group 1: NO1-C1,
Group 2: NO2-C2, Group 3: NO3-C3, Group 4: NO4-C4,
Group 5: NO5, C5, NC5). Output alarm signal to the
external alarm device. Make sure power supply is
available for the external alarm device.
●
NO: Normal open alarm output port.
●
C: Alarm output public end.
●
NC: Normal close alarm output port.
GND. Alarm input ground port.
RS-485 port (A, B)
●
RS485_A port. Control cable A of the 485 device. It
connects external devices such as speed dome and PTZ.
●
RS485_B port. Control cable B of the 485 device. It
connects external devices such as speed dome and PTZ.
User's Manual
58
Summary of Contents for DHI-NVR5432-EI
Page 1: ...ZHEJIANG DAHUA VISION TECHNOLOGY CO LTD V2 3 4 Network Video Recorder User s Manual...
Page 89: ...Figure 2 103 Alarm input port 1 User s Manual 75...
Page 137: ...Figure 5 8 Unlock pattern login User s Manual 123...
Page 152: ...Figure 5 23 AcuPick human detection User s Manual 138...
Page 156: ...Figure 5 27 Shortcut menu 1 User s Manual 142...
Page 217: ...Figure 5 87 AcuPick human detection User s Manual 203...
Page 223: ...Figure 5 93 Custom search 2 Step 8 Configure the search conditions as needed User s Manual 209...
Page 335: ...Figure 5 203 TCP IP Step 2 Click to configure the NIC card and then click OK User s Manual 321...
Page 387: ...Figure 5 253 Pattern login User s Manual 373...
Page 444: ...Figure 5 314 Shutdown 2 User s Manual 430...
Page 471: ......


