D-Link DXS-3250/DXS-3227P/DXS-3227 User Guide
Page
31
4.
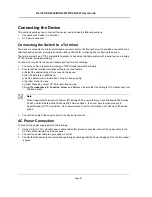
Activate the AC power receptacle.
When the power is turned on with the local terminal already connected, the switch goes through Power On Self
Test (POST). POST runs every time the device is initialized and checks hardware components to determine if the
device is fully operational before completely booting. If a critical problem is detected, the program flow stops. If
POST passes successfully, a valid executable image is loaded into RAM. POST messages are displayed on the
terminal and indicate test success or failure.
As the switch boots, the bootup test first counts the device memory availability and then continues to boot. The fol-
lowing screen is an example of the displayed POST.
The boot process runs approximately 30 seconds.
The auto-boot message that appears at the end of POST (see the last lines) indicates that no problems were
encountered during boot.
During boot, the Startup menu can be accessed if necessary to run special procedures. To enter the Startup menu,
press <Esc> or <Enter> within the first two seconds after the auto-boot message is displayed. For information on
the Startup menu, see "Startup Menu Functions."
If the system boot is not interrupted by pressing <Esc> or <Enter>, the system continues operation by decom-
pressing and loading the code into RAM. The code starts running from RAM and the list of numbered system ports
and their states (up or down) are displayed.
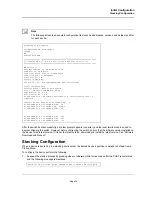
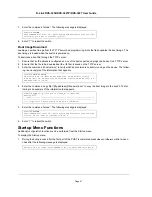
------ Performing the Power-On Self Test (POST) ------
UART Channel Loopback Test........................PASS
Testing the System SDRAM..........................PASS
Boot1 Checksum Test...............................PASS
Boot2 Checksum Test...............................PASS
Flash Image Validation Test.......................PASS
BOOT Software Version x.x.x.xx Built 07-Jan-200x 10:53:05
Processor: xxxxxx xxxxx xxxx, xx MByte SDRAM.
I-Cache 8 KB. D-Cache 8 KB. Cache Enabled.
Autoboot in 2 seconds - press RETURN or Esc. to abort and enter prom.
Summary of Contents for DXS-3250 - xStack Switch - Stackable
Page 9: ...Preface Intended Audience Page 8 ...
Page 274: ......
Page 275: ......
Page 285: ...Contacting D Link Technical Support Page 278 ...
Page 286: ...D Link DXS 3250 DXS 3227P DXS 3227 User Guide Page 279 ...
Page 287: ...Contacting D Link Technical Support Page 280 ...
Page 288: ...D Link DXS 3250 DXS 3227P DXS 3227 User Guide Page 281 ...
Page 289: ...Contacting D Link Technical Support Page 282 ...
Page 290: ...D Link DXS 3250 DXS 3227P DXS 3227 User Guide Page 283 ...
Page 291: ...Contacting D Link Technical Support Page 284 ...
Page 292: ...D Link DXS 3250 DXS 3227P DXS 3227 User Guide Page 285 ...
Page 293: ...Contacting D Link Technical Support Page 286 ...
Page 294: ...D Link DXS 3250 DXS 3227P DXS 3227 User Guide Page 287 ...
Page 295: ...Contacting D Link Technical Support Page 288 ...
Page 296: ...D Link DXS 3250 DXS 3227P DXS 3227 User Guide Page 289 ...
Page 297: ...Contacting D Link Technical Support Page 290 ...
Page 298: ...D Link DXS 3250 DXS 3227P DXS 3227 User Guide Page 291 ...
Page 299: ...Contacting D Link Technical Support Page 292 ...
Page 300: ...D Link DXS 3250 DXS 3227P DXS 3227 User Guide Page 293 ...
Page 301: ...Contacting D Link Technical Support Page 294 ...
Page 302: ...D Link DXS 3250 DXS 3227P DXS 3227 User Guide Page 295 ...
Page 303: ...Contacting D Link Technical Support Page 296 ...
Page 304: ...D Link DXS 3250 DXS 3227P DXS 3227 User Guide Page 297 ...
Page 305: ...Contacting D Link Technical Support Page 298 ...
Page 306: ...D Link DXS 3250 DXS 3227P DXS 3227 User Guide Page 299 ...
Page 307: ...Contacting D Link Technical Support Page 300 ...
Page 308: ...D Link DXS 3250 DXS 3227P DXS 3227 User Guide Page 301 ...
Page 309: ...Contacting D Link Technical Support Page 302 ...
Page 310: ...D Link DXS 3250 DXS 3227P DXS 3227 User Guide Page 303 ...

