Section 3. Initial Configuration
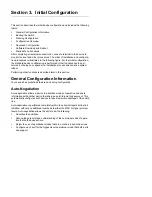
This section describes the initial device configuration and includes the following
topics:
•
General Configuration Information
•
Booting the Switch
•
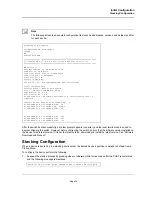
Stacking Configuration
•
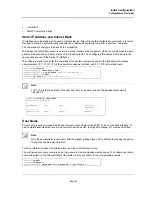
Configuration Overview
•
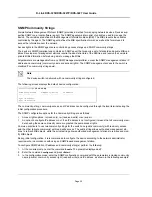
Advanced Configuration
•
Software Download and Reboot
•
Startup Menu Functions
After completing all external connections, connect a terminal to the device to
monitor the boot and other procedures. The order of installation and configura-
tion procedures is illustrated in the following figure. For the initial configuration,
the standard device configuration is performed. Other functions can be per-
formed, but doing so suspends the installation process and causes a system
reboot.
Performing other functions is described later in this section.
General Configuration Information
Your device has predefined features and setup configuration.
Auto-Negotiation
Auto-negotiation allows a device to advertise modes of operation and share
information with another device that shares a point-to-point link segment. This
automatically configures both devices to take maximum advantage of their abili-
ties.
Auto-negotiation is performed completely within the physical layers during link
initiation, without any additional overhead to either the MAC or higher protocol
layers. Auto-negotiation allows the ports to do the following:
•
Advertise their abilities
•
Acknowledge receipt and understanding of the common modes of opera-
tion that both devices share
•
Reject the use of operational modes that are not shared by both devices
•
Configure each port for the highest-level operational mode that both ports
can support
Summary of Contents for DXS-3250 - xStack Switch - Stackable
Page 9: ...Preface Intended Audience Page 8 ...
Page 274: ......
Page 275: ......
Page 285: ...Contacting D Link Technical Support Page 278 ...
Page 286: ...D Link DXS 3250 DXS 3227P DXS 3227 User Guide Page 279 ...
Page 287: ...Contacting D Link Technical Support Page 280 ...
Page 288: ...D Link DXS 3250 DXS 3227P DXS 3227 User Guide Page 281 ...
Page 289: ...Contacting D Link Technical Support Page 282 ...
Page 290: ...D Link DXS 3250 DXS 3227P DXS 3227 User Guide Page 283 ...
Page 291: ...Contacting D Link Technical Support Page 284 ...
Page 292: ...D Link DXS 3250 DXS 3227P DXS 3227 User Guide Page 285 ...
Page 293: ...Contacting D Link Technical Support Page 286 ...
Page 294: ...D Link DXS 3250 DXS 3227P DXS 3227 User Guide Page 287 ...
Page 295: ...Contacting D Link Technical Support Page 288 ...
Page 296: ...D Link DXS 3250 DXS 3227P DXS 3227 User Guide Page 289 ...
Page 297: ...Contacting D Link Technical Support Page 290 ...
Page 298: ...D Link DXS 3250 DXS 3227P DXS 3227 User Guide Page 291 ...
Page 299: ...Contacting D Link Technical Support Page 292 ...
Page 300: ...D Link DXS 3250 DXS 3227P DXS 3227 User Guide Page 293 ...
Page 301: ...Contacting D Link Technical Support Page 294 ...
Page 302: ...D Link DXS 3250 DXS 3227P DXS 3227 User Guide Page 295 ...
Page 303: ...Contacting D Link Technical Support Page 296 ...
Page 304: ...D Link DXS 3250 DXS 3227P DXS 3227 User Guide Page 297 ...
Page 305: ...Contacting D Link Technical Support Page 298 ...
Page 306: ...D Link DXS 3250 DXS 3227P DXS 3227 User Guide Page 299 ...
Page 307: ...Contacting D Link Technical Support Page 300 ...
Page 308: ...D Link DXS 3250 DXS 3227P DXS 3227 User Guide Page 301 ...
Page 309: ...Contacting D Link Technical Support Page 302 ...
Page 310: ...D Link DXS 3250 DXS 3227P DXS 3227 User Guide Page 303 ...

