207
5
Vie
w
er
Ref
erence
●
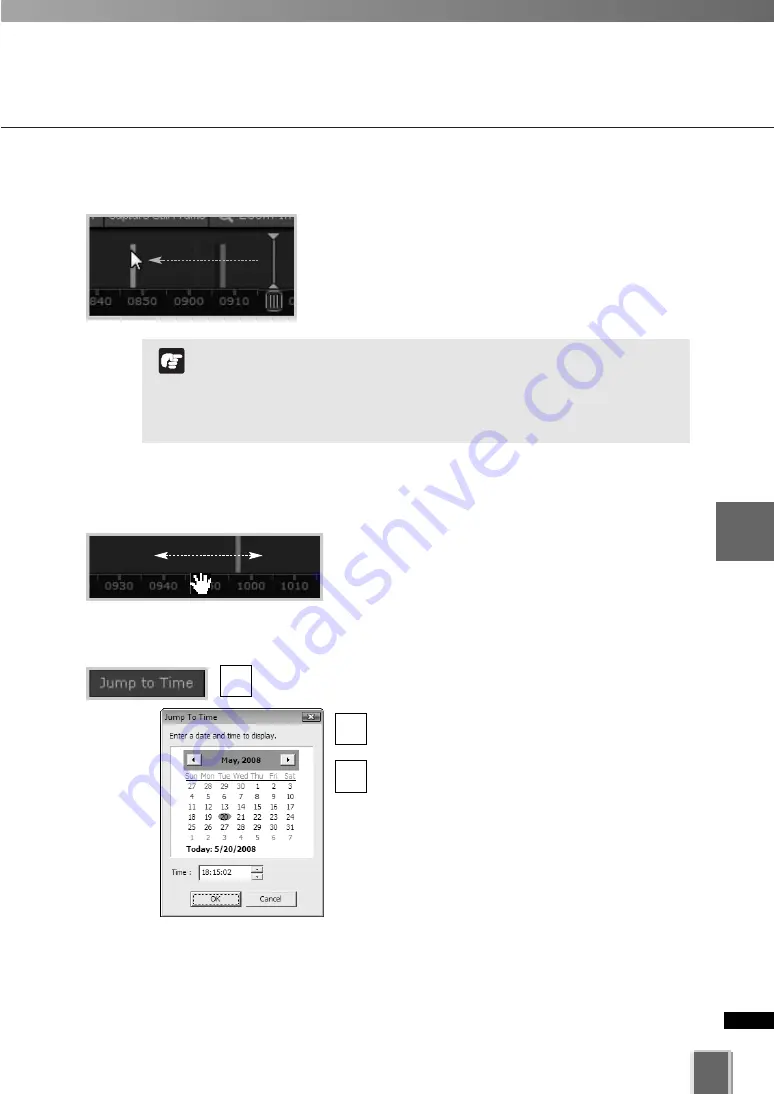
Jump to time entered
Select a Video Window and click
Jump to Time
.
The
Jump to Time
dialog opens. Select a day
and/or time.
Click
OK
.
The Playhead and Timeline will move to the
time selected. If no Video Windows are
selected, only the timeline is moved.
Using the calendar is shown below.
3
2
1
Use Timeline and View Events
●
Click in the Event Display Area of the Timeline
Click in the Event Display Area of the Timeline. The
Playhead will move to that location and playback of
recorded video commences from that time.
When you choose to play back video, the video is played. The
response and smoothness of the play back may depend on
network traffic and other properties of the network.
The time displayed on the Timeline is the time of PC where the
Viewer is running.
Note
●
Click and drag the time bar to move through the Timeline
Move your mouse pointer over the time bar and it
becomes a hand. Click and drag to the left or right to
move back or forward in time. You can only scroll
right to the current time, or “live” time.
Summary of Contents for VK-16 v2.0
Page 13: ...Chapter 1 System Overview ...
Page 15: ...15 1 System Overview ...
Page 42: ...42 ...
Page 43: ...Chapter 2 Installation ...
Page 49: ...Chapter 3 Storage Server Configuration Reference ...
Page 75: ...Chapter 4 Register Camera Server and Set Recording Schedule ...
Page 152: ...152 ...
Page 153: ...Chapter 5 Viewer Reference ...
Page 155: ...155 5 Viewer Reference ...
Page 218: ...218 ...
Page 219: ...Chapter 6 Operation and Management ...
Page 227: ...Chapter 7 Backup Scheme ...
Page 243: ...Chapter 8 System Maintenance ...
Page 250: ...250 ...
Page 251: ...Chapter 9 Troubleshooting ...
Page 290: ...290 ...
Page 291: ...Appendix ...
Page 301: ...301 ...


