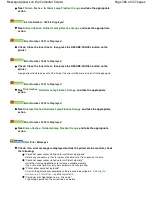
6000 Is Displayed
If any object is placed in front of the printer, remove it.
Open the Paper Output Tray gently, then turn the power off and back on.
Four-Digit Alphanumeric and "Printer error has occurred." Is Displayed
Turn off the printer, and unplug the power cord of the printer from the power supply.
Plug the printer back in and turn the printer back on.
If the problem is not resolved, contact the service center.
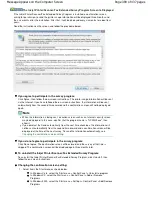
Error Regarding Automatic Duplex Printing Is Displayed
Check: See
Cannot Print Properly with Automatic Duplex Printing
and take the
appropriate action.
Error Regarding Automatic Print Head Alignment Is Displayed
Check: See
Eleven flashes:
in
Alarm Lamp Flashes Orange
and take the
appropriate action.
Writing Error/Output Error/Communication Error
Check 1: If the Power lamp is off, make sure that the power plug is plugged in,
then turn the printer on.
While the
Power
lamp is flashing green, the printer is initializing. Wait until the
Power
lamp
stops flashing and remains lit green.
Check 2: Make sure that the printer port is configured appropriately in the printer
driver.
* In the following instructions, "
XXX
" signifies your printer's name.
1.
Log on as a user account with administrator privilege.
2.
Click Control Panel, then Printer under Hardware and Sound.
In Windows XP, click Control Panel, Printers and Other Hardware, then Printers and
Faxes.
In Windows 2000, click Control Panel then Printers.
3.
Right-click the Canon XXX icon, then select Properties.
4.
Click the Ports tab to confirm the port settings.
Make sure that a port named USBnnn (where "n" is a number) with Canon XXX appearing
in the Printer column is selected for Print to the following port(s).
If the port setting is not correct, reinstall the printer driver or change the port setting
according to the interface you are using.
Check 3: Make sure that the USB cable is securely plugged in to the printer and
the computer.
If you are using a relay device such as a USB hub, disconnect it, connect the printer
directly to the computer, and try printing again. If printing starts normally, there is a
problem with the relay device. Consult the reseller of the relay device for details.
There could also be a problem with the USB cable. Replace the USB cable and try
printing again.
Check 4: Make sure that the printer driver is installed correctly.
Page 396 of 437 pages
Message Appears on the Computer Screen
Summary of Contents for iP4700 - PIXMA Color Inkjet Printer
Page 29: ...Page top Page 29 of 437 pages Loading Paper ...
Page 33: ...Page top Page 33 of 437 pages Loading Paper in the Cassette ...
Page 47: ...Page top Page 47 of 437 pages Replacing an Ink Tank ...
Page 50: ...Page top Page 50 of 437 pages Checking the Ink Status ...
Page 52: ...Page top Page 52 of 437 pages When Printing Becomes Faint or Colors Are Incorrect ...
Page 105: ...Page top Page 105 of 437 pages What Is Easy PhotoPrint EX ...
Page 107: ...How Do I Print with Even Margins Page top Page 107 of 437 pages Printing Photos ...
Page 133: ...See Help for details on the Edit screen Page top Page 133 of 437 pages Editing ...
Page 142: ...Page top Page 142 of 437 pages Printing ...
Page 151: ...Adjusting Images Page top Page 151 of 437 pages Correcting and Enhancing Photos ...
Page 190: ...Page top Page 190 of 437 pages Printing an Index ...
Page 192: ...Page top Page 192 of 437 pages Printing ID Photos ID Photo Print ...
Page 211: ...Page top Page 211 of 437 pages Printing Dates on Photos ...
Page 232: ...Page top Page 232 of 437 pages Borderless Printing ...
Page 291: ...Page top Page 291 of 437 pages Smoothing Jagged Outlines ...
Page 324: ...Page top Page 324 of 437 pages About PictBridge Print Settings ...
Page 356: ...Page top Page 356 of 437 pages If an Error Occurs ...
Page 421: ...Page top Page 421 of 437 pages Installing the Printer Driver ...
Page 435: ...Page top Page 435 of 437 pages Using Easy PhotoPrint EX ...


