4.
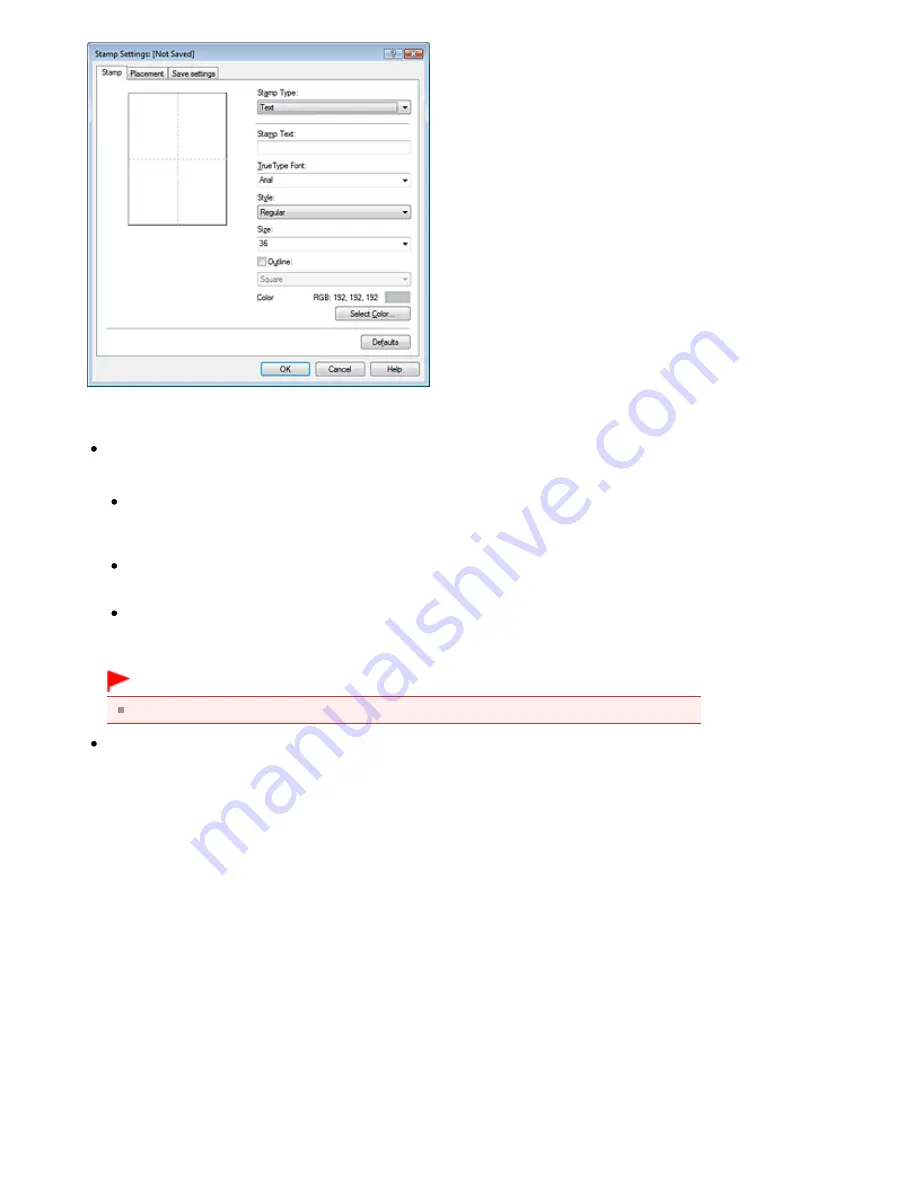
Configure the stamp while viewing the preview window
Stamp tab
Select Text, Bitmap, or Date/Time/User Name that matches your purpose for Stamp Type.
For Text registration, the characters must already be entered in Stamp Text. If necessary,
change the TrueType Font, Style, Size, and Outline settings. You can select the color of the
stamp by clicking Select Color....
For Bitmap, click Select File... and select the bitmap file (.bmp) to be used. If necessary,
change the settings of the Size and Transparent white area.
For Date/Time/User Name, the creation date/time and user name of the printed object are
displayed in Stamp Text. If necessary, change the settings of TrueType Font, Style, Size, and
Outline. You can select the color of the stamp by clicking Select Color....
Important
Stamp Text appears grayed out and is unavailable when Date/Time/User Name is selected.
Placement tab
Select the stamp position from the Position list. You can also select Custom from the Position
list and specify coordinates for X-Position and Y-Position.
You can also change the stamp position by dragging the stamp in the preview window.
To change the stamp position angle, type a value in the Orientation box directly.
5.
Save the stamp
Click the Save settings tab and enter a title in the Title box, and then click Save.
Click OK when the confirmation message appears.
6.
Complete the setup
Click OK. The Stamp/Background dialog box opens again.
The registered title appears in the Stamp list.
Changing and Registering Some of Stamp Settings
1.
Select the stamp for which the settings are to be changed
Check the Stamp check box in the Stamp/Background dialog box, and then select the title of the
stamp to be changed from the Stamp list.
Page 252 of 437 pages
Registering a Stamp
Summary of Contents for iP4700 - PIXMA Color Inkjet Printer
Page 29: ...Page top Page 29 of 437 pages Loading Paper ...
Page 33: ...Page top Page 33 of 437 pages Loading Paper in the Cassette ...
Page 47: ...Page top Page 47 of 437 pages Replacing an Ink Tank ...
Page 50: ...Page top Page 50 of 437 pages Checking the Ink Status ...
Page 52: ...Page top Page 52 of 437 pages When Printing Becomes Faint or Colors Are Incorrect ...
Page 105: ...Page top Page 105 of 437 pages What Is Easy PhotoPrint EX ...
Page 107: ...How Do I Print with Even Margins Page top Page 107 of 437 pages Printing Photos ...
Page 133: ...See Help for details on the Edit screen Page top Page 133 of 437 pages Editing ...
Page 142: ...Page top Page 142 of 437 pages Printing ...
Page 151: ...Adjusting Images Page top Page 151 of 437 pages Correcting and Enhancing Photos ...
Page 190: ...Page top Page 190 of 437 pages Printing an Index ...
Page 192: ...Page top Page 192 of 437 pages Printing ID Photos ID Photo Print ...
Page 211: ...Page top Page 211 of 437 pages Printing Dates on Photos ...
Page 232: ...Page top Page 232 of 437 pages Borderless Printing ...
Page 291: ...Page top Page 291 of 437 pages Smoothing Jagged Outlines ...
Page 324: ...Page top Page 324 of 437 pages About PictBridge Print Settings ...
Page 356: ...Page top Page 356 of 437 pages If an Error Occurs ...
Page 421: ...Page top Page 421 of 437 pages Installing the Printer Driver ...
Page 435: ...Page top Page 435 of 437 pages Using Easy PhotoPrint EX ...


