4
What the imageRUNNER 400/330 Series Can Do
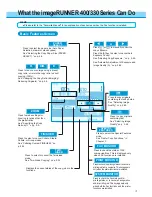
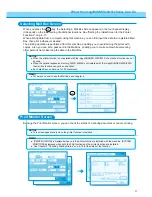
Press to set or cancel the Different Size Original mode. This mode
enables you to feed different-size originals together in one group in the
feeder providing that the leading edge of each page is the same length.
See “Feeding Different-size Originals Together in the Feeder (DIF. SIZE
ORIGINAL),” on p. 3-10.
Press to select or cancel the Shift mode.
This mode enables you to shift the
position of the original image on the copy
sheet.
See “Making Copies with Original Images
Shifted (SHIFT),” on p. 3-13.
SHIFT
Press to select or cancel the Margin
mode. This mode enables you to create
margins along the sides of copies.
See “Making Copies with Margins
(MARGIN),” on p. 3-14.
MARGIN
Press to select or cancel the Frame Erase mode. This mode
enables you to eliminate dark border areas and lines that
appear around original images, or shadows from punched
holes.
See “Erasing Shadows and Frame Lines from Copies
(FRAME ERASE),” on p. 3-16.
Press to select or cancel the Image Combination mode. This
mode enables you to automatically reduce two, four or eight
originals to fit on a single-sided or two-sided copy sheet.
See “Reducing Two, Four or Eight Originals to Fit on a
Single Copy Sheet (IMAGE COMB.),” on p. 3-20.
Press to select or cancel the Image Separation mode. This mode enables
you to divide an original into 2 or 4 sections and enlarge each section onto
a copy sheet of specified size.
See “Dividing an Original Into Equal Sections and Enlarging Each Section
on a Separate Copy Sheet (IMAGE SEPARATION),” on p. 3-24.
SHARPNESS
Press to select or cancel the Two-page Separation mode.
This mode enables you to copy two pages of an opened
book onto separate copy sheets in one step.
See “Making Copies of Facing Pages in a Book onto Two
Separate Copy Sheets in One Step (TWO-PAGE
SEPARATION),” on p. 3-2.
Press to copy two pages originals or two
pages of an opened book onto a single
sheet of copy paper.
See “Superimposing Two Original
Images on a Single Copy Sheet
(OVERLAY),” on p. 3-7.
Press to store or recall copy jobs.
See “Storing Often Used Copy Settings in Memory
(MODE MEMORY),” on p. 3-32.
Press to recall a previously set copy job.
See “Recalling a Previous Copy Job (RECALL),” on p. 3-39.
REC.
BOOKLET
Press when making copies of several
originals for a booklet.
See “Making Copies for Use as a Booklet
(BOOKLET),” on p. 3-11.
NEGA/POSI
Press to make copies with the entire
black/white image inverted.
See “Inverting Original Images (NEGA/
POSI),” on p. 3-27.
Special Features Screen
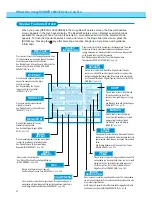
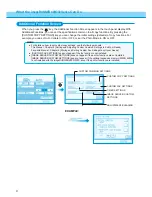
When you press [SPECIAL FEATURES] in the Copy Basic Features screen, the Special Features
screen appears in the touch panel display. The Special Features screen displays special functions
available for copying. When a function is selected, a more detailed screen for the selected mode
appears. To close the Special Features screen and return to the Basic Features screen, press the
[DONE] key. Pressing the
Guide
key after selecting a function brings up a help screen with guidance
information.
Press to select or cancel the Transparency Interleaving mode. This mode
enables you to insert a blank sheet between each transparency when
copying transparencies. It is also possible to have the same image printed
on the inserted sheet as on the transparency.
See “Making Copies with Sheets of Paper Interleaved between
Transparencies (TRANSP. INTERLVING),” on p. 3-4.
Press to select or cancel the Sharpness mode. This mode enables you to
make copies of original images with the contrast reproduced more sharply.
See “Making Sharp Contrast Copies (SHARPNESS),” on p. 3-28.
TWO-PAGE
SEPARATION
MODE
MEMORY
IMAGE
SEPARATION
IMAGE
COMB.
FRAME
ERASE
DIF. SIZE
ORIGINAL
TRANSP.
INTERLVING
OVERLAY
Press to repeatedly copy the image of an original
in either the lengthwise or widthwise direction.
See “Making Copies with the Original Image
Repeated (IMAGE REPEAT),” on p. 3-30.
IMAGE
REPEAT


