sm00569
Figure 2-121. Fork Seal Driver
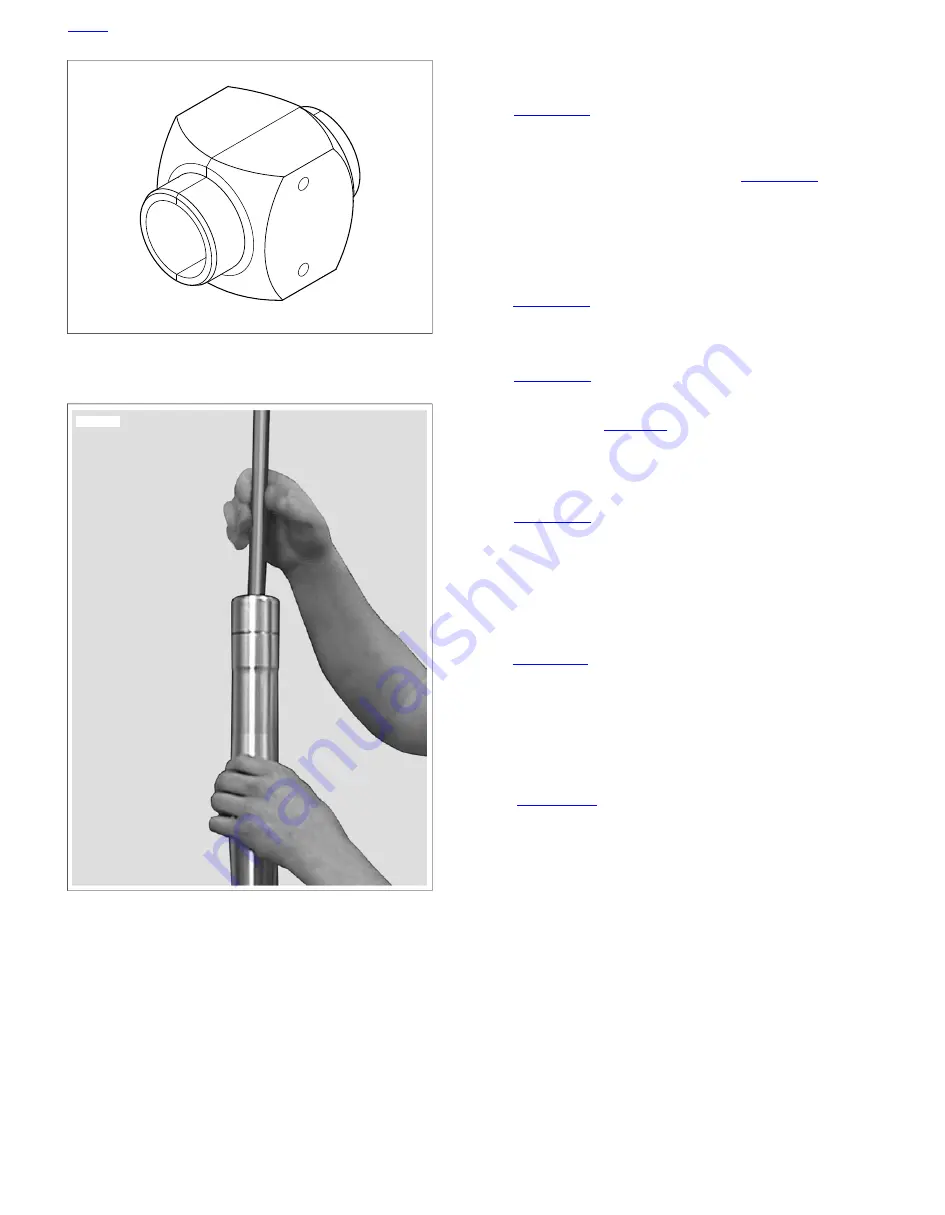
sm03830
Figure 2-122. Damper Rod Retrieval Tool
Final Assembly
1.
Once again install the bottom of the slider tube (22) in the
vise using soft jaws.
NOTES
•
The recommended fork oil is hydraulic fork oil Type "E"
(Part No. HD-99884-80).
•
The fork spring should not be installed for this part of the
procedure.
2.
With the fork fully collapsed, fill the fork with oil until it
reaches the threads on the outer tube.
3.
See
. Obtain damper rod retrieval tool found
in the Race Tech Inc. FORK BLEED TOO SET. Thread
damper rod retrieval tool found in the Race Tech Inc.
DAMPER ROD RETRIEVAL TOOL (Part No. TBFT 02S)
onto end of damper rod assembly (6). See
NOTE
While pumping the outer tube up and down be sure not to
exceed the travel of the fork assembly.
4.
Pump the outer tube up and down approximately 6 inches
10 times.
5.
. Collapse the fork again and once bub-
bling has stopped, pump the damping rod up and down
its full stroke until consistent resistance is felt for the entire
stroke.
6.
See
. With fork completely collapsed, adjust
fork oil level with FRONT FORK OIL LEVEL GAUGE (Part
No. B-59000A) to the specified level below the top of the
outer tube. Refer to
.
NOTE
When installing the fork spring verify that the tighter wound
portion of the spring is installed down.
7.
See
. Install the fork spring (12), fork spring
joint (11) and fork spring collar (10) over the damper rod
retrieval tool.
NOTE
Be sure to never over compress the fork assembly.
8.
Remove the fork slider from the vise and install the fork
assembly in the front fork compressor.
9.
See
. Compress the fork spring until you have
access to the damper rod assembly with jamnut.
10. Remove the damper rod retrieval tool while holding onto
the damper rod with your fingers.
NOTE
Make sure you place the damper rod jamnut at the bottom of
the threads.
11. See
. If the fork push rod (4) has been
removed from the fork cap assembly (1) install at this time.
12. When installing the fork push rod with fork cap, insert it
into the damper rod and allow it to float down until it stops.
13. Thread the fork cap onto the damper rod until it stops. Do
not tighten.
NOTE
Before tightening the damper rod jamnut, back the rebound
adjuster out 1/4 turn to prevent damage to the tapered end of
the fork push rod.
14. Thread the damper rod jamnut until bottoms lightly on the
rebound adjuster assembly in the fork cap.
15. Tighten the damper rod jamnut (2) to 22-30 ft-lbs (29.8-
40.7 Nm).
16. Remove the fork assembly from the front fork compressor
and install in the fork holding tool and install in vise.
2-88 2010 XB Service: Chassis
Summary of Contents for XB 2010
Page 1: ...2010 Buell XB Models Service Manual 99490 10Y 2009 Buell Motorcycle Company ...
Page 4: ...Blank Text Here ...
Page 6: ...NOTES ...
Page 22: ...NOTES ...
Page 78: ...1 56 2010 XB Service Maintenance NOTES ...
Page 80: ...NOTES ...
Page 268: ...NOTES ...
Page 306: ...sm00134 Figure 3 46 Valve Spring Compressor HOME 3 38 2010 XB Service Engine ...
Page 338: ...sm00207 Figure 3 98 Flanged Oil Line HOME 3 70 2010 XB Service Engine ...
Page 364: ...3 96 2010 XB Service Engine NOTES ...
Page 366: ...NOTES ...
Page 410: ...4 44 2010 XB Service Fuel System NOTES ...
Page 412: ...NOTES ...
Page 472: ...5 60 2010 XB Service Drive Transmission NOTES ...
Page 474: ...NOTES ...
Page 488: ...sm00366 Figure 6 13 Boot Gap HOME 6 14 2010 XB Service Electrical ...
Page 570: ...6 96 2010 XB Service Electrical NOTES ...
Page 572: ...NOTES ...
Page 596: ...NOTES ...
Page 610: ......
Page 620: ...B 24 2010 XB Service Appendix B Wiring NOTES ...
Page 622: ...NOTES ...
Page 626: ...C 4 2010 XB Service Appendix C Conversions NOTES ...
Page 628: ...NOTES ...
Page 666: ...D 38 2010 XB Service Appendix D Hose and Wire Routing NOTES ...
Page 668: ...NOTES ...
Page 674: ...E 6 2010 XB Service Appendix E Active Intake Japanese Models NOTES ...
Page 675: ...TABLE OF CONTENTS SUBJECT PAGE NO F 1 GLOSSARY F 1 APPENDIX F GLOSSARY ...
Page 676: ...NOTES ...
Page 680: ...F 4 2010 XB Service Appendix F Glossary NOTES ...
Page 706: ...XXVI TORQUE VALUES NOTES ...


