


220
ScreenPRO-II Controller • User’s Guide
6. Operations
Operational Configuration
råÇÉêëí~åÇáåÖ=o~ëíÉê=_çñÉë
With ScreenPRO-II Controller,
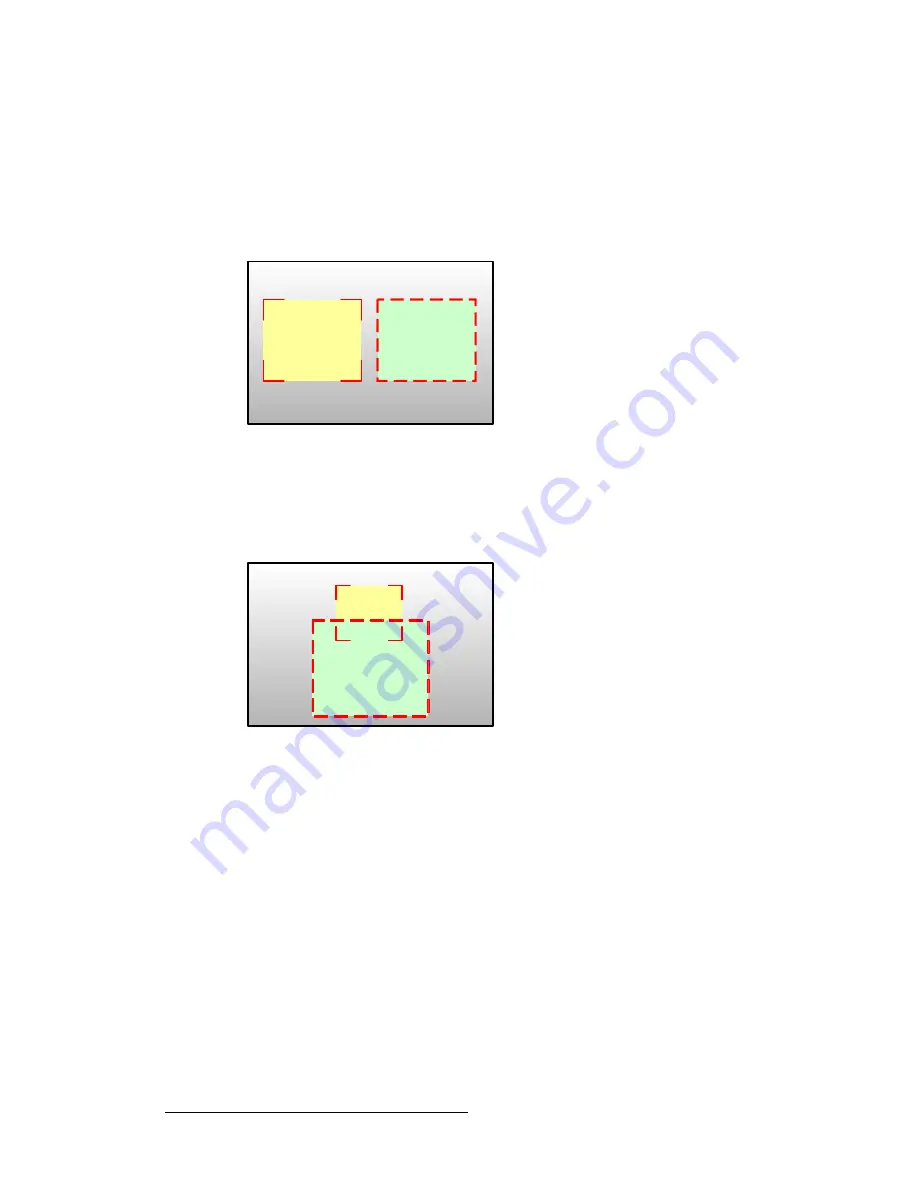
Raster Boxes
are always enabled on Preview, each PIP or
Key is surrounded by a thin border that helps you identify the PIP or Key’s original layer.
•
The PIP or Key with a red “corner” style raster box is
Layer A
.
•
The PIP or Key with a red “dashed” raster box is
Layer B
.
Figure 6-5.
Raster Box Styles (sample)
•
The "blinking" raster box is always the one enabled for modification, and its
corresponding layer button will blink.
•
Raster boxes that are
underneath
other layers (such as another PIP, the DSK or
the LOGO) are still visible on Preview.
Figure 6-6.
Raster Box Visibility (sample)
Remember that Raster Box size can be adjusted:
1.
From the
Home Menu
, press
OUTPUT
to display the
Output Menu
.
2.
On the
Destination
Bus
, select the destination that you want to configure.
3.
Press
{
SETTINGS
}
to display the
Settings Menu
.
4.
On the
Raster Box Size
line, set the size of the raster box that appears around
PIPs and Keys.
PIP A
PIP B
PIP A
PIP B
Summary of Contents for ScreenPRO-II
Page 1: ...r d p molJff Manual 26 0505000 00 Revision A...
Page 14: ...14 ScreenPRO II Controller User s Guide Table of Contents...
Page 52: ...52 ScreenPRO II Controller User s Guide 2 Hardware Orientation Front Panel Sections...
Page 214: ...214 ScreenPRO II Controller User s Guide 5 System Setup Backup to Flash Memory Card...
Page 266: ...266 ScreenPRO II Controller User s Guide K p ScreenPRO II Input and Output Resolutions...


