26
Installing the Autosampler
Installing the Autosampler
Installing the Autosampler
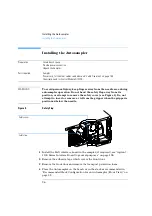
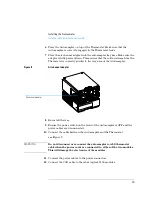
WA R N I N G
To avoid personal injury, keep fingers away from the needle area during
autosampler operation. Do not bend the safety flap away from its
position, or attempt to remove the safety cover (see Figure 5). Do not
attempt to insert or remove a vial from the gripper when the gripper is
positioned below the needle.
Figure 5
Safety Flap
1
Install the LAN interface board in the sampler (if required), see “Agilent
1100 Series Interface Board to general purposes” on page 198.
2
Remove the adhesive tape which covers the front door.
3
Remove the front door and remove the transport protection foam.
4
Place the Autosampler on the bench or in the stack as recommended in
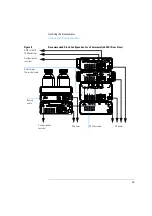
“Recommended Stack Configuration for an Autosampler (Front View)” on
page 22.
Preparation
Locate bench space
Provide power connection
Unpack the Sampler
Parts required
Sampler
Power cord, for the other cables see below and “Cable Overview” on page 185
Chemstation and/or Control Module G1323B.
Safety flap
Safety cover
Summary of Contents for G1313A
Page 1: ...s1 Agilent 1100 Series Standard Micro and Preparative Autosamplers Reference Manual ...
Page 3: ...Reference Manual Agilent 1100 Series Standard Micro and Preparative Autosamplers ...
Page 12: ...12 Contents ...
Page 39: ...2 2 Optimizing Performance How to optimize the autosamplers to achieve best results ...
Page 93: ...93 Troubleshooting and Test Functions Step Commands ...
Page 216: ...216 Introduction to the Autosampler Electrical Connections ...
Page 244: ...244 Theory of Operation The Main Power Supply Assembly ...
Page 265: ...265 Introduction to the Control Module Diagnostics and Tests ...
Page 268: ...268 Introduction to the Control Module Diagnostics and Tests ...
Page 274: ...274 Specifications Performance Specifications ...
Page 275: ...10 Legal Safety and Warranty Information ...
Page 286: ...286 Agilent Technologies on Internet ...
Page 290: ...290 Index ...
Page 291: ......


