122
Repairing the Autosampler
Metering Seal and Plunger
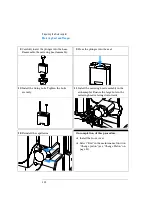
8
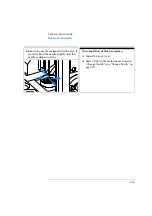
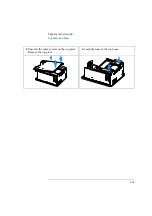
Carefully insert the plunger into the base.
Reassemble the metering head assembly.
9
Press the plunger into the seal.
10
Install the fixing bolts. Tighten the bolts
securely.
11
Install the metering head assembly in the
autosampler. Ensure the large hole in the
metering head is facing downwards.
12
Reinstall the capillaries.
On completion of this procedure:
❏
Install the front cover.
❏
Select “End” in the maintenance function
“Change piston” (see “Change Piston” on
page 83).
CellFrame
Summary of Contents for G1313A
Page 1: ...s1 Agilent 1100 Series Standard Micro and Preparative Autosamplers Reference Manual ...
Page 3: ...Reference Manual Agilent 1100 Series Standard Micro and Preparative Autosamplers ...
Page 12: ...12 Contents ...
Page 39: ...2 2 Optimizing Performance How to optimize the autosamplers to achieve best results ...
Page 93: ...93 Troubleshooting and Test Functions Step Commands ...
Page 216: ...216 Introduction to the Autosampler Electrical Connections ...
Page 244: ...244 Theory of Operation The Main Power Supply Assembly ...
Page 265: ...265 Introduction to the Control Module Diagnostics and Tests ...
Page 268: ...268 Introduction to the Control Module Diagnostics and Tests ...
Page 274: ...274 Specifications Performance Specifications ...
Page 275: ...10 Legal Safety and Warranty Information ...
Page 286: ...286 Agilent Technologies on Internet ...
Page 290: ...290 Index ...
Page 291: ......

