123
Repairing the Autosampler
Gripper Arm
Gripper Arm
Frequency
Defective gripper arm
Tools required
Straightened paper clip.
Parts required
Gripper assembly, G1313-60010.
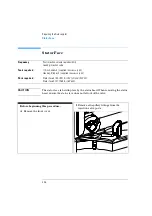
Before beginning this procedure:
❏
Select “Start” in the maintenance function
“ChangeGripper” (see “Change Gripper
(Change Arm)” on page 85).
❏
Turn off the power to the autosampler.
❏
Remove the front cover.
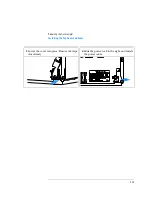
1
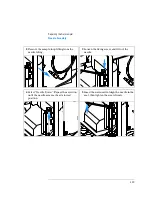
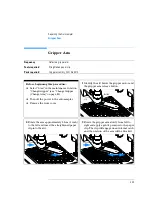
Identify the slit below the gripper motor and
the gripper arm release button.
2
Rotate the arm approximately 2.5cm (1 inch)
to the left and insert the straightened paper
clip into the slit.
.
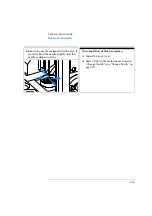
3
Rotate the gripper arm slowly from left to
right and apply a gentle pressure to the paper
clip. The clip will engage on an internal catch
and the rotation of the arm will be blocked.
CellFrame
slit
button
CellFrame
CellFrame
Summary of Contents for G1313A
Page 1: ...s1 Agilent 1100 Series Standard Micro and Preparative Autosamplers Reference Manual ...
Page 3: ...Reference Manual Agilent 1100 Series Standard Micro and Preparative Autosamplers ...
Page 12: ...12 Contents ...
Page 39: ...2 2 Optimizing Performance How to optimize the autosamplers to achieve best results ...
Page 93: ...93 Troubleshooting and Test Functions Step Commands ...
Page 216: ...216 Introduction to the Autosampler Electrical Connections ...
Page 244: ...244 Theory of Operation The Main Power Supply Assembly ...
Page 265: ...265 Introduction to the Control Module Diagnostics and Tests ...
Page 268: ...268 Introduction to the Control Module Diagnostics and Tests ...
Page 274: ...274 Specifications Performance Specifications ...
Page 275: ...10 Legal Safety and Warranty Information ...
Page 286: ...286 Agilent Technologies on Internet ...
Page 290: ...290 Index ...
Page 291: ......

