Applications
Applications (cont'd)
9.
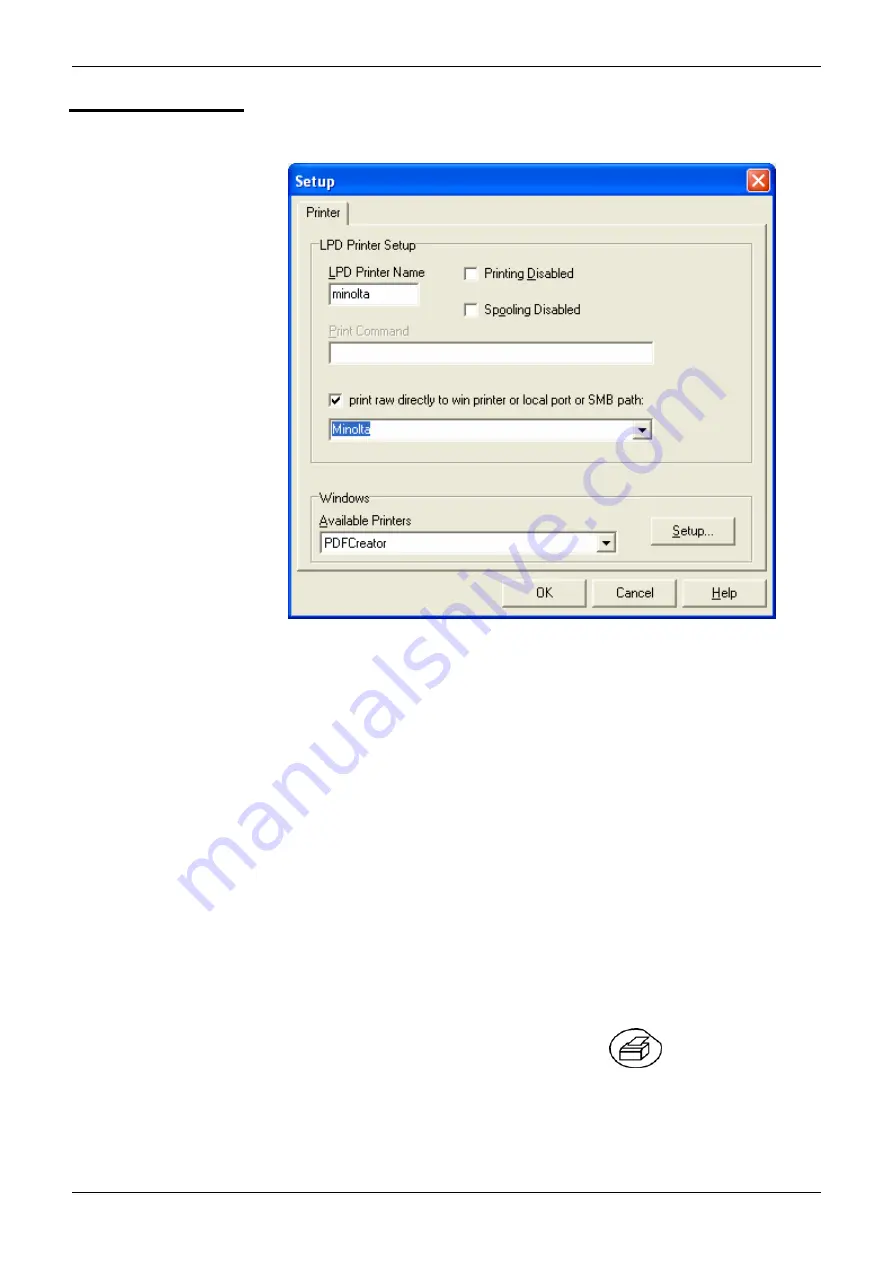
In the "File" menu, select the "Add Printer" option.
10. In the field, "LPD Printer Name", type in the logical name of a printer
(
Minolta).
11. Tick the box "print raw directly…"
12. Choose the port in the list which the printer is connected to
(
: Minolta).
13. Validate by clicking on "OK".
SCOPIX settings
14. To configure the LPD server, in the menu
"Util"
"Config I/O Ports”
“Network” in SCOPIX, fix the LPD
server settings (IP address of the PC on which the server was
installed, logical name of the printer).
15. In the menu “Util”
“Copy screen” in SCOPIX, select the language
and printing mode and choose the port “Network (LPD)”, then
validate your choice by closing the “Copy Screen” window.
16. Begin printing by pressing on the button
on the front panel.
IX - 182
SCOPIX Oscilloscopes
Summary of Contents for OX7102-CII
Page 13: ...Description of the instrument SCOPIX Oscilloscopes II 13...
Page 20: ...Description of the instrument II 20 SCOPIX Oscilloscopes...
Page 21: ...Description of Accessories SCOPIX Oscilloscopes III 21...
Page 34: ...Description of Accessories III 34 SCOPIX Oscilloscopes...
Page 93: ...Oscilloscope Mode SCOPIX Oscilloscopes IV 93...
Page 108: ...Multimeter Mode V 108 SCOPIX Oscilloscopes...
Page 118: ...Harmonic Analysis VI 118 SCOPIX Oscilloscopes...
Page 146: ...Recorder Mode VII 146 SCOPIX Oscilloscopes...
Page 156: ...WEB Server VIII 156 SCOPIX Oscilloscopes...
Page 183: ...Applications SCOPIX Oscilloscopes IX 183...
Page 200: ...Technical Specifications X 200 SCOPIX Oscilloscopes...


